Lese-Ansicht

Prusa CORE One+ INDX review: Time for a 'Tool' change

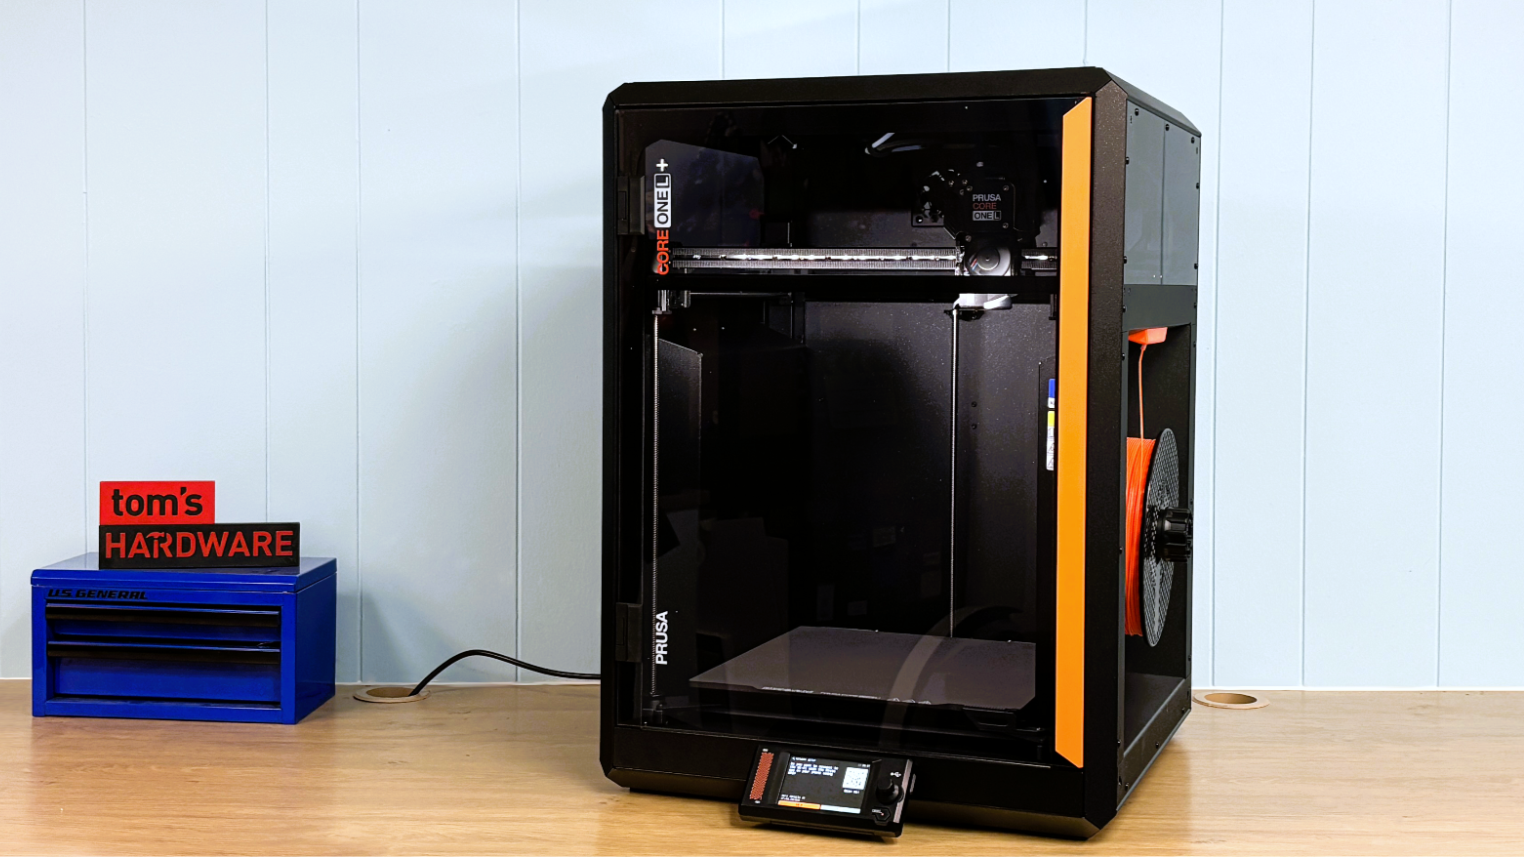
The Prusa INDX is a revolutionary new toolchanger capable of printing up to eight colors of various materials. INDX stands for Induction Dynamic Extruder, with each slim toolhead having no moving parts, just a nozzle and filament path. The extruder, or “smart head,” does all the work.

INDX is a collaborative project between Prusa Research and Bondtech. Prusa makes the platform, in this case a CORE One+ Gen 2, while Bondtech produces the toolhead system. The two companies have a long history of working together, going back to 2017’s MK3 bedslinger. The INDX can also be purchased separately on Bondtech’s site as a DIY kit to be mounted on any open-source 3D printer you feel like modding.

There are definite advantages of going with the Prusa INDX. You can buy it ready to roll, premounted on CORE One that’s ready to print ten minutes after removing it from the box. Even purchasing it as a kit from Prusa removes a lot of hassle and headache, as the kit is custom-fitted to CORE One, with all the wiring, programming, and whatnot done for you.

Sorting through the website to figure out what combination of kit and printer you need is the hardest part of the INDX experience. If you already have a CORE One, prices start at $749 for a four-color INDX “conversion” kit. Prusa optimistically says the kit takes 5 to 6 hours to install, but it took me the better part of a weekend to disassemble my machine and rebuild it as an INDX when I tested out the early Founder’s Edition.

The Prusa INDX is the first multicolor 3D printer to ditch the prime tower, making it practically waste-free. While all toolchangers can seriously cut down on wasted material by virtue of having a nozzle for each color, they still need to “prime” the nozzles before printing. This priming creates a tower of wasted material. Prusa has circumvented the prime tower with a new wiper mechanism that quickly shoots out a tiny blob of filament that’s about 13 milligrams in size – smaller than a grain of rice.

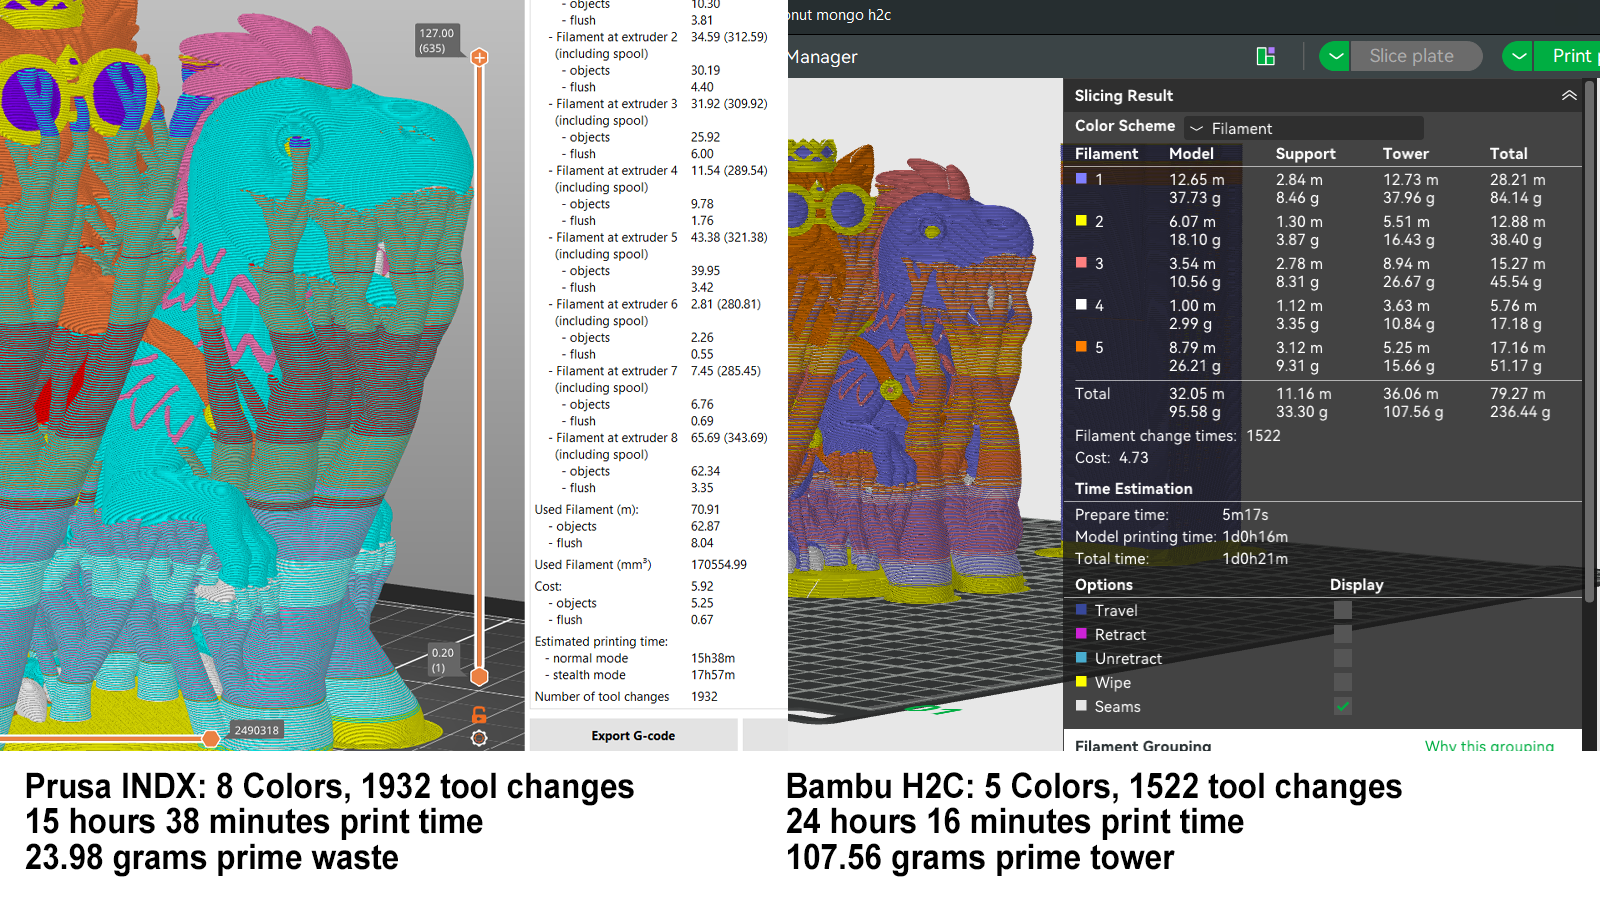
In my testing, I found the Prusa INDX was faster and less wasteful than any other toolchanger in the workshop. I ran the same model with similar settings on both the Prusa INDX and the Bambu Lab H2C, the closest machine to a toolchanger that Bambu currently has in production. The INDX was able to run it nearly nine hours faster, with 83.58 grams less wasted material (not counting supports) and 3 more colors.
Prusa CORE One+ INDX

(Image credit: Tom's Hardware)

The CORE One+ INDX starts at $1,699 for a DIY kit with four toolheads and goes up to $2,119 for an assembled 3D printer with eight toolheads, plus a Buddy Cam and Advanced filtration. If you already have the printer, the conversion kit is $749 for four toolheads and $999 for eight. There is no pricing for individual toolheads at the moment, but you can start with four toolheads and later add more. Individual tools are currently $45 on the Bondtech website.

The Prusa CORE One+ INDX lives up to its reputation and is one of the best 3D printers we’ve tested to date.

Specifications

Prusa CORE One+ INDX

Prusa CORE One

Prusa CORE One L

Prusa CORE One L+

Build Volume

248 x 205 x 270 mm (9.76 x 8.07 x 10.6in)

250 x 210 x 270 mm (9.84 x 8.3 x 10.6 in)

300 x 300 x 330 mm (11.8 x 11.8 x 12.99 in)

300 x 300 x 330 mm (11.81 x 11.81 x 12.99 in)

Material

PLA/PETG/TPU/ABS/ASA /PC (up to 300 degrees)

PLA/PETG/TPU/ABS/ASA /PC (up to 300 degrees)

PLA/PETG/TPU/ABS/ASA /PC (up to 290 degrees)

PLA/PETG/Flex/PVA,ABS/ASA/PA/PC (up to 290C degrees)

Extruder Type

Direct drive

Direct drive

Direct drive

Direct drive

Nozzle

.4mm (Highflow, Surface hardened steel)

.4mm (Highflow CHT)

.4mm (Highflow CHT & Hardened Steel)

.4mm (Brass CHT Installed, Abrasive Resistant Included)

Build Platform

Satin Powder Coated, spring steel flex plate (heated)

PEI spring steel flex plate

PEI spring steel flex plate

Double-sided PEI flex plate

Bed Leveling

Automatic + Load Cell

Automatic

Fully automatic

Automatic, Loadcell

Filament Runout Sensor

Yes

Yes

Yes

Yes

Connectivity

USB, LAN, Wi-Fi, App

USB, LAN, Wi-Fi, App

USB, LAN, Wi-Fi, App

LAN, WiFi, USB Flash Drive

Interface

Color touch screen with knob

Color touch screen with knob

3.5-inch color screen touch screen with additional knob

Color touch screen

Machine Footprint

630 x 471x 690 mm 24.8 x 18.5 x 27.1 in) with Spoolholders & Top Hat

415 x 444 x 555 mm (16.3 x 17.5 x 21.8 in)

469×521×635 mm (18.5×20.5×25 in)

469 x 521x 635 mm (18.5 × 20.5 × 25 in)

Machine Weight

24 KG (52.9 lbs)

22.5 KG (49.6 lbs)

21.9 KG (48.28 lbs)

21.9 KG (48.21 lbs)

MSRP

$1,699 (4 Toolheads)
$2,119 (8 Toolheads)

$1,199

$1,999

Starts at $1,999

Release Date

April 23. 2026

November 19, 2024

November 19, 2025

August 2026

Prusa CORE One+ INDX: Included in the Box
Prusa CORE One+ INDX

(Image credit: Tom's Hardware)

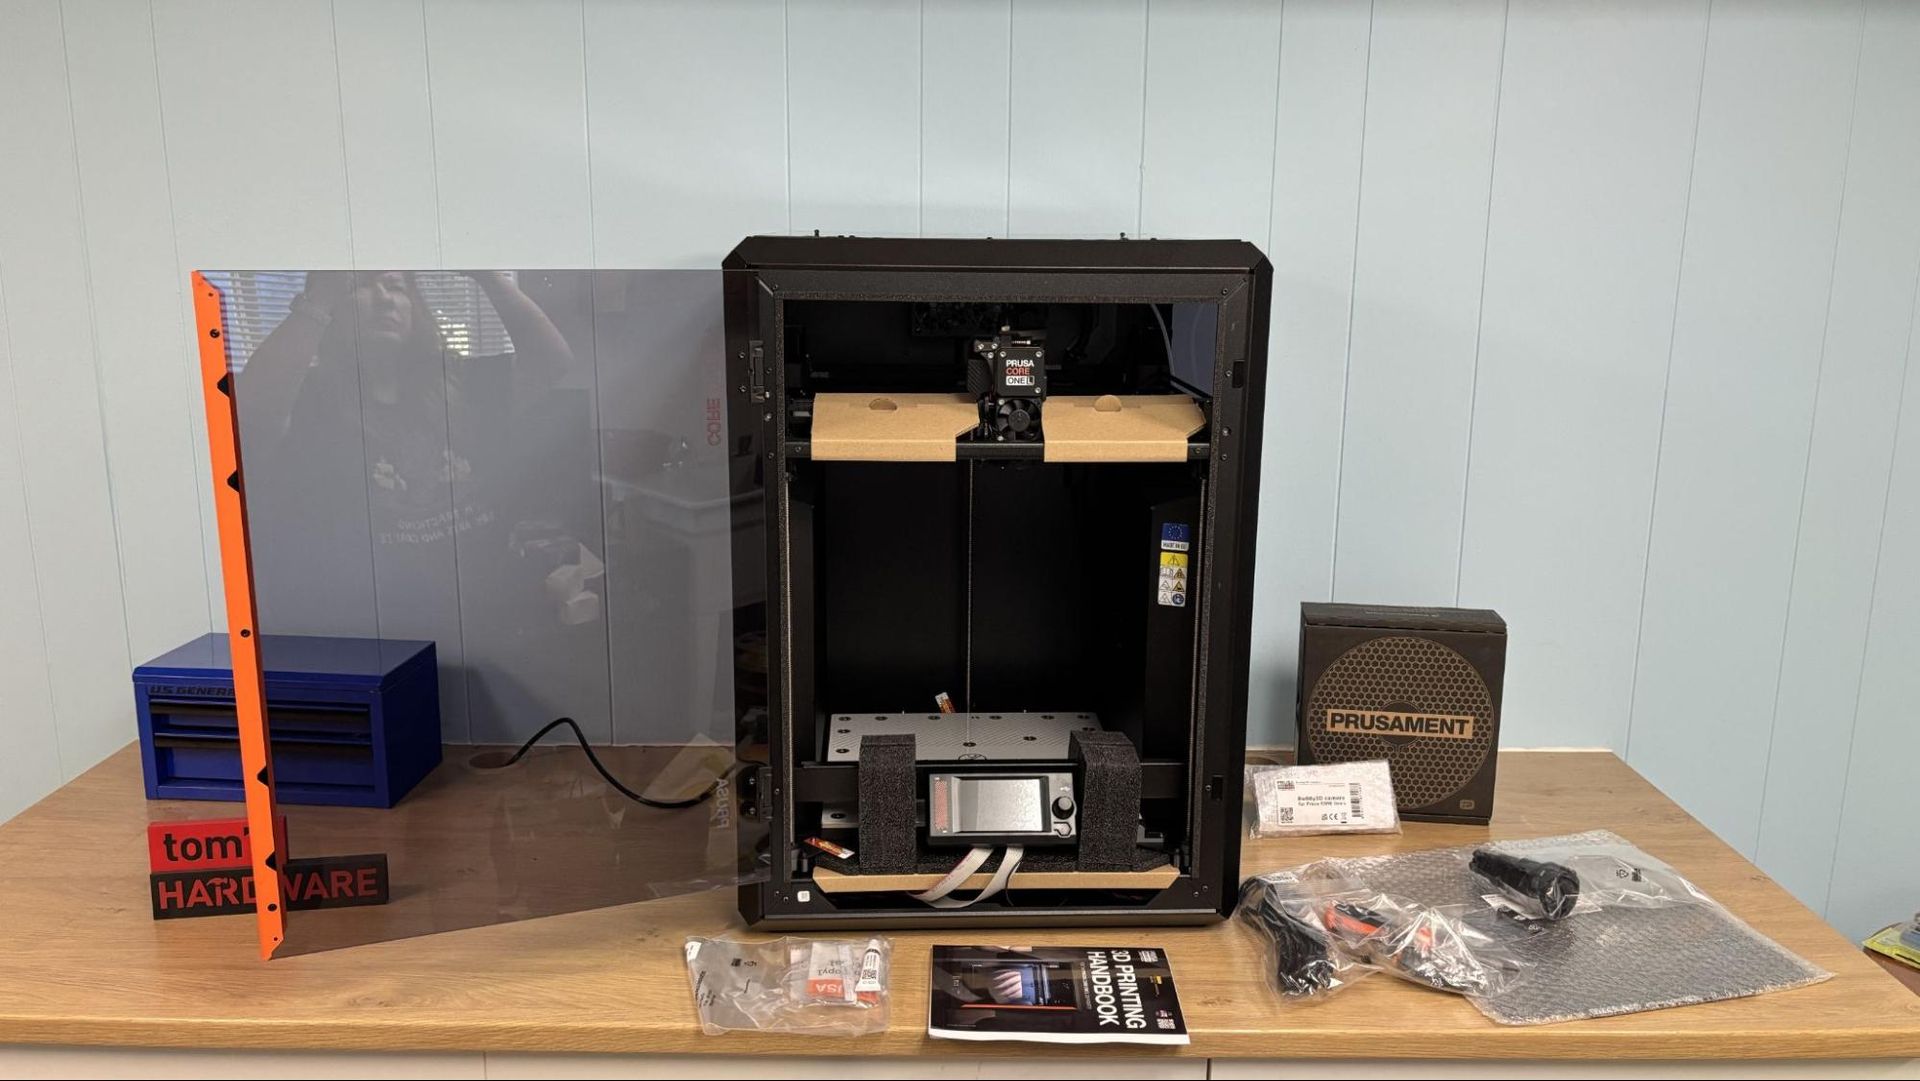
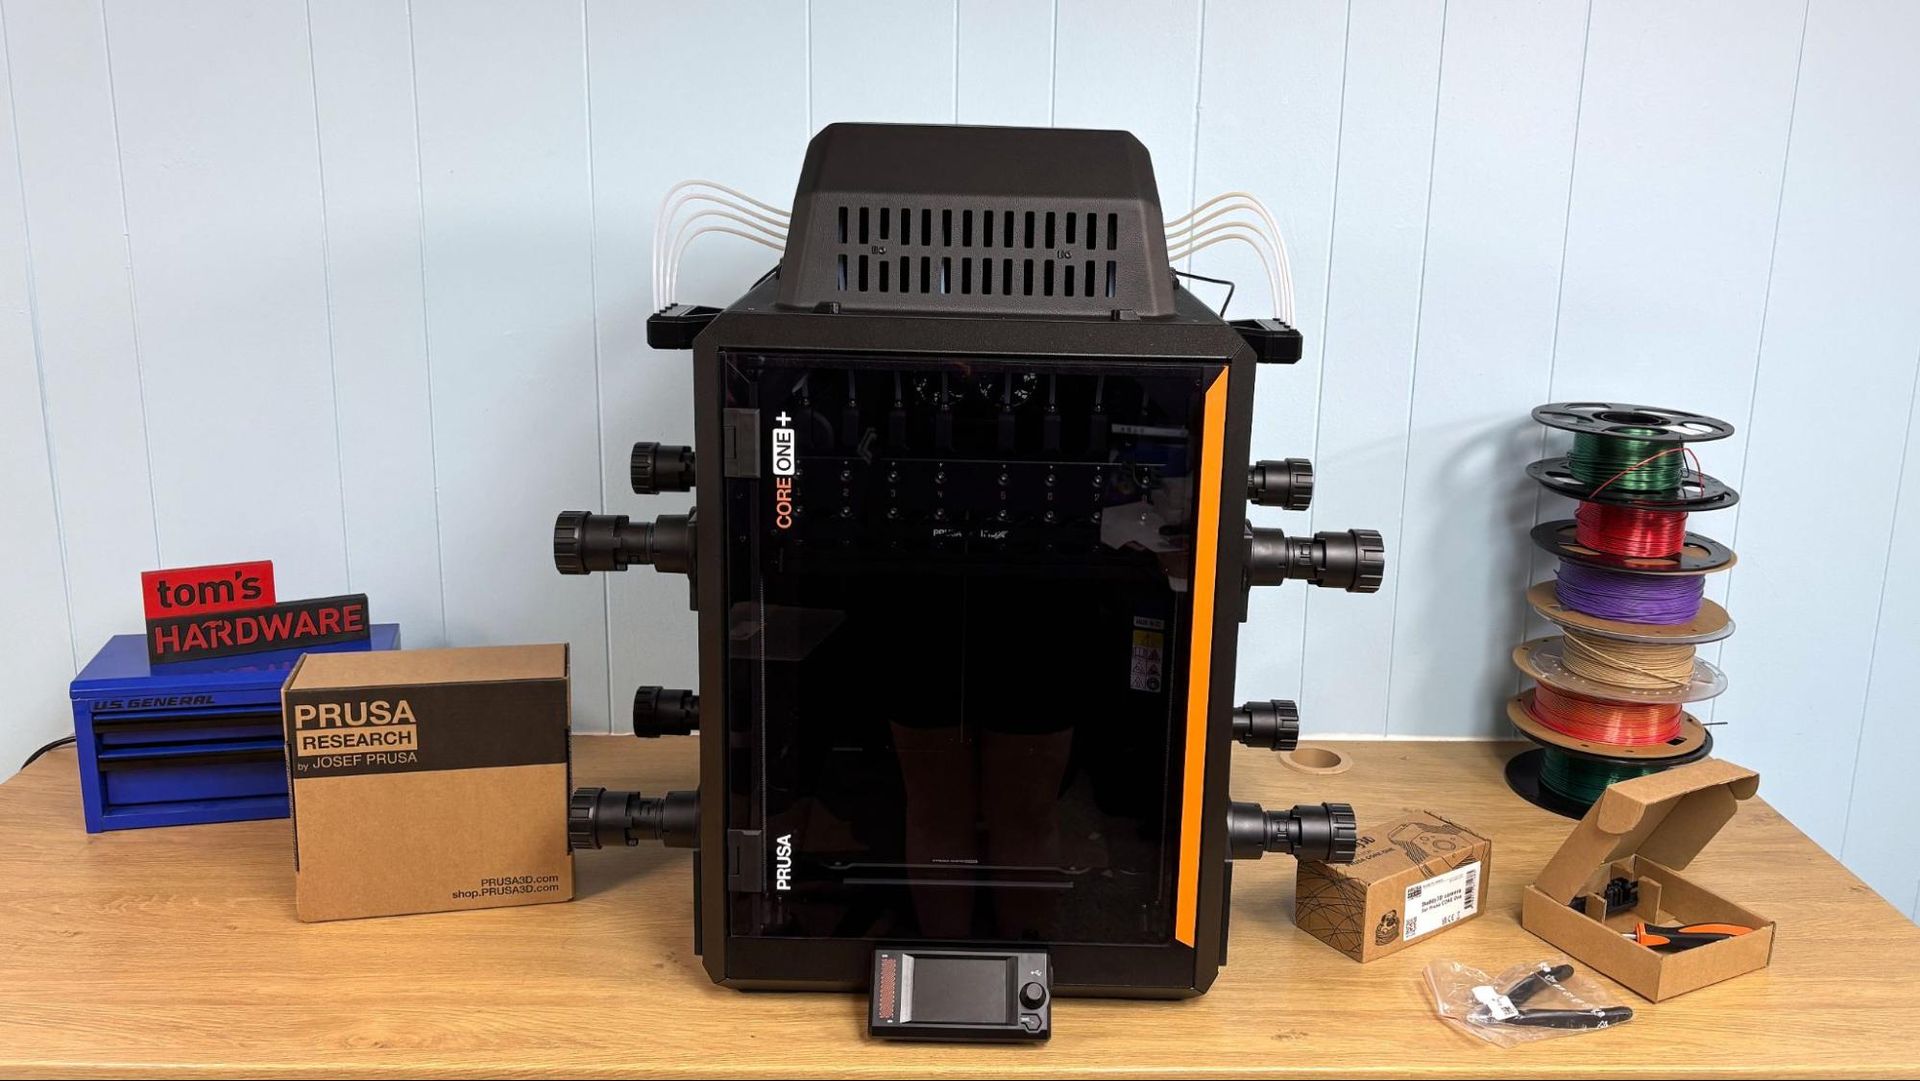
The Prusa CORE One+ INDX we received was pre-assembled and included eight toolheads. It only needed to be unpacked, have its screen mounted, then snap on the spool holders and Bowden tubes. Besides tools, the printer comes with a full spool of Galaxy Black Prusament PLA, a USB Stick, a handbook on 3D printing with your new machine, and a bag of Gummy Bears. The USB stick contains several models, while PrusaSlicer is available for free download from the website.

We also received a Buddy Camera and several boxes of filament to perform the review.

Design of the Prusa CORE One+ INDX
Prusa CORE One+ INDX

(Image credit: Tom's Hardware)

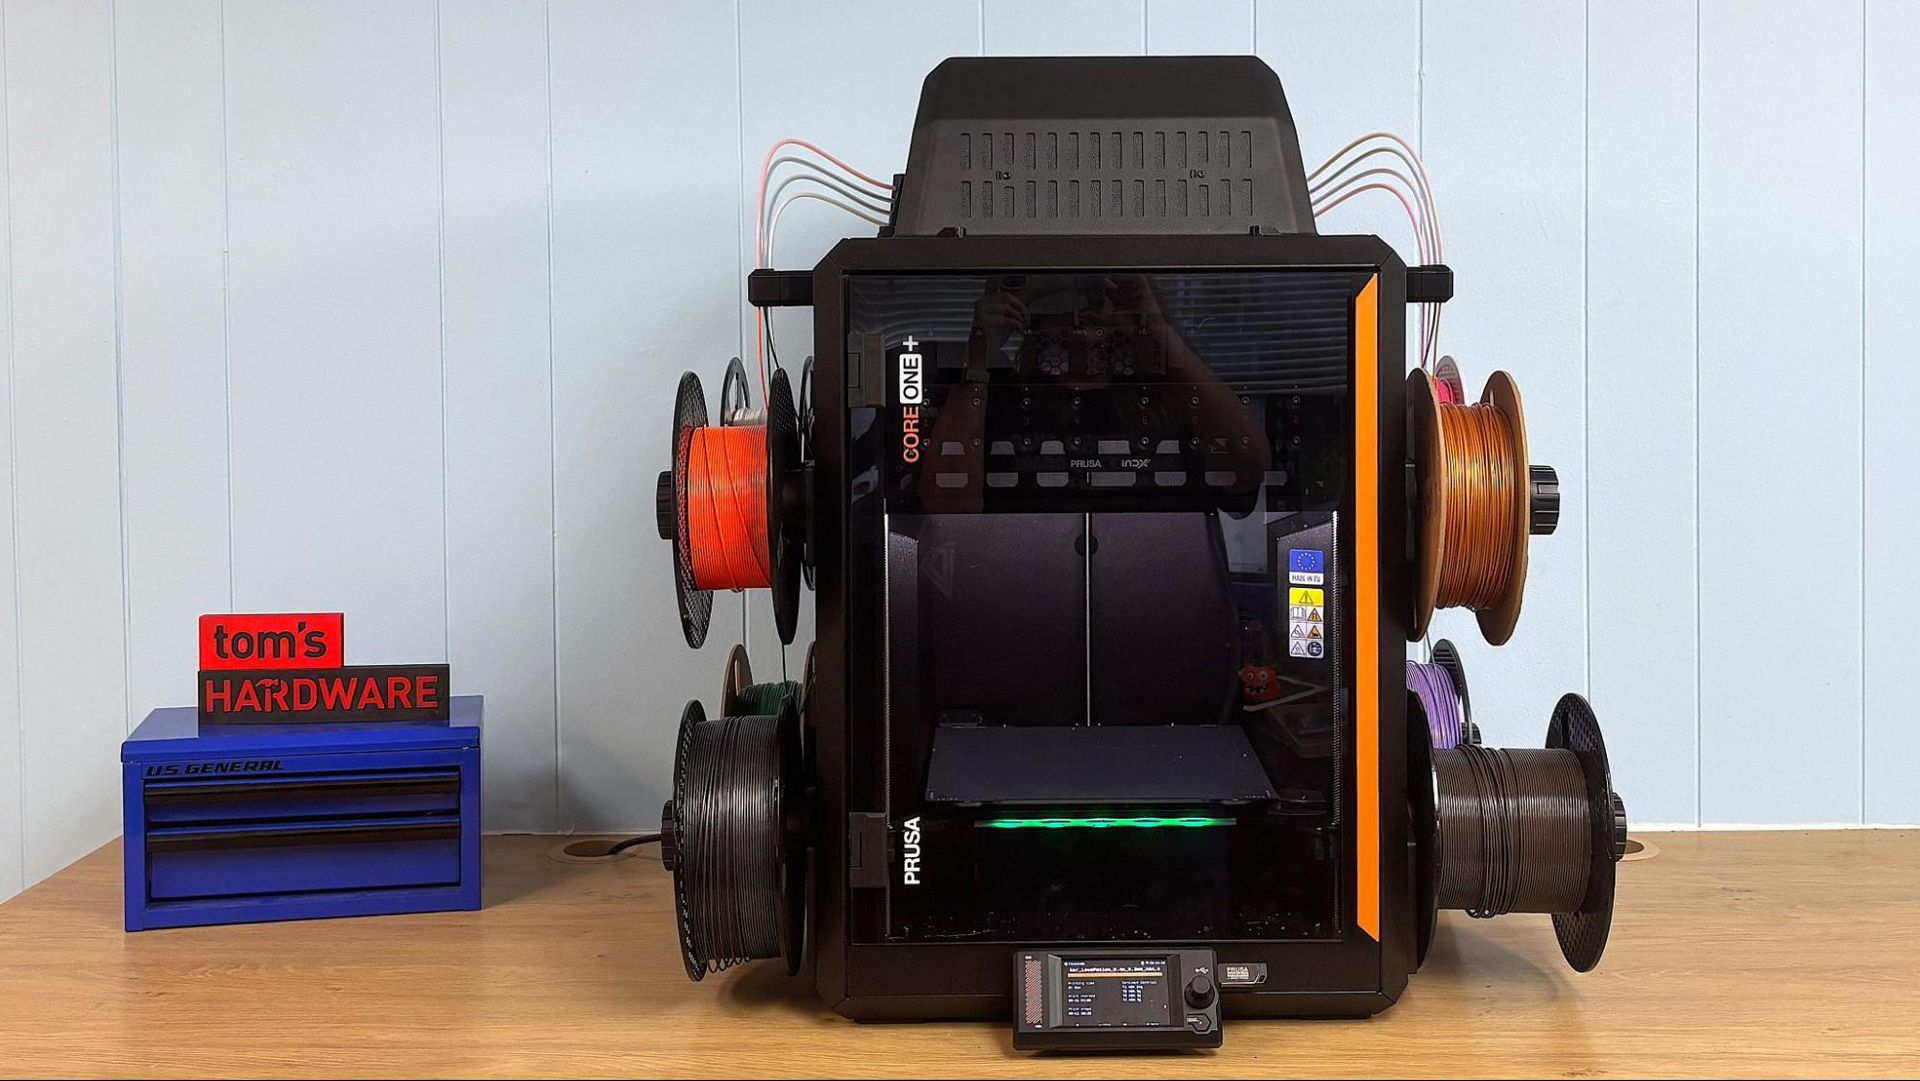
The CORE One+ INDX is a Core XY 3D printer converted into a toolchanger. It has a slim, steel exoskeleton with indents on either side. The right side holds a 3D-printed waste container on the outside for the tiny bits of filament the machine drops from the wiper system inside the chamber. We’re unsure if this mod is a permanent feature or an apology bonus for being unable to deliver fully hardened steel nozzles at launch.

Like the original CORE One, the door and upper parts of the side panels are translucent black polymer. The top panel is now replaced by a “top hat” to give the multitude of Bowden tubes room to work. Since the shell is made of folded steel, it’s not exactly airtight, but so far we haven’t had any trouble printing ASA or ABS in the machine.

The exoskeleton is an interesting concept. It provides a strong, stiff frame for the printer while also minimizing materials and avoiding that cheap plastic feel that plagues many other designs. The indented sides do more than slim down the printer’s silhouette; they reduce the interior space of the printer, allowing the chamber to be sufficiently heated (when needed) by only the heater bed.

Like every other Prusa printer before it, several of the CORE One+ parts are 3D printed with PC Blend Carbon Fiber, though more pieces are moving to in-house injection molding. Most of the machine is manufactured at the main factory in Prague, though printers assembled in the United States will have some parts printed locally in Delaware.

The CORE One+ has a door that can be flipped to open on either side. And thankfully, that door can remain closed at all times thanks to an active cooling system and automatic top vent.

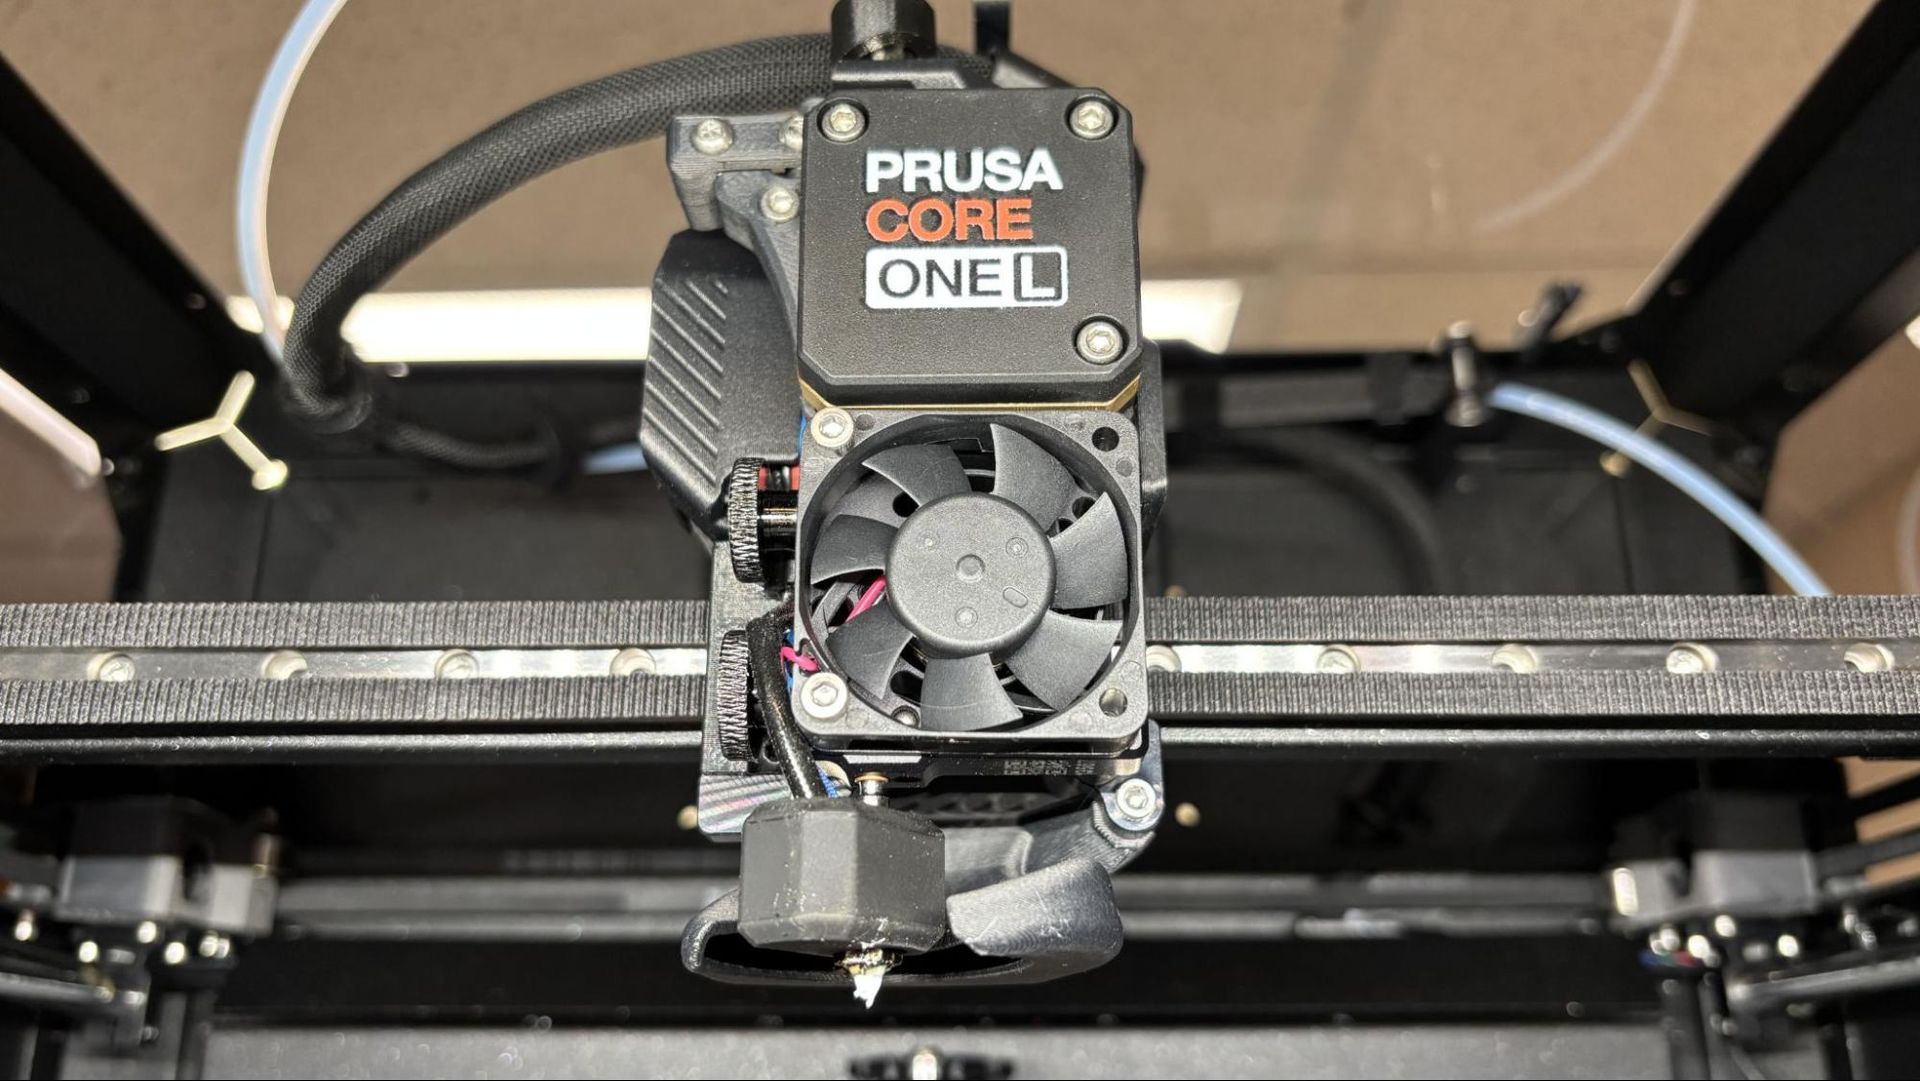
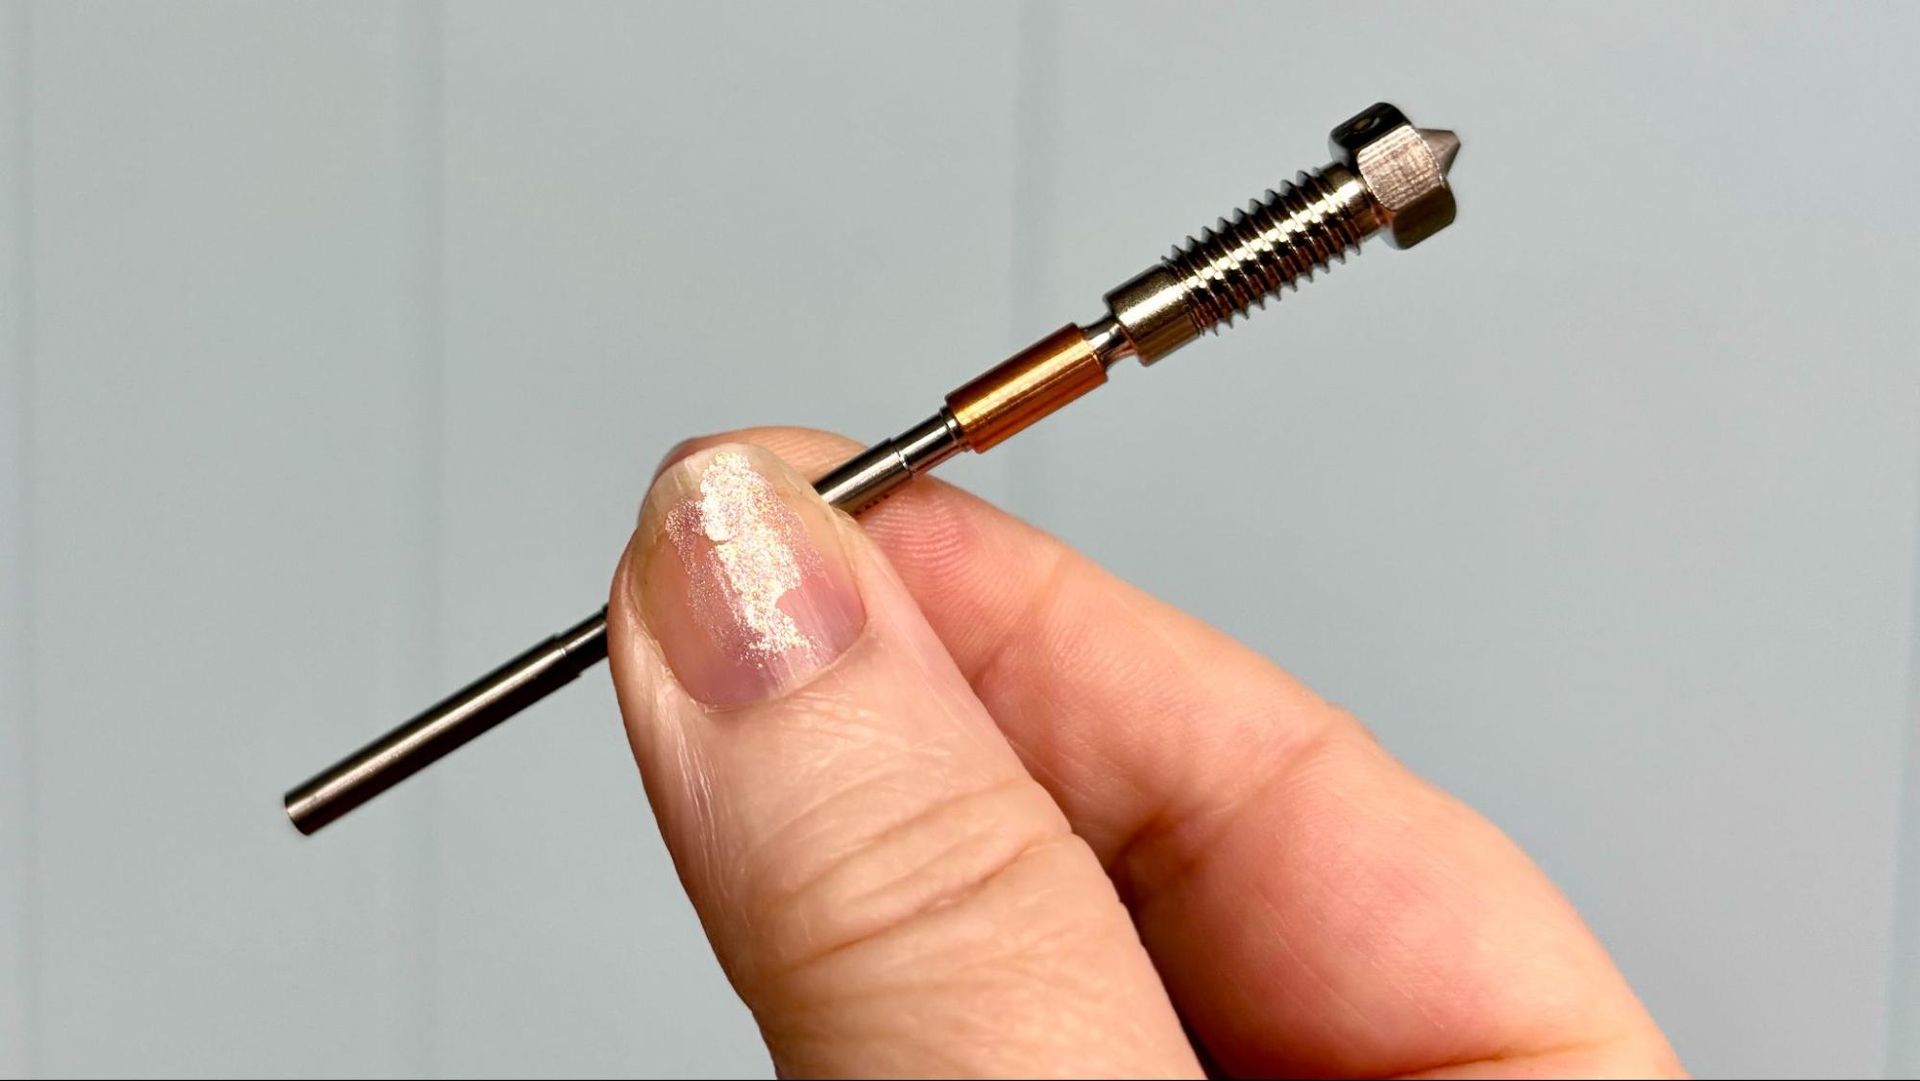
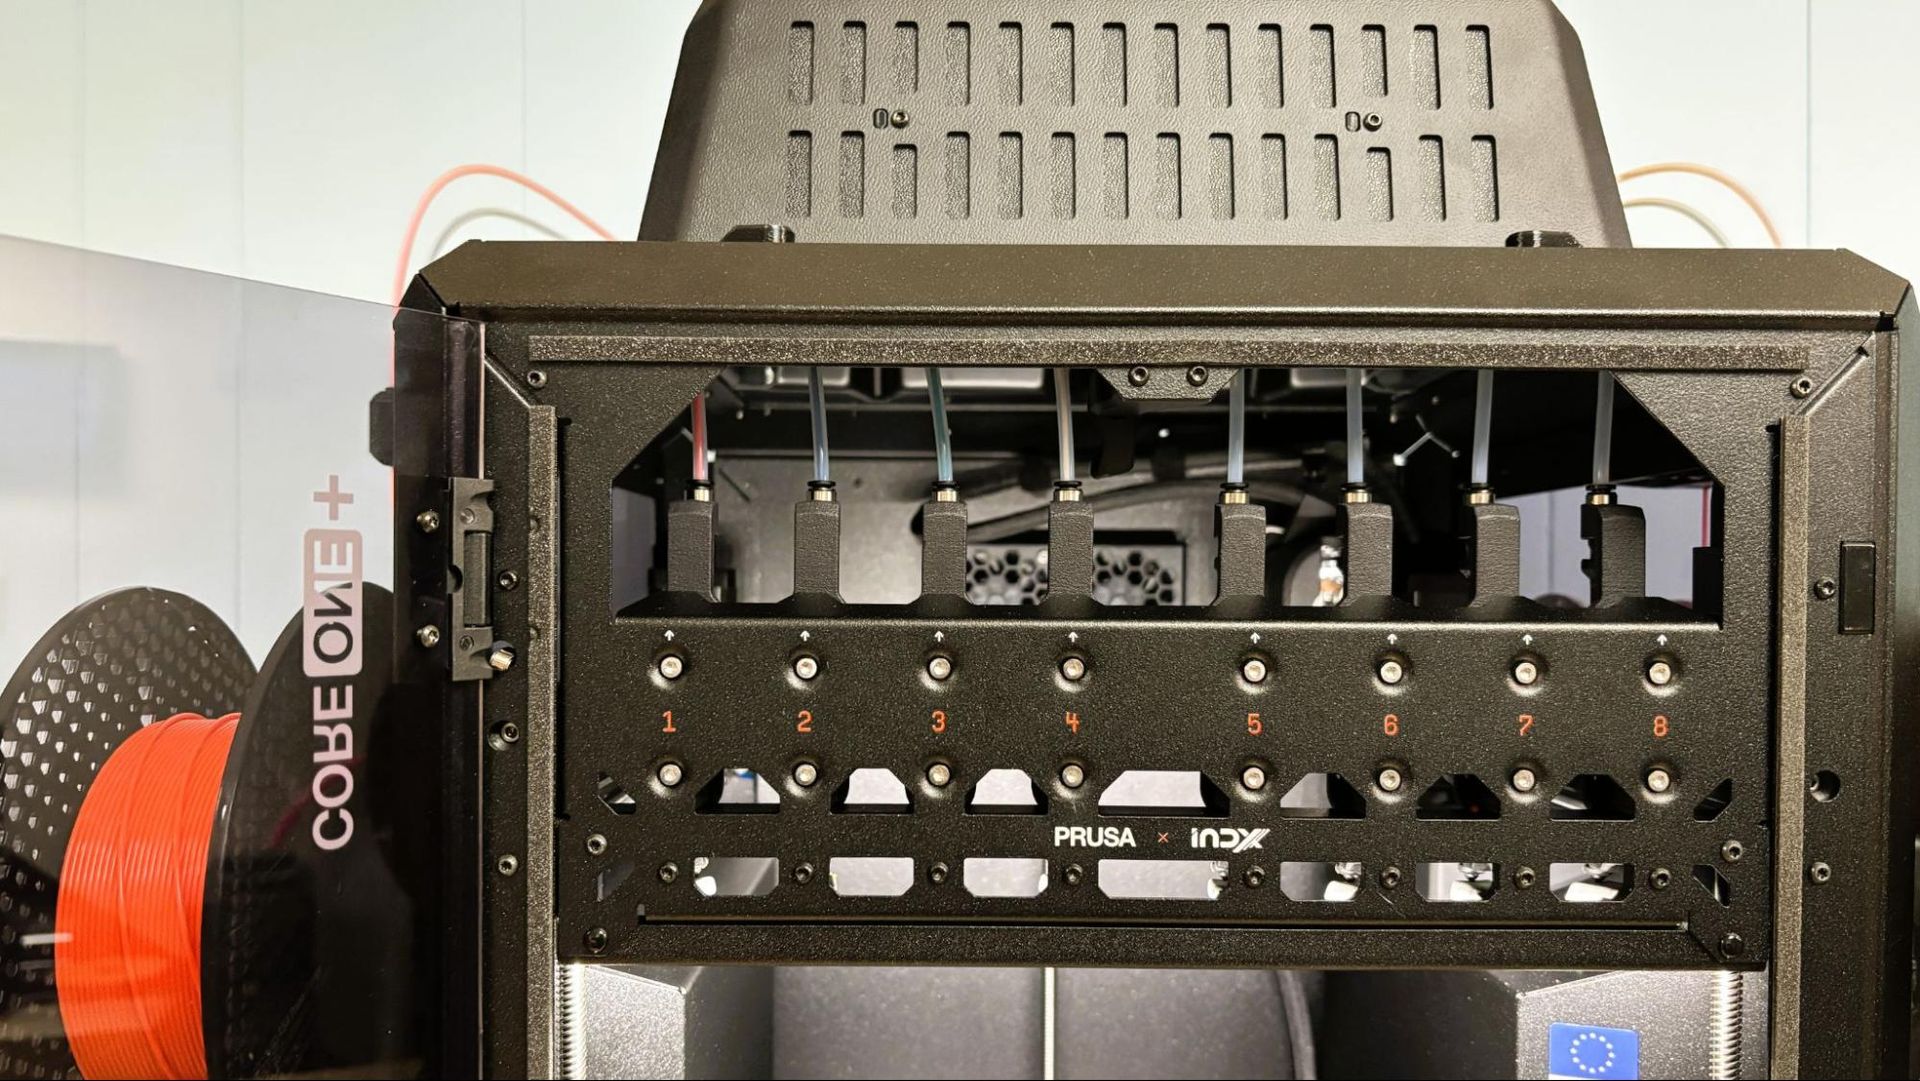
The INDX ditches the Nextruder extruder for the Bondtech induction-heated toolhead. The toolhead looks way too exposed out of necessity, as it picks up the passive nozzles by simply ramming itself onto the rack and grabbing the toolhead with magnets. The motion system is extremely accurate, and I had no problems with it during testing. You can see the copper coils of the induction heating system very plainly.
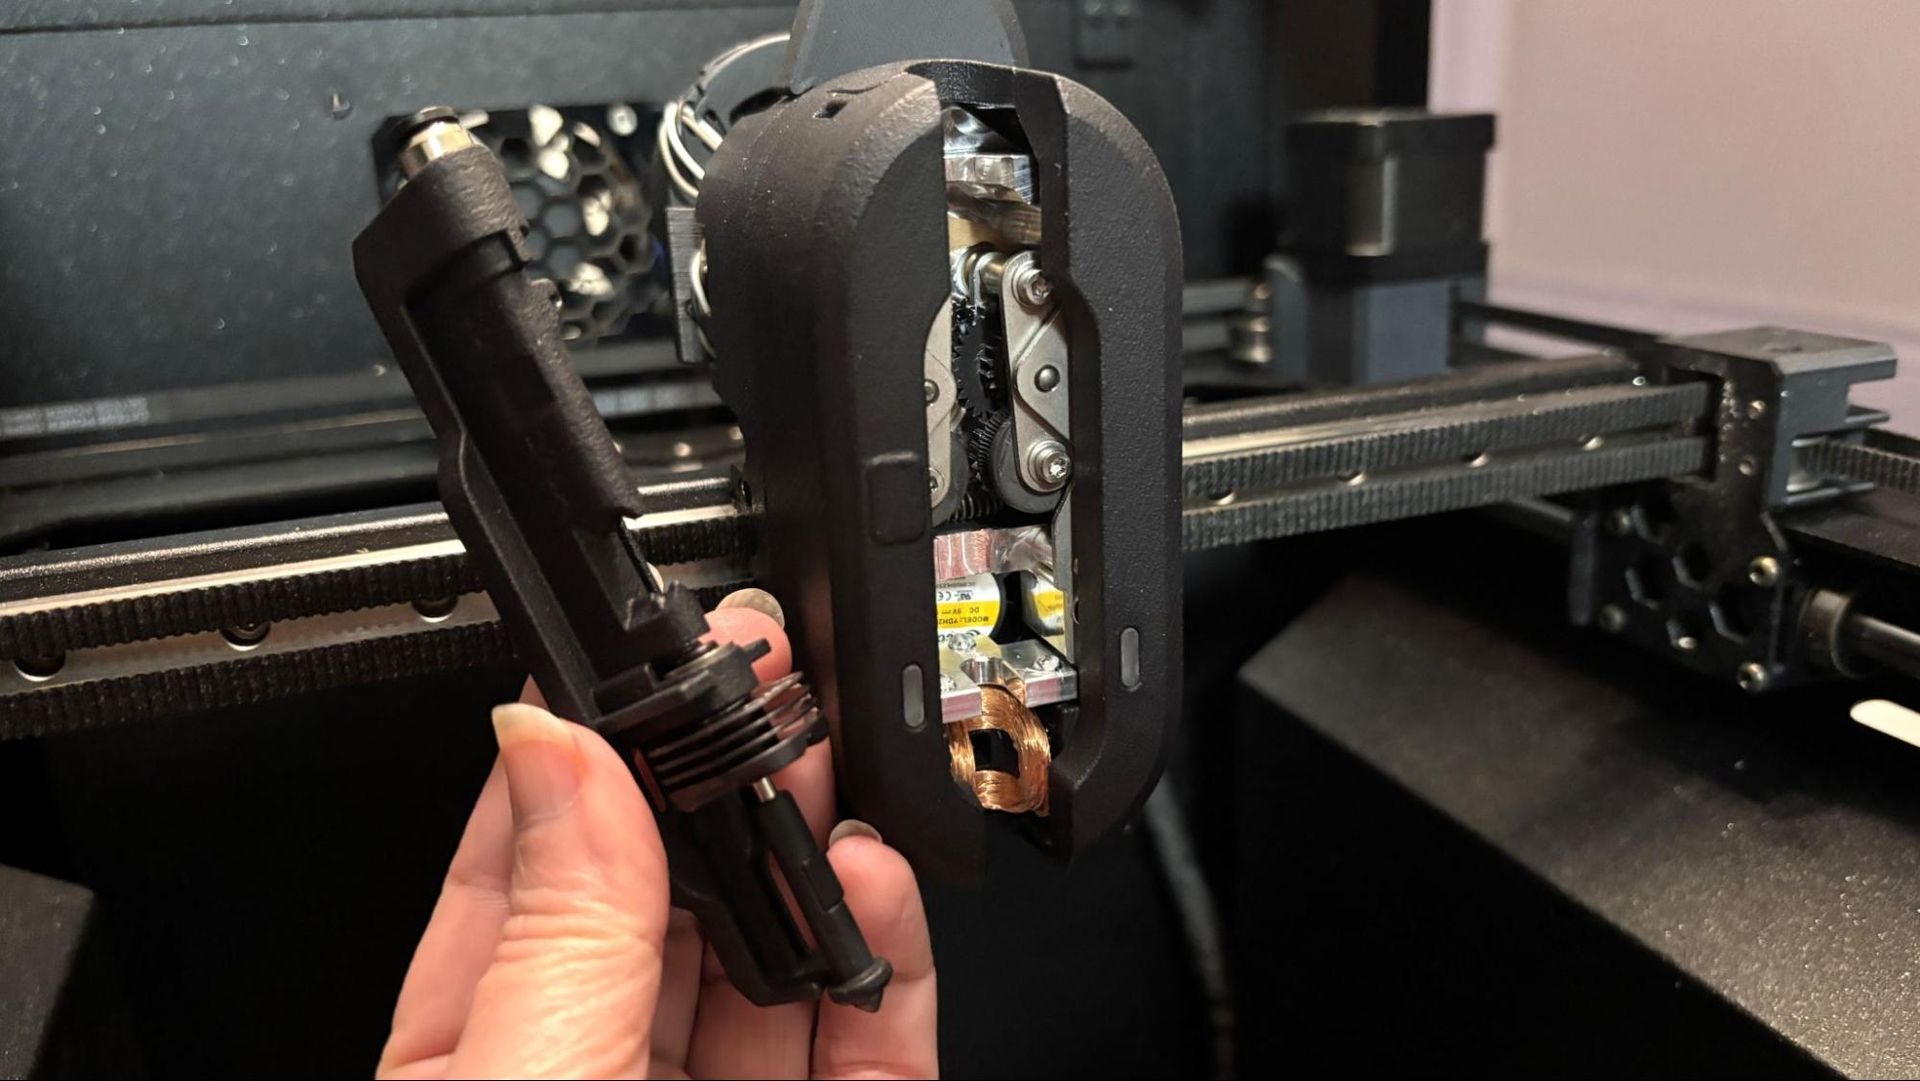
Prusa CORE One+ INDX

(Image credit: Tom's Hardware)

Unlike the Prusa XL, the toolheads mount on a rack in the front of the chamber. They take up very little space, but you will lose 15 mm of Y and 2 mm of X on the build plate compared to the CORE One+.

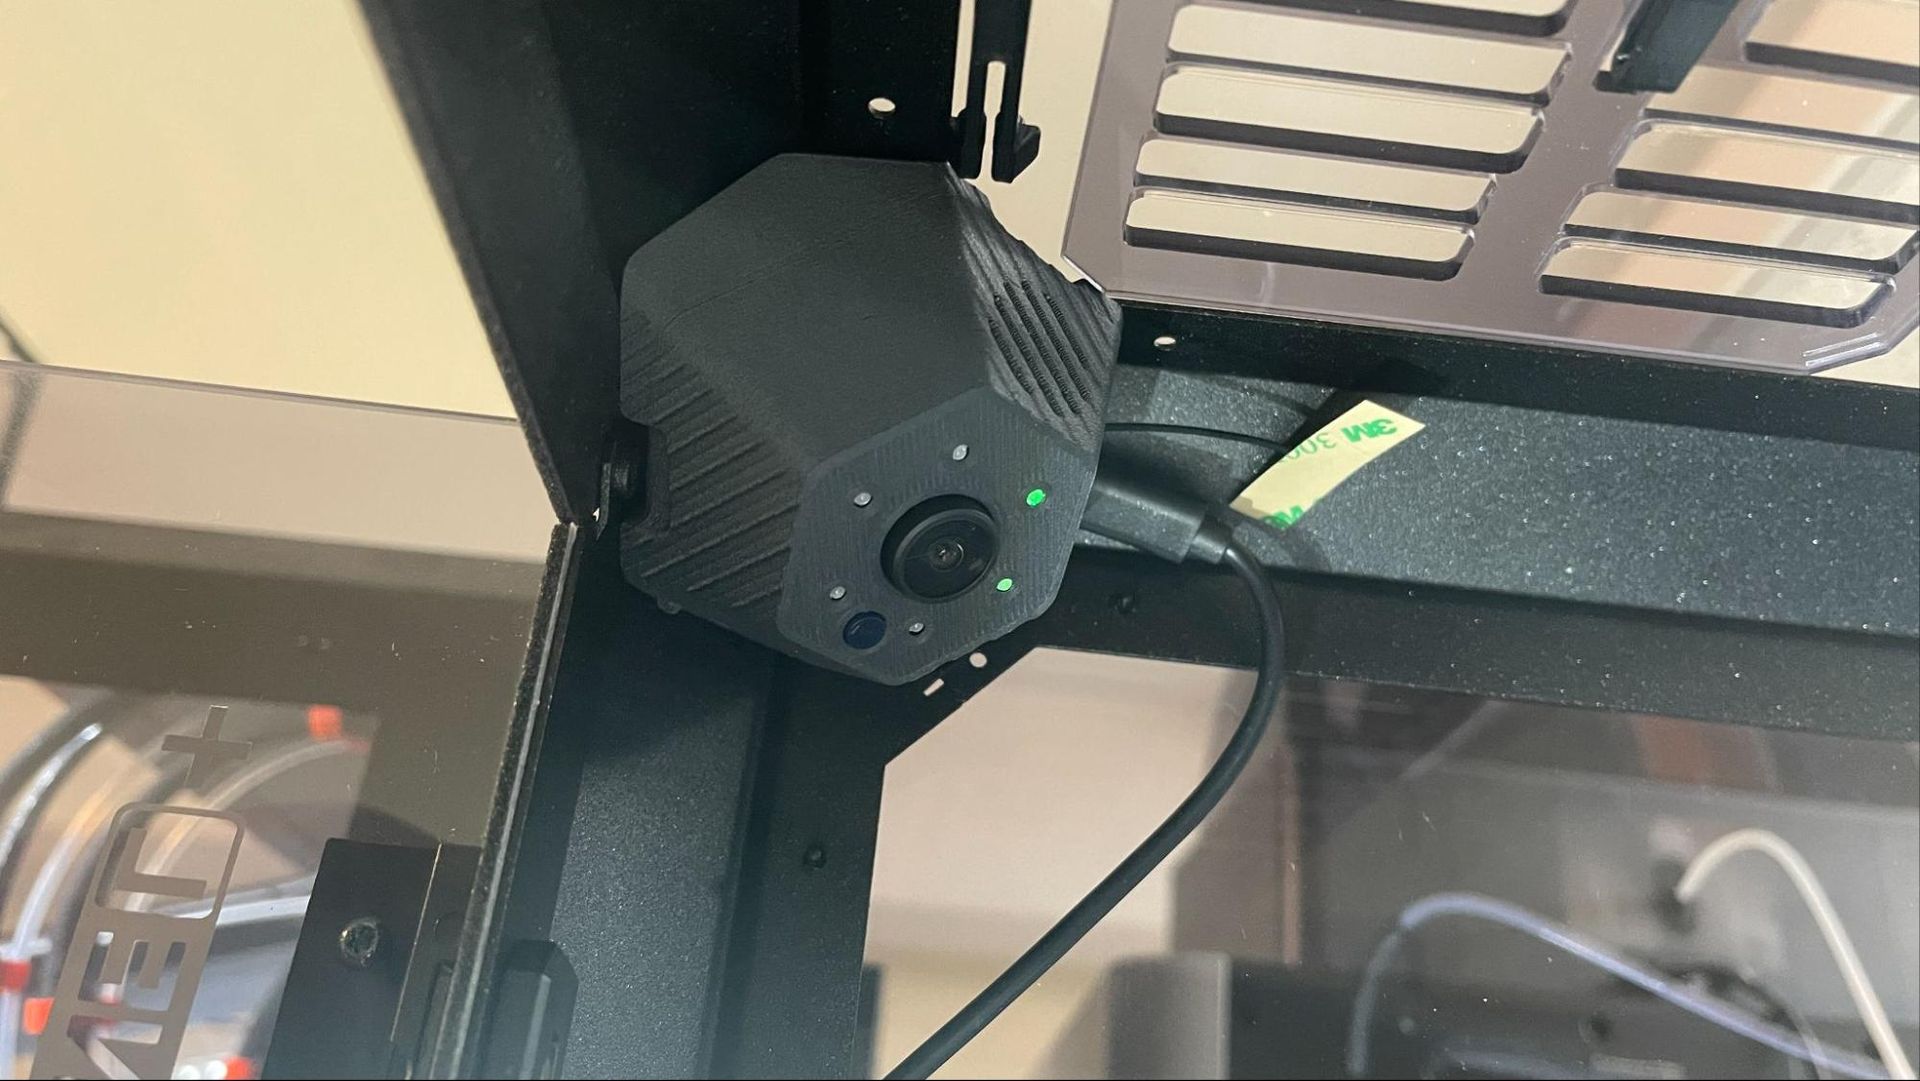
The rack does make seeing inside the printer a bit of a challenge, but the optional Buddy Cam has a clear view from the inside.
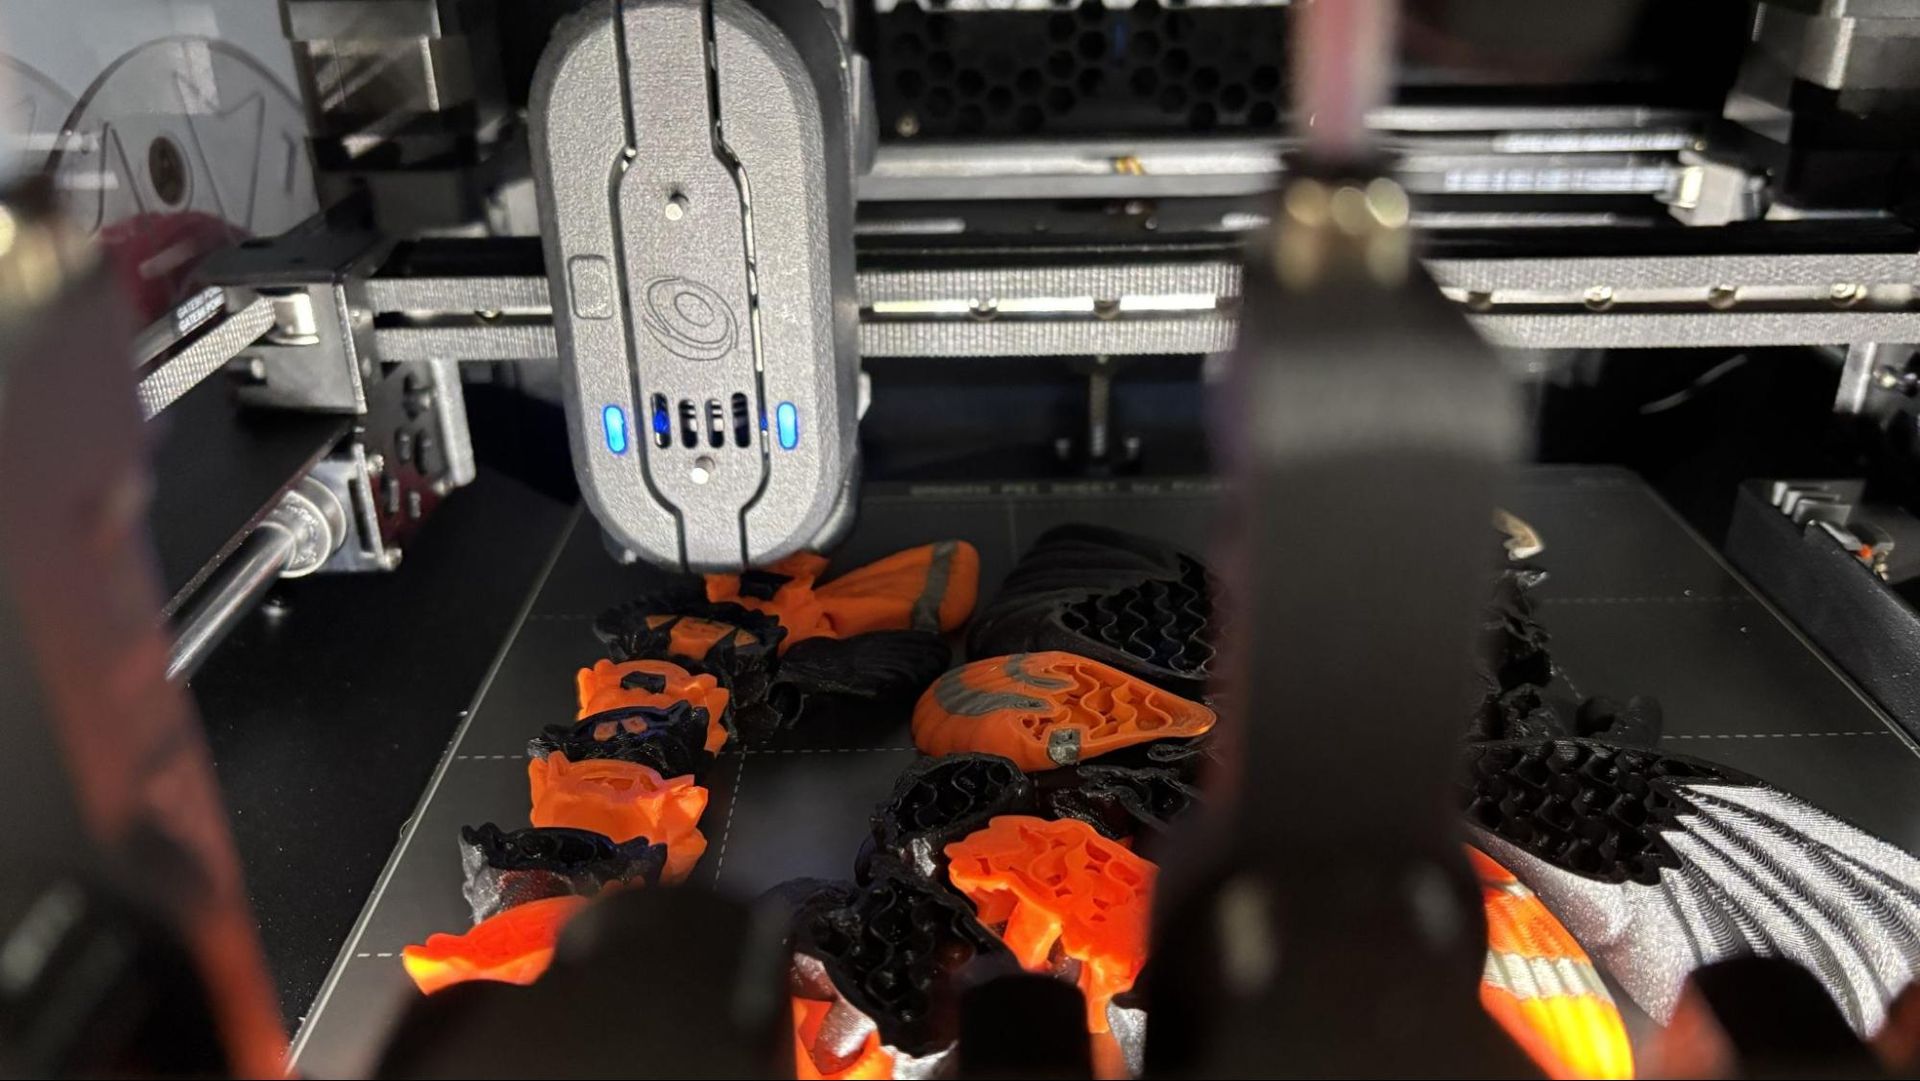
Prusa CORE One+ INDX

(Image credit: Tom's Hardware)

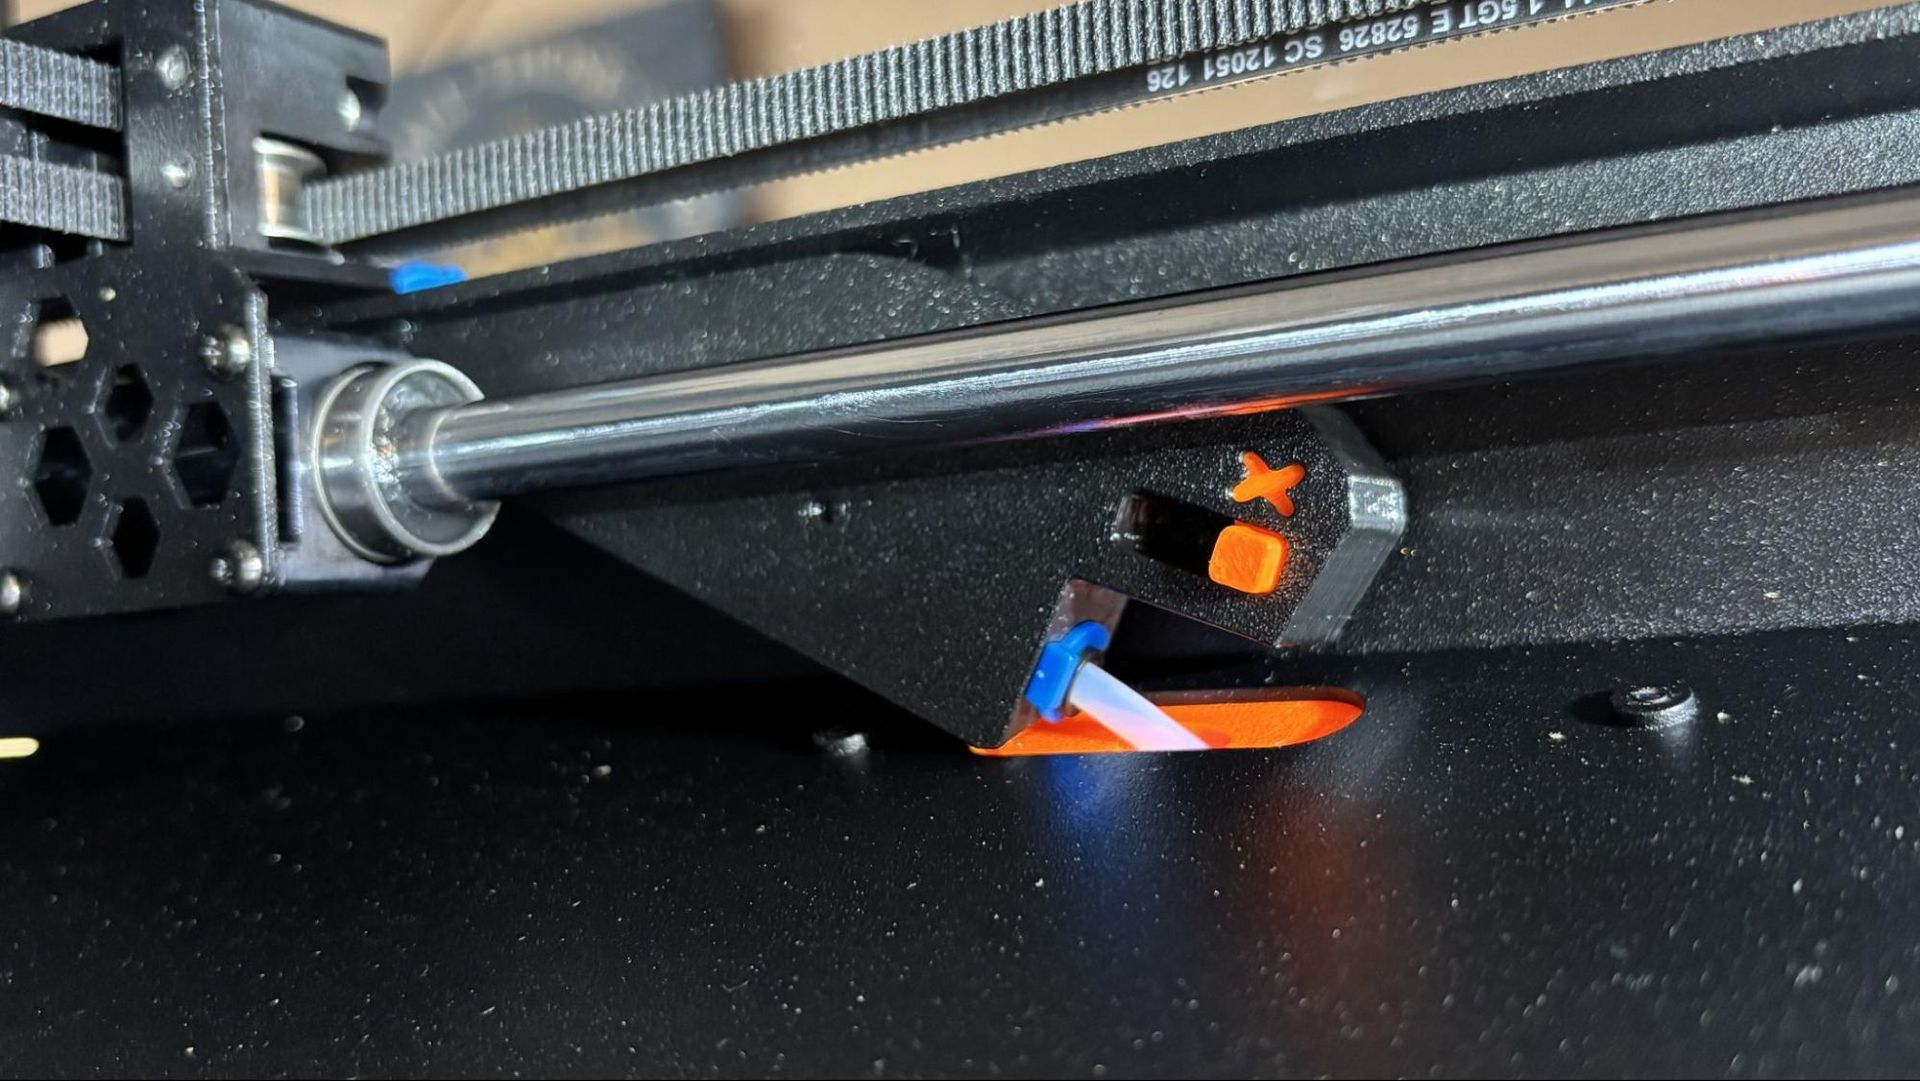
The wiper is located to the side, on top of the indent. In the Founder’s Edition, the wiper dumped into a small removable cup clamped to the side panel. Our review unit has a hole drilled into it to dump into a large exterior container, which is a huge improvement.
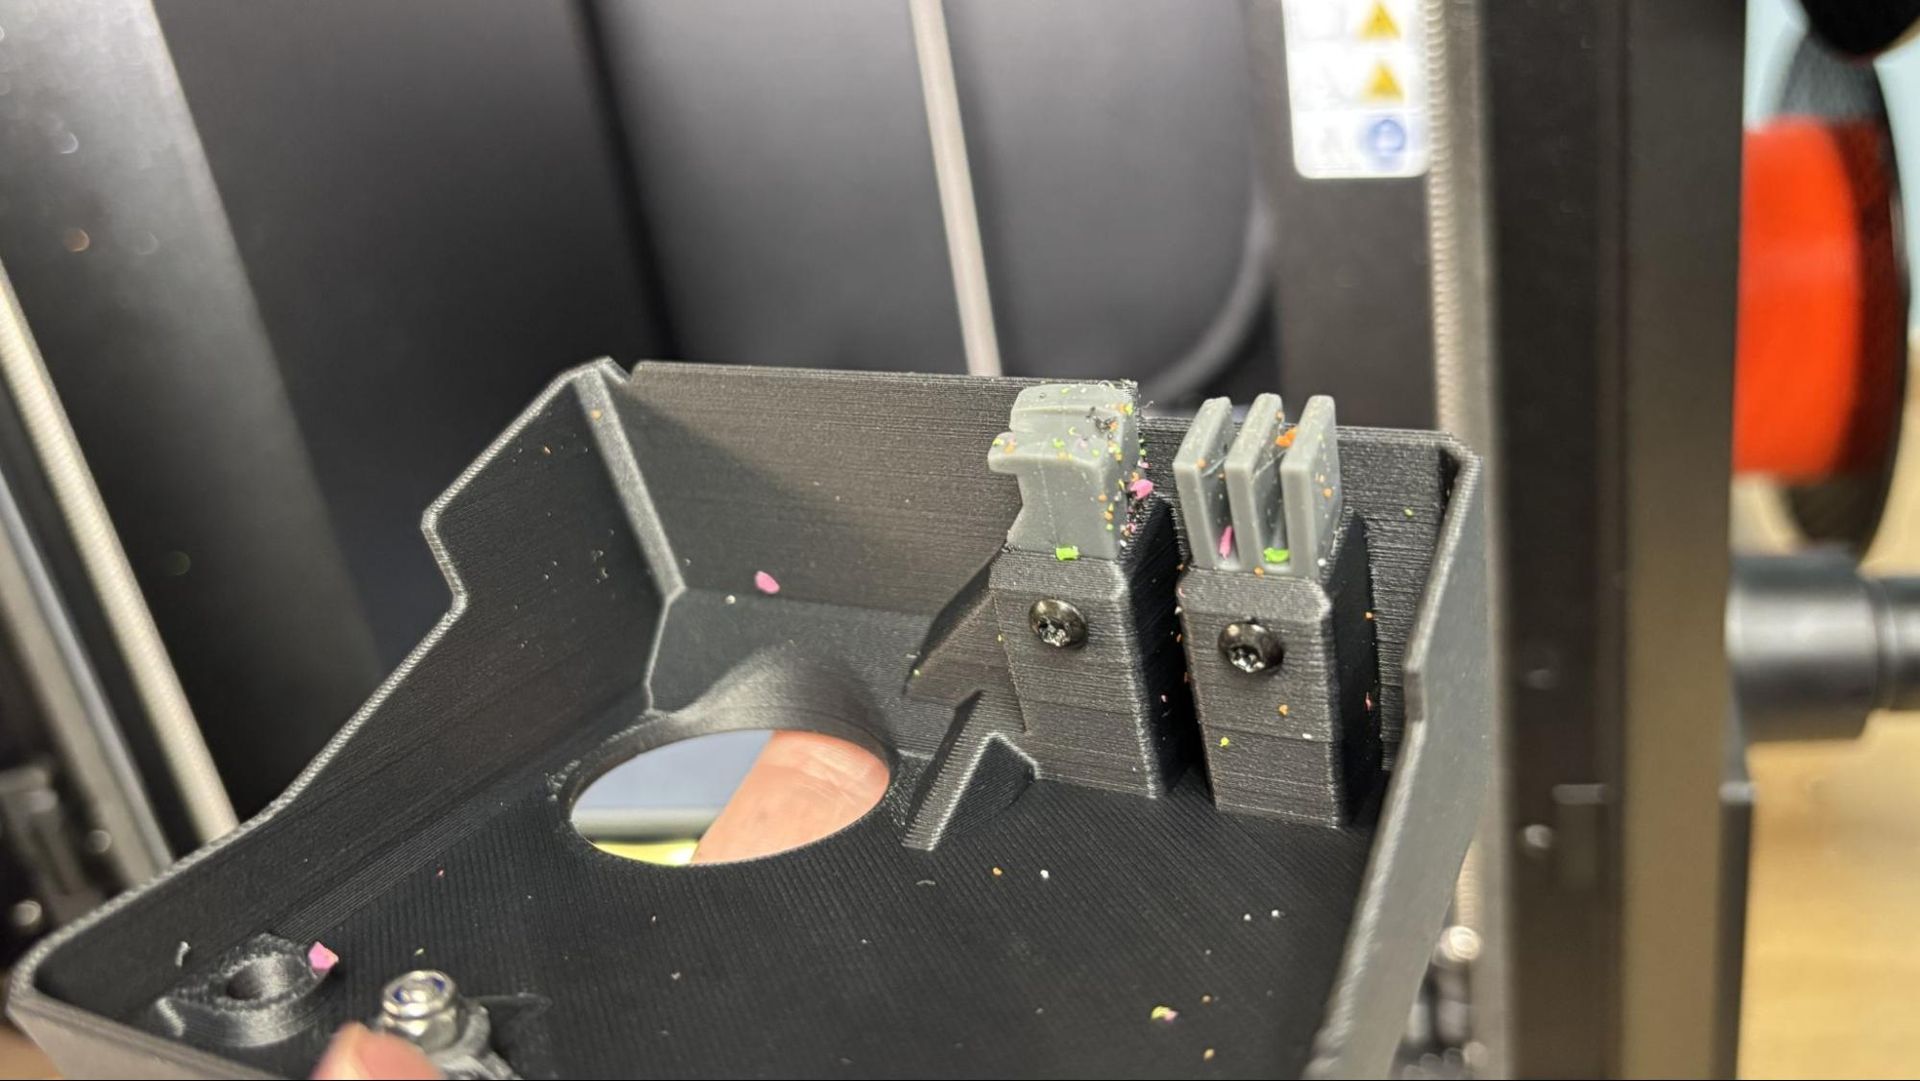
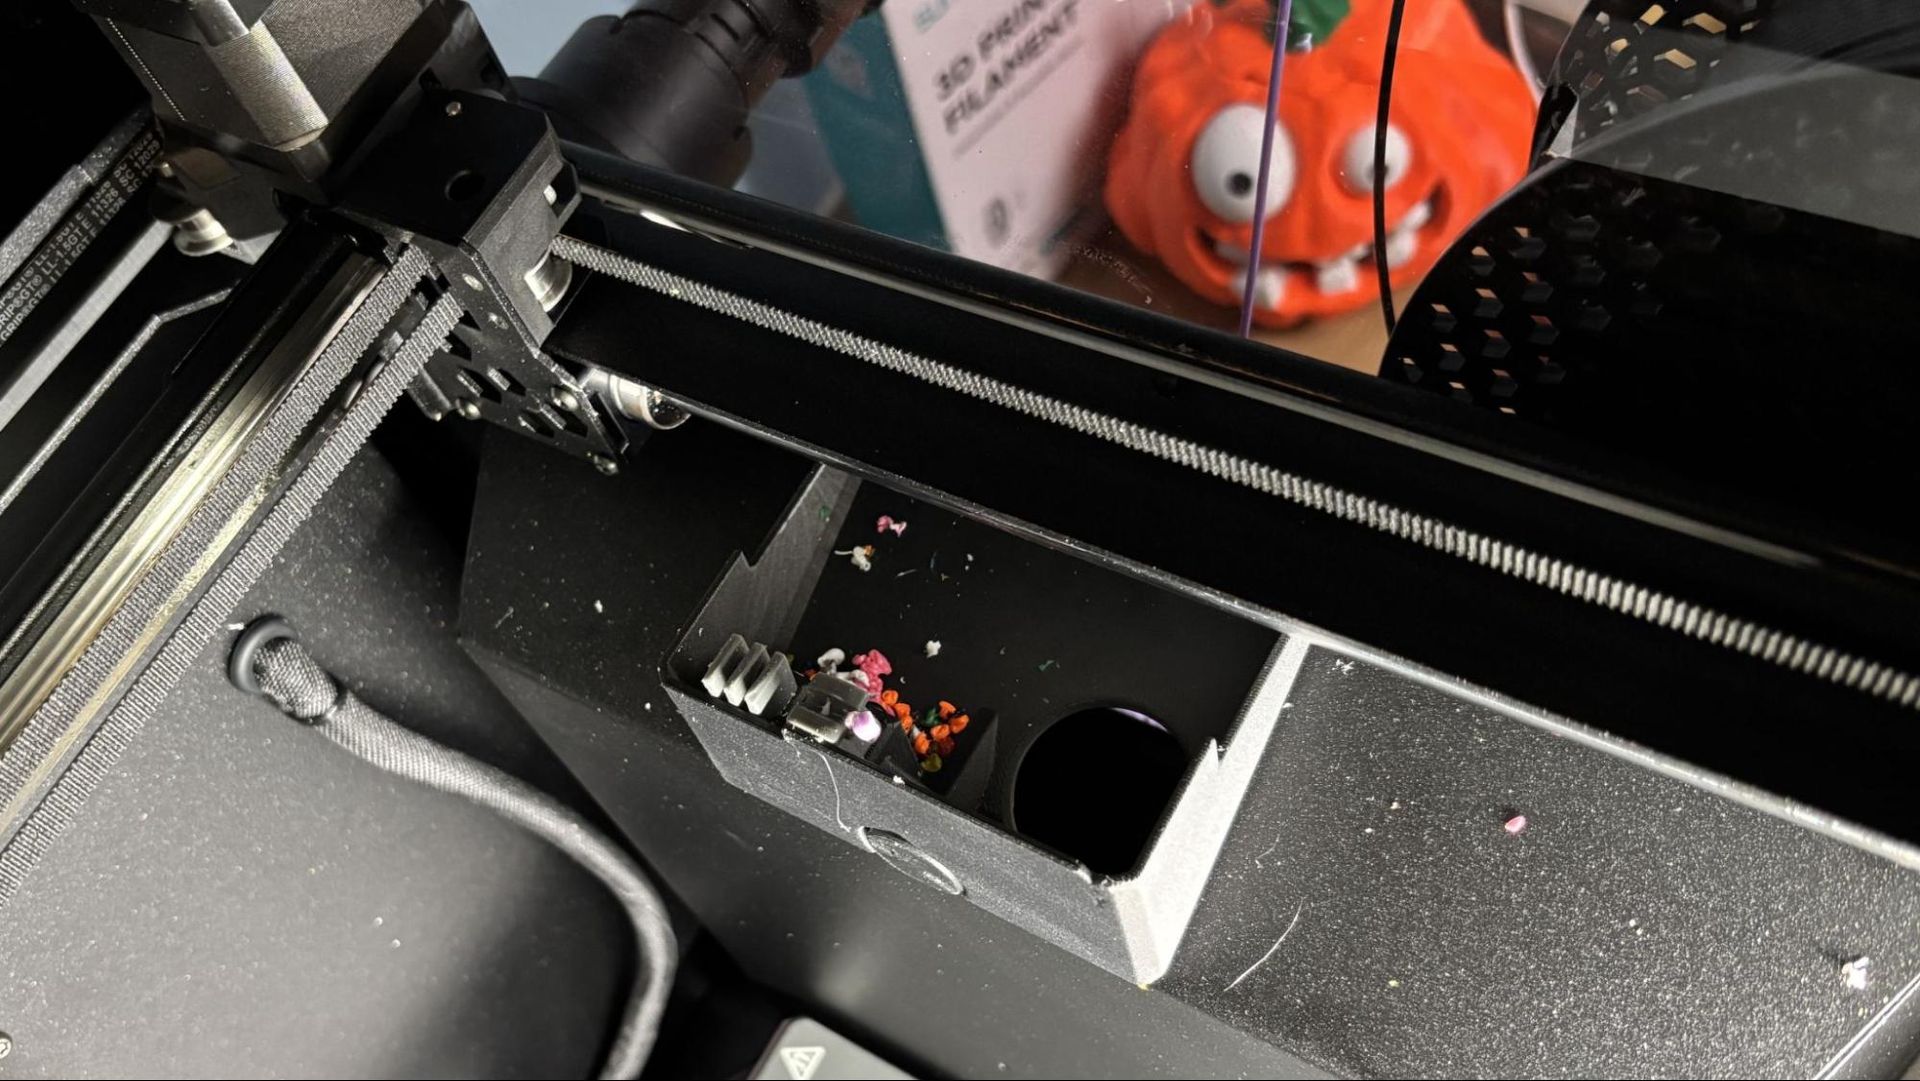
Prusa CORE One+ INDX
Tom's Hardware
Prusa CORE One+ INDX
Tom's Hardware
Prusa CORE One+ INDX
Tom's Hardware

Anyone who’s had to calibrate an XL will rejoice at the new automatic tool offset calibration system. A calibration sensor sits in the front corner of the machine, and you don’t need to do a thing but keep it clean.
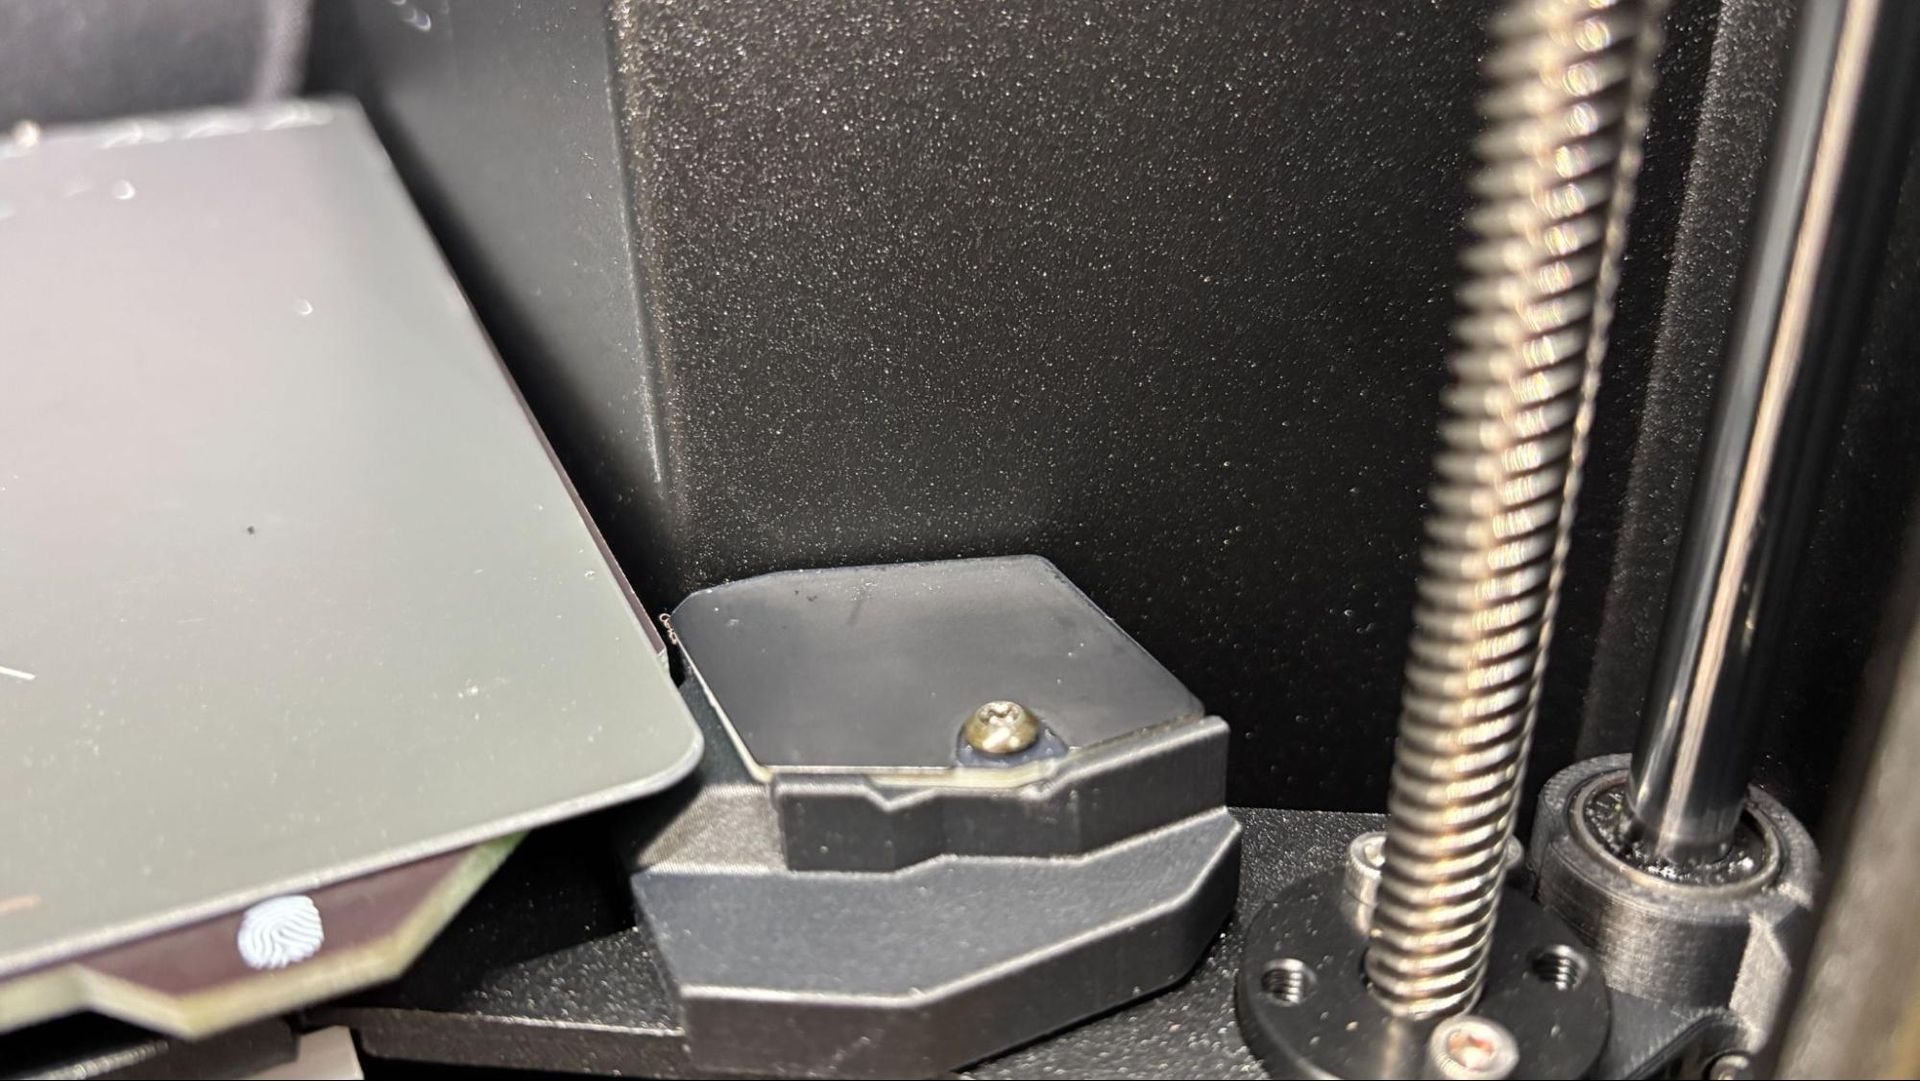
Prusa CORE One+ INDX

(Image credit: Tom's Hardware)

The CORE One+ has active chamber temperature control, which is NOT the same as chamber heating. Instead, the machine’s interior geometry is optimized to capture heat thrown from the bed to heat the chamber up to 55C. A fan and smart ventilation system likewise keep the chamber cool enough for PLA even with the door closed.

Assembling the Prusa CORE One+ INDX
Prusa CORE One+ INDX

(Image credit: Tom's Hardware)

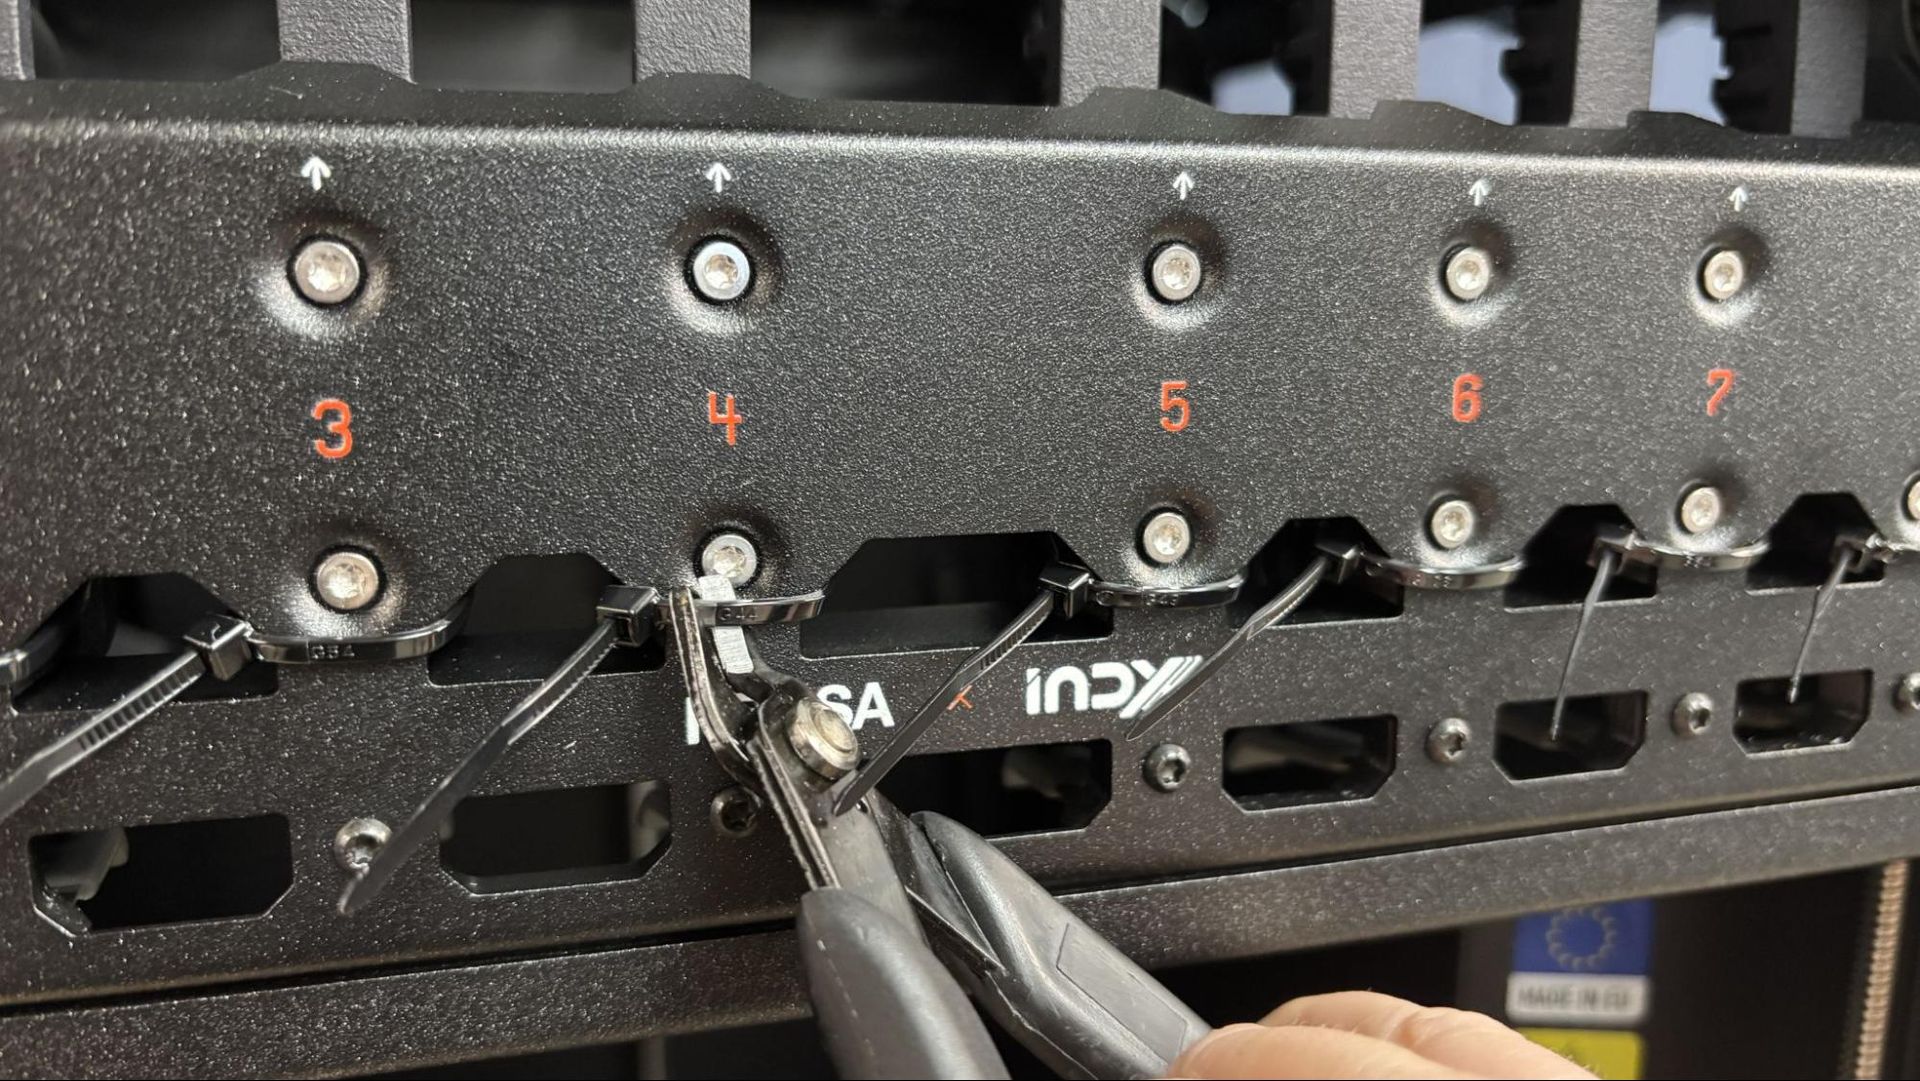
The Prusa CORE One+ INDX we reviewed came fully assembled and only needed to be unpacked. Simply pull it out of the box, remove the packing materials, snap the screen on and the spool holders, and plug it in.

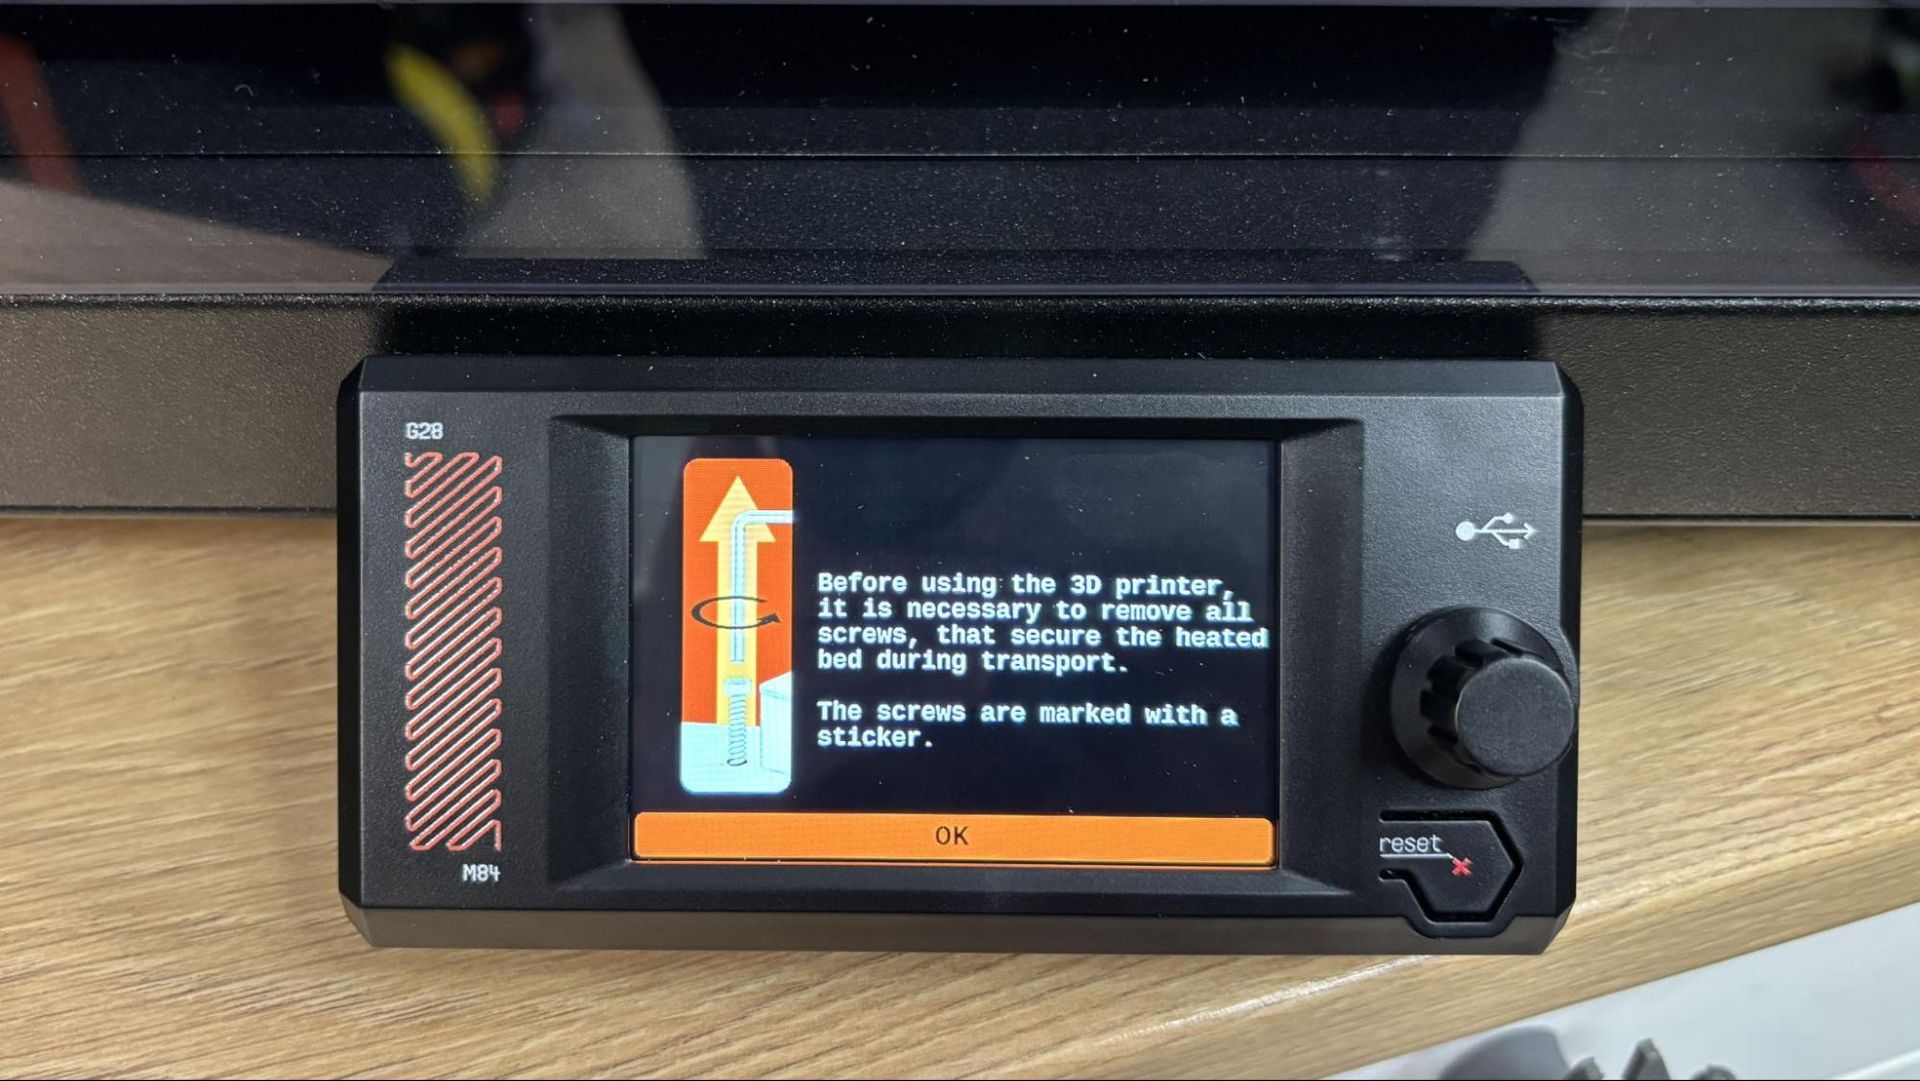
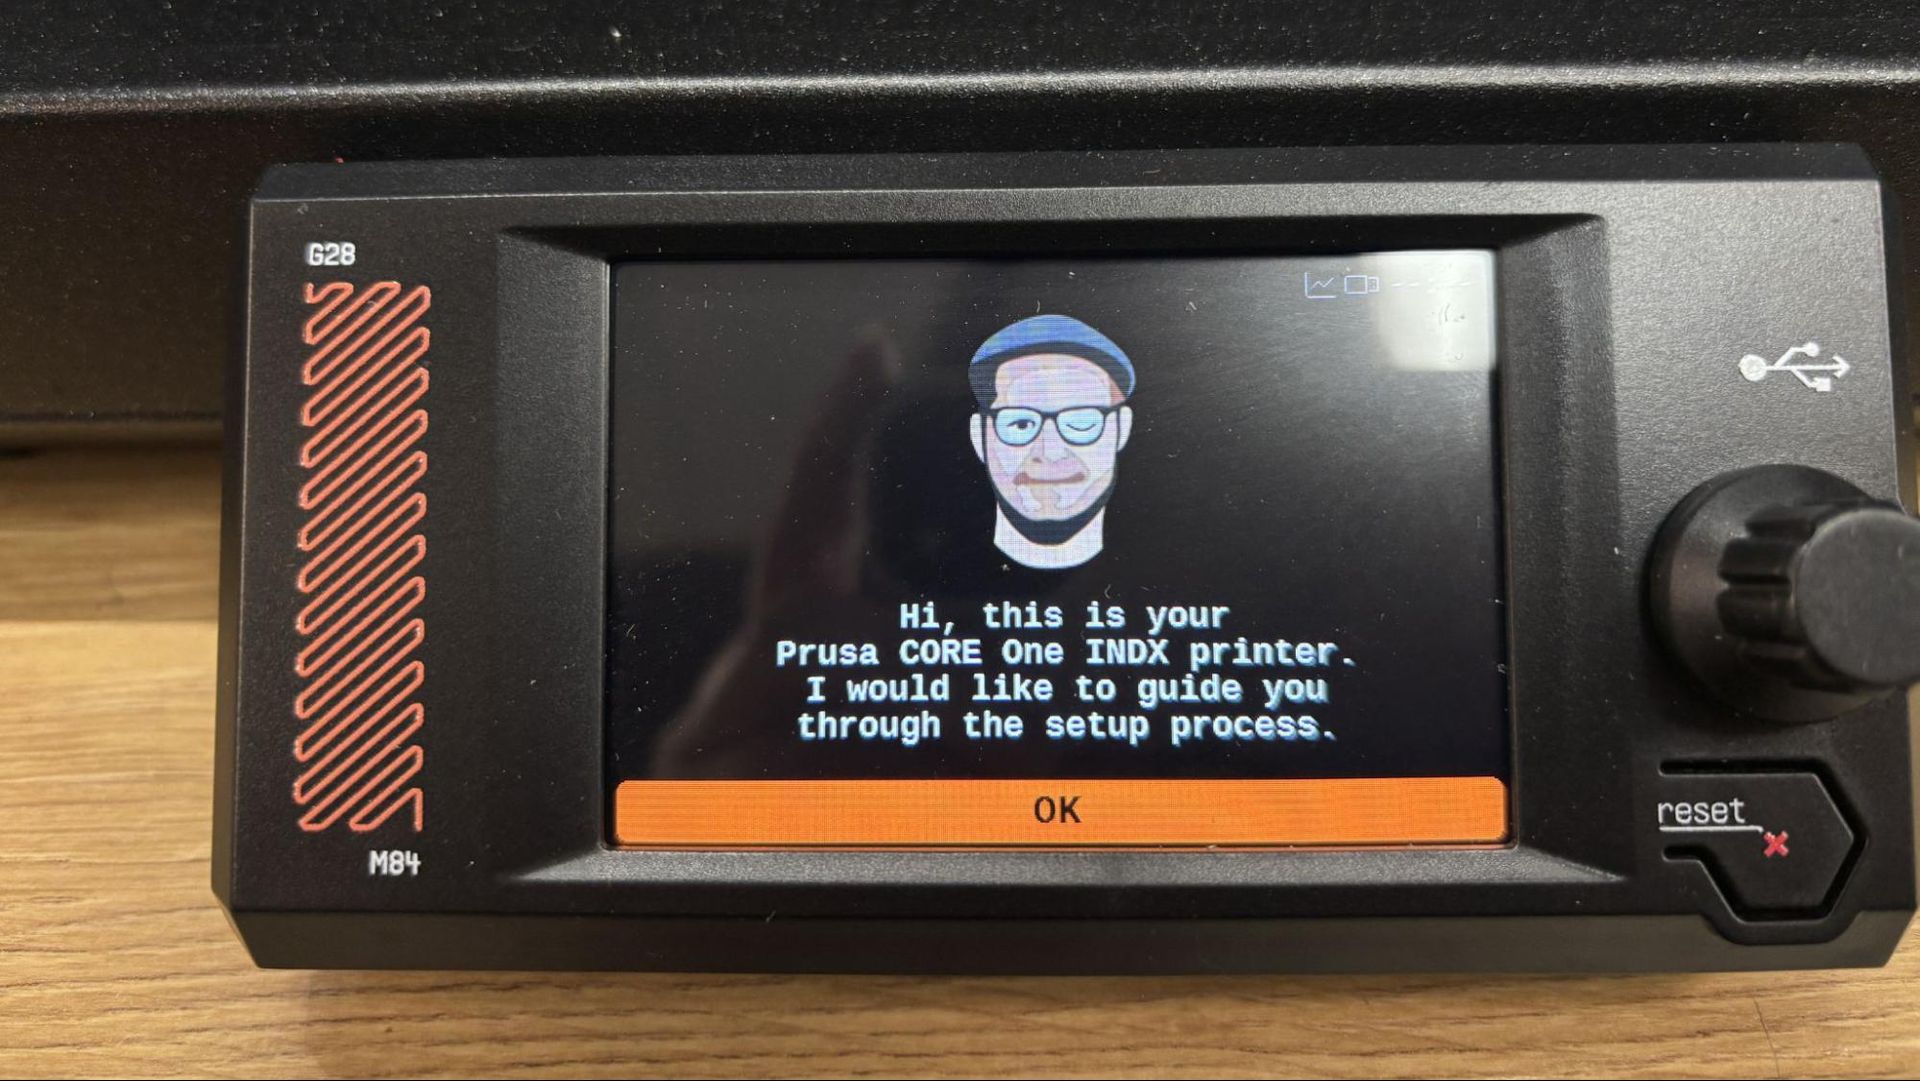
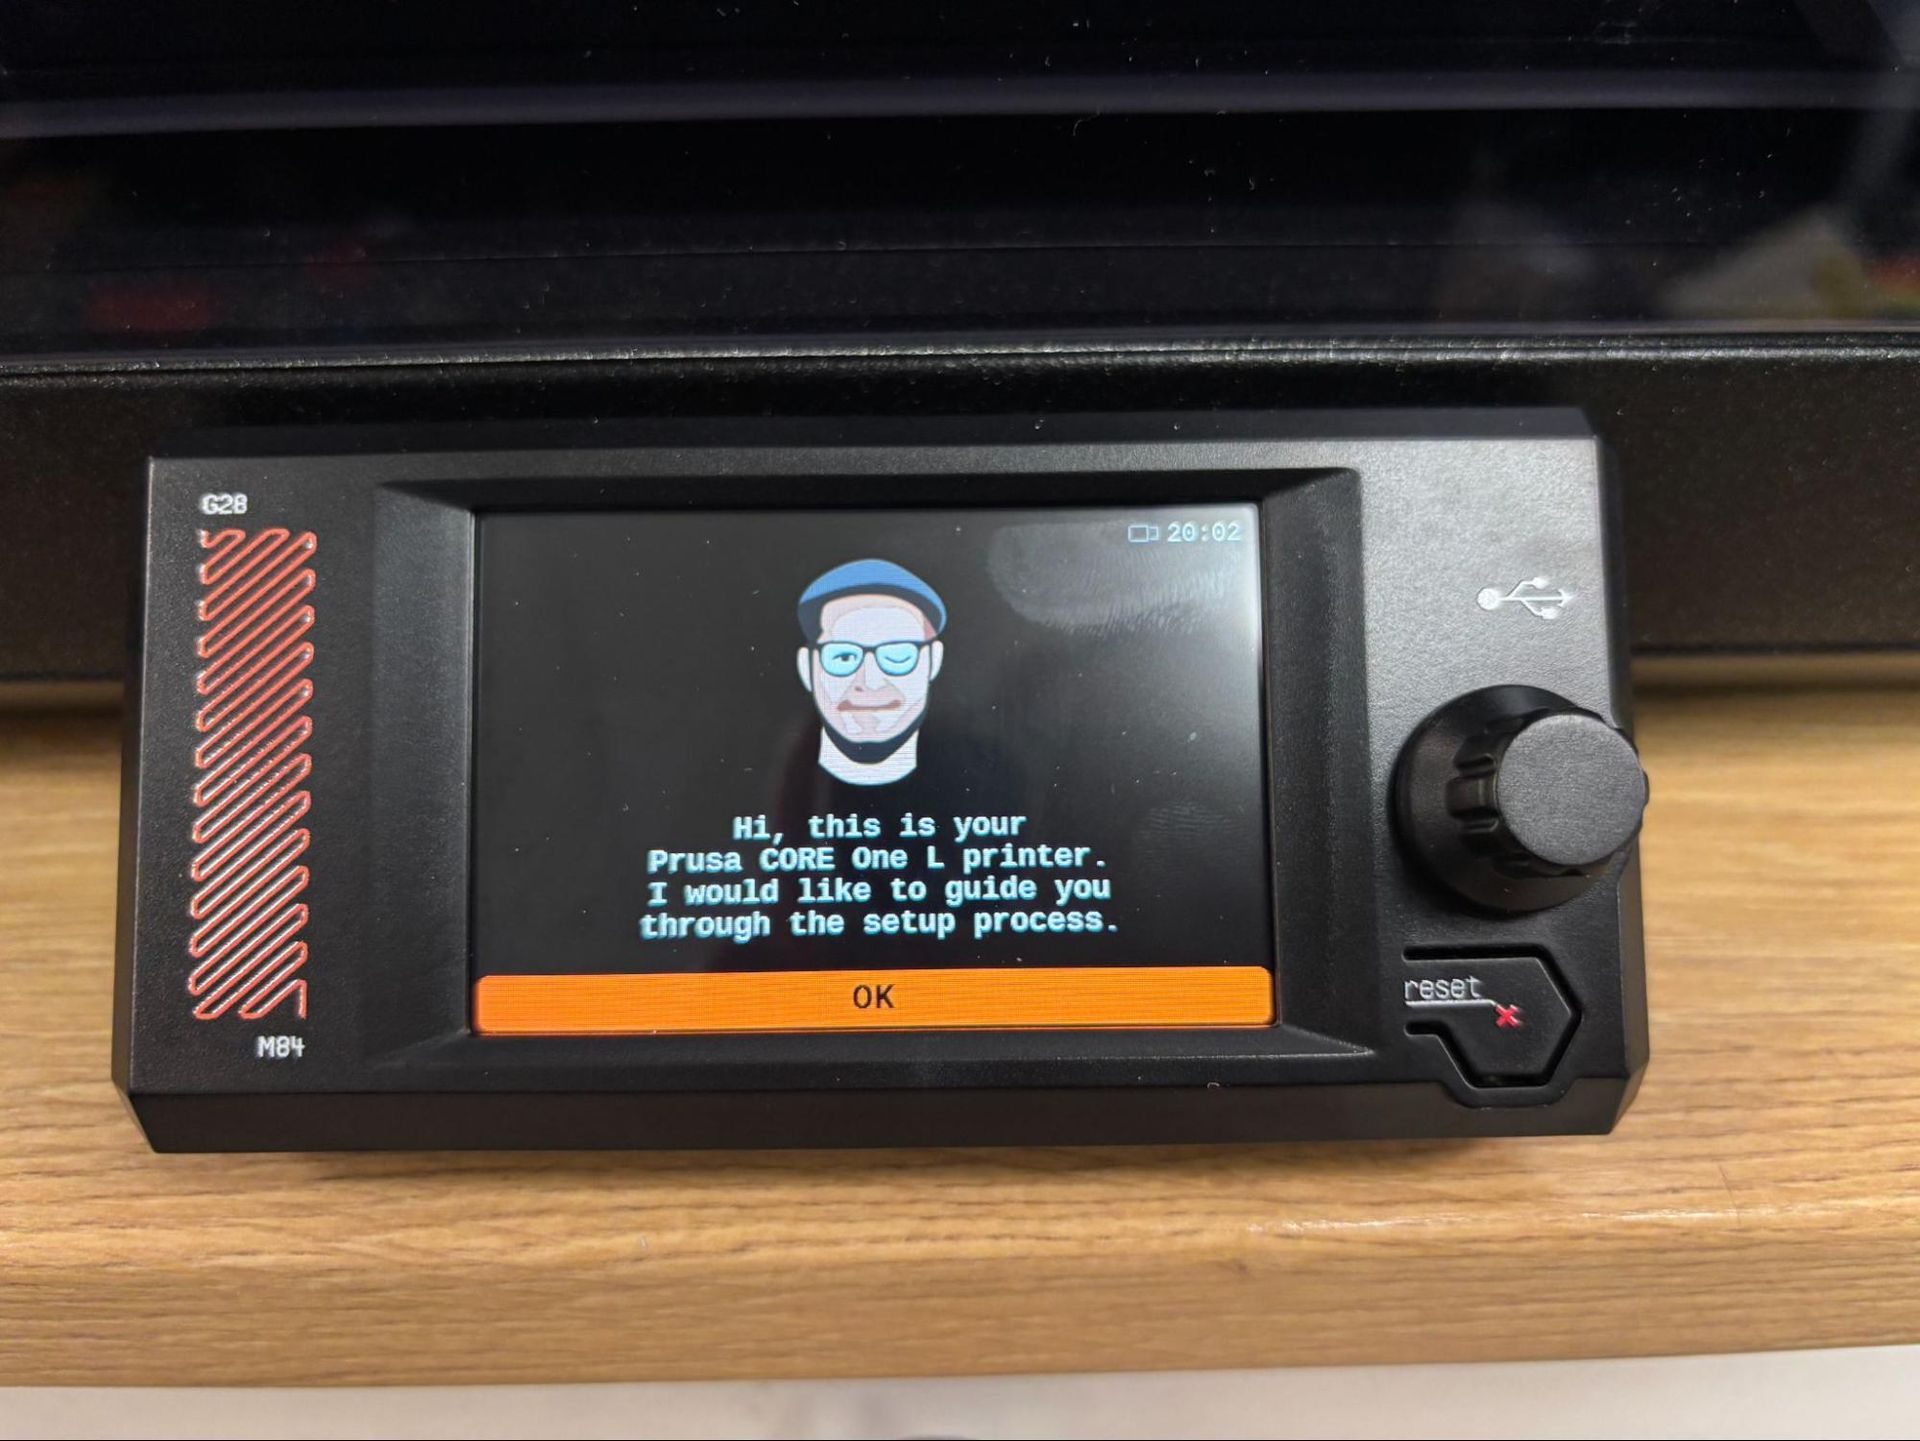
Once the machine is turned on, you’ll see a cartoon version of Josef Prusa to guide you through setup. However, calibration is now handled at the factory, so there’s nothing left to do but make sure you’ve removed the zip ties and carry on your merry way.

Leveling the Prusa CORE One+ INDX
Prusa CORE One+ INDX

(Image credit: Tom's Hardware)

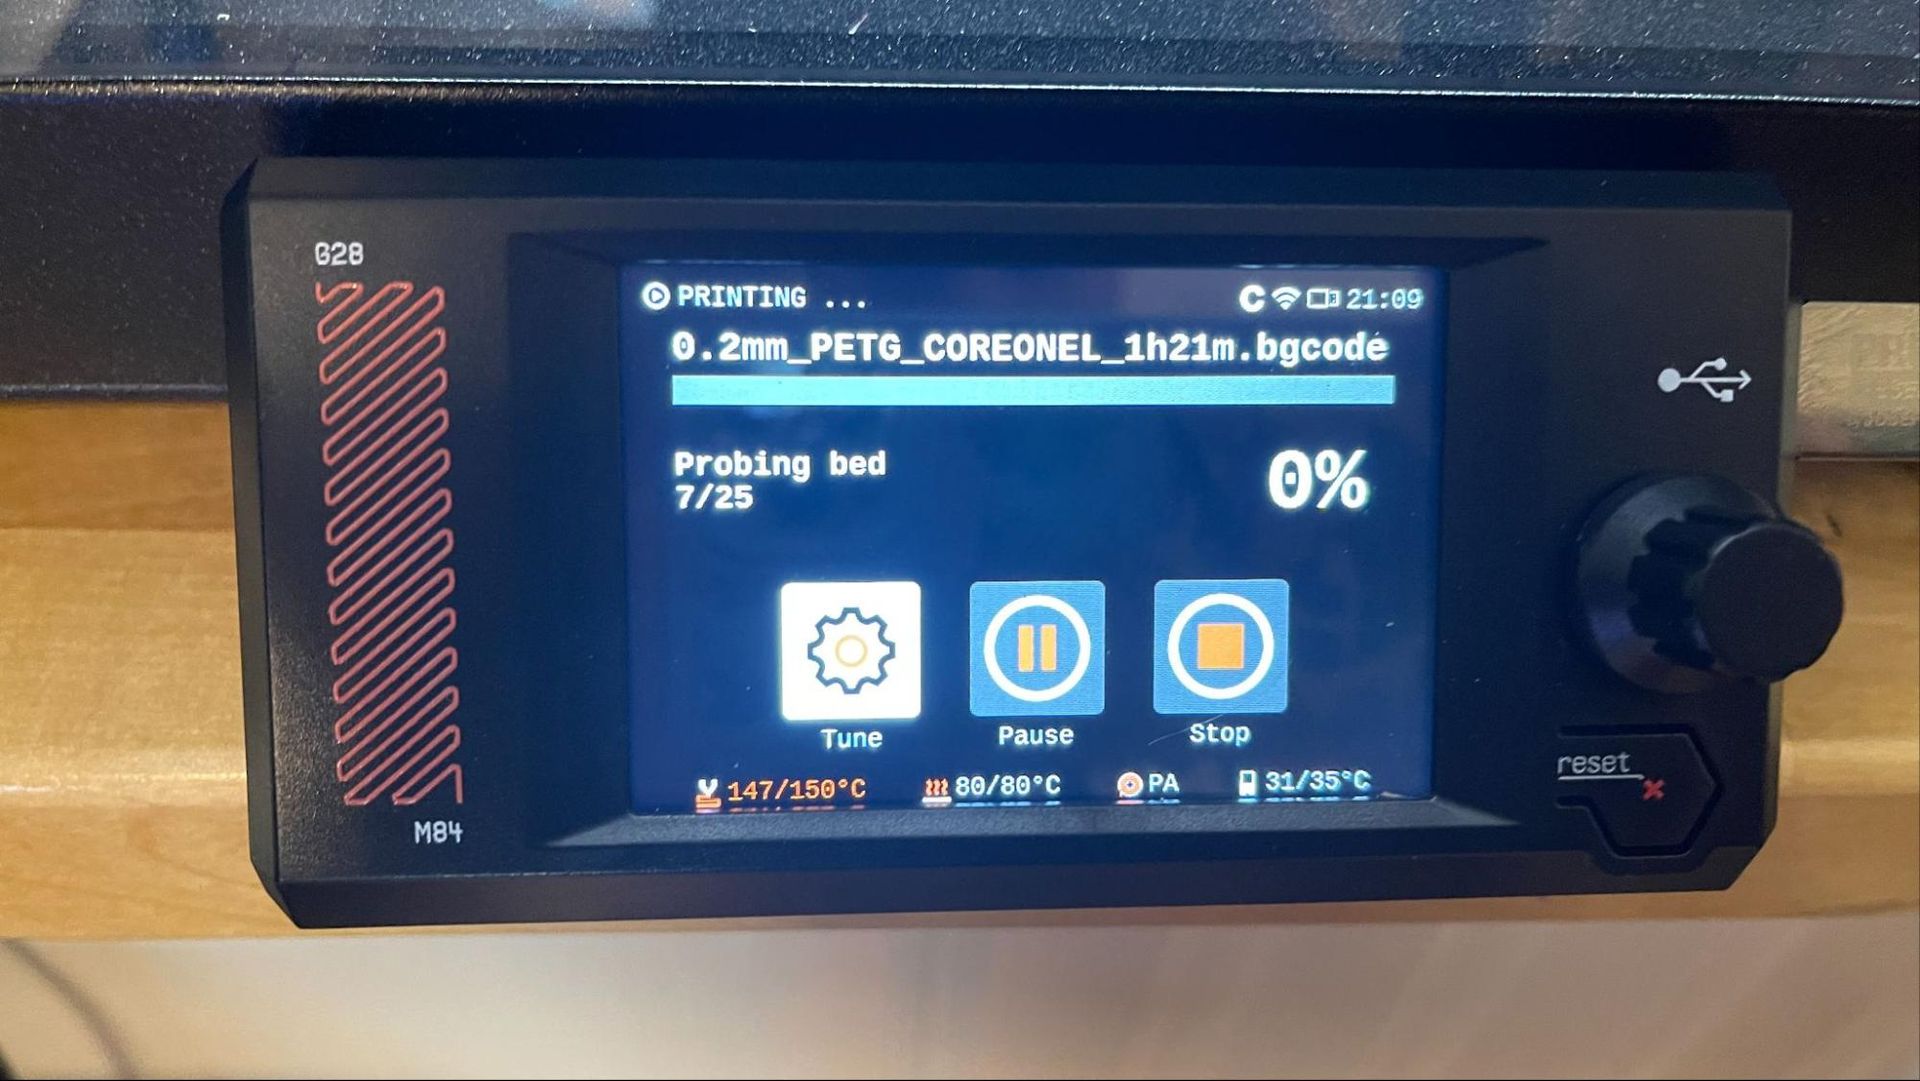
Bed leveling is a no-brainer, as the Prusa CORE One+ is fully automatic. There are no manual adjustments and no need to adjust the Z offset. The printer uses a load cell sensor connected to the nozzle, which physically taps the print surface for precise measurement.

The printer trams the bed and calculates the required Z height before each print. And yes, if you need it, live Z adjustments are available in the control panel.

Loading Filament on the Prusa CORE One+ INDX
Prusa CORE One+ INDX

(Image credit: Tom's Hardware)

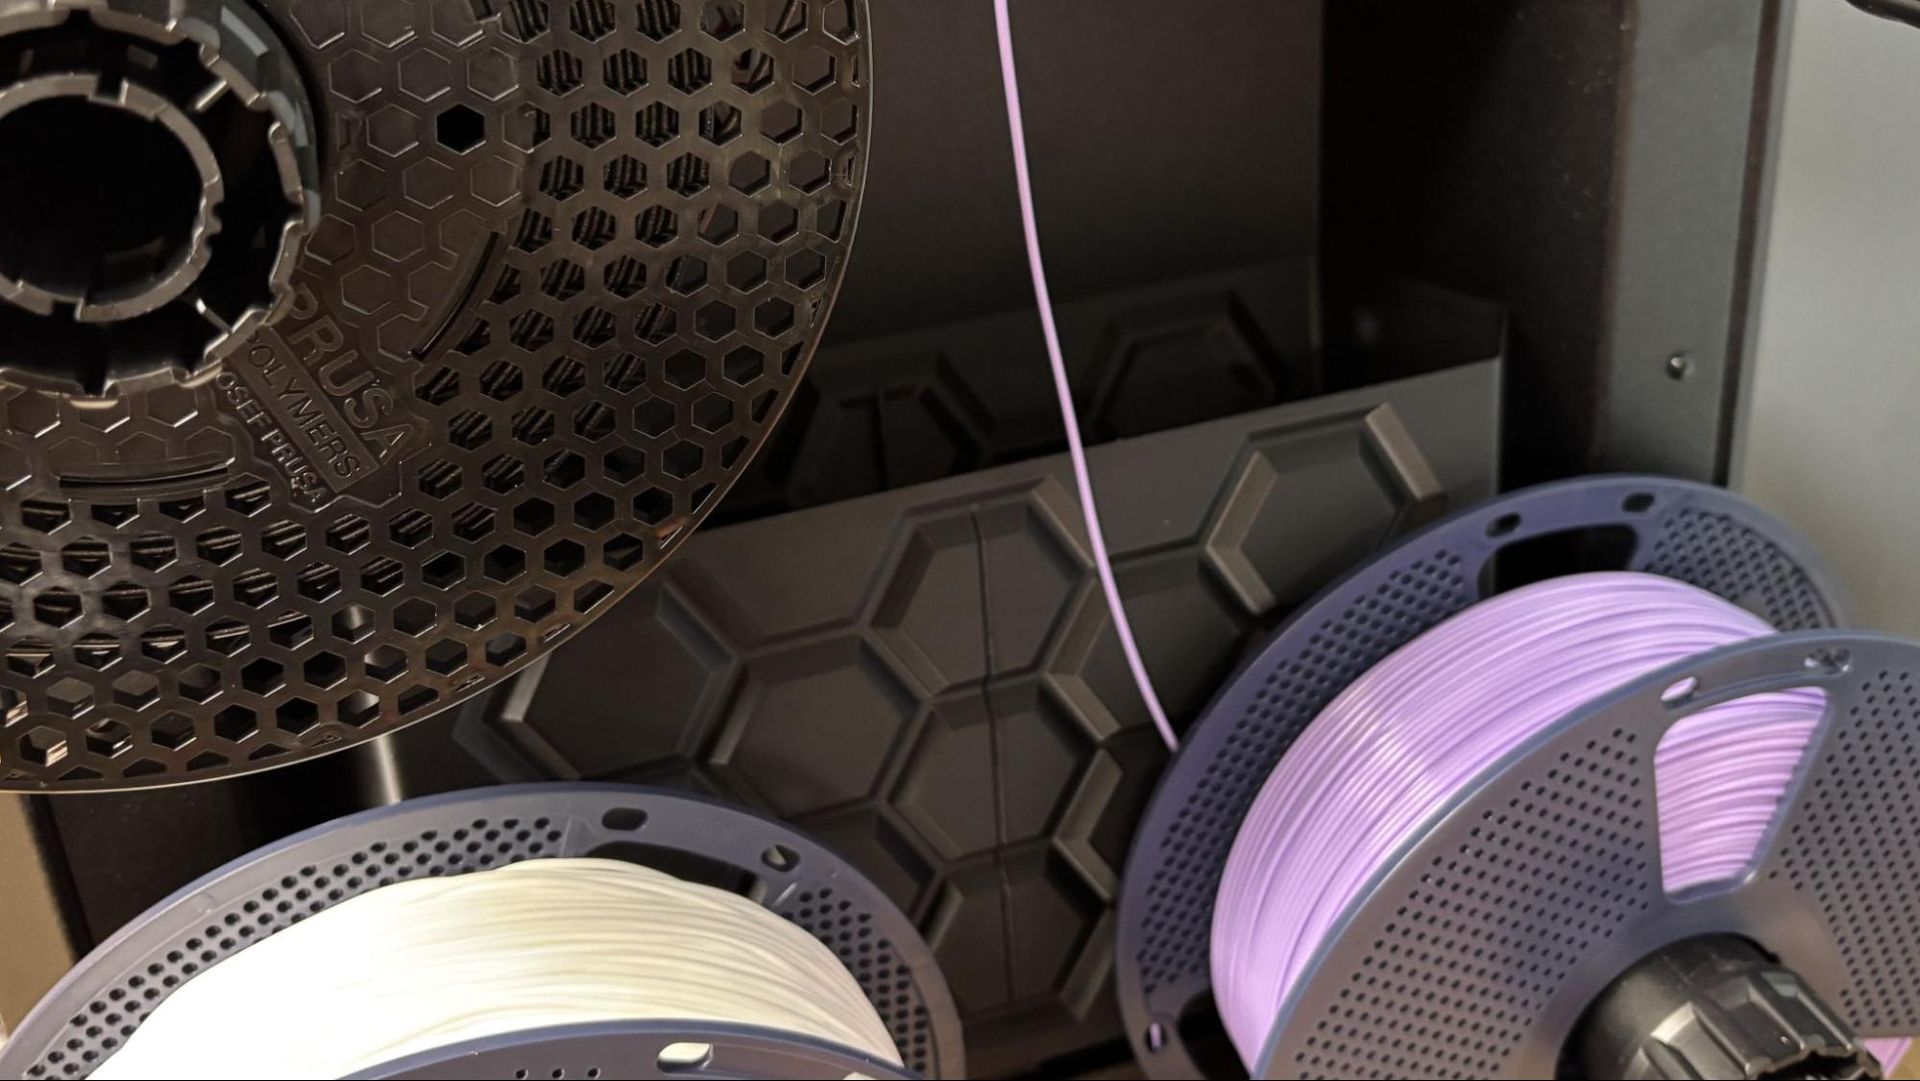
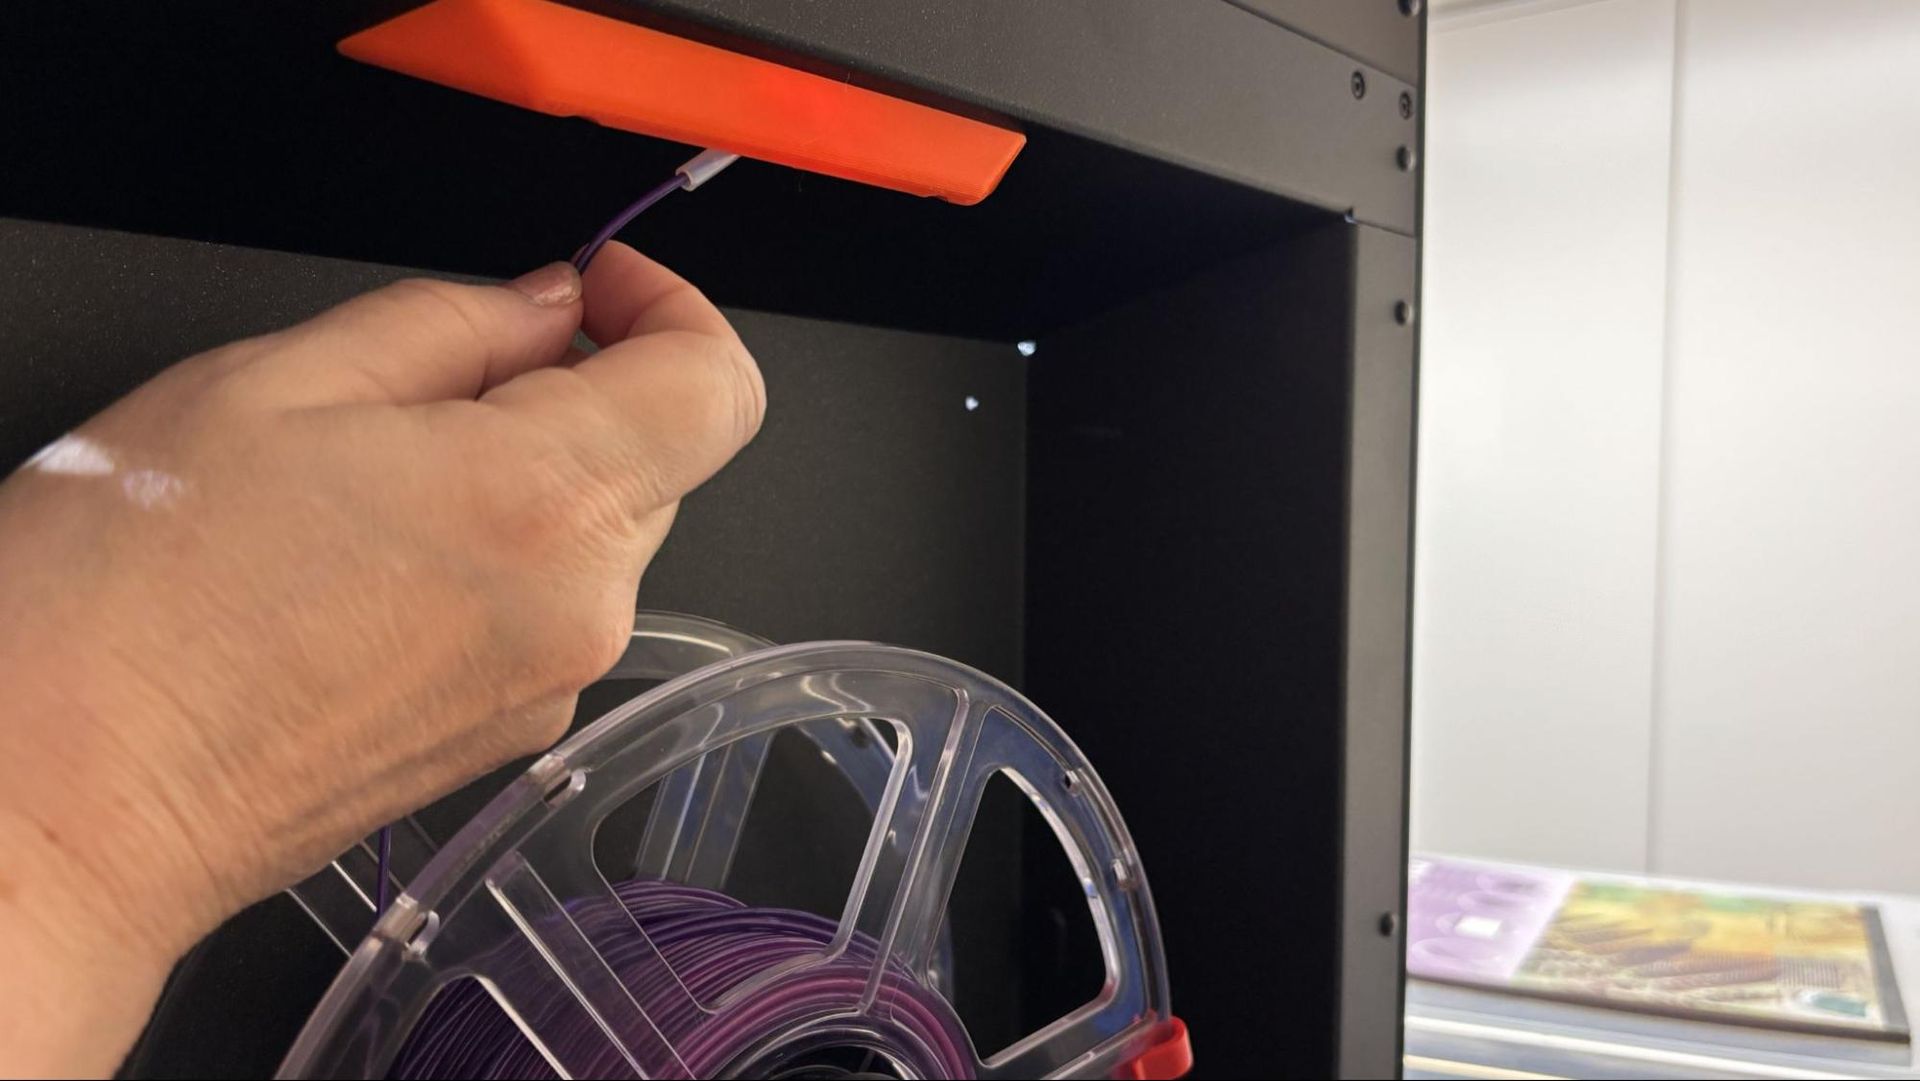
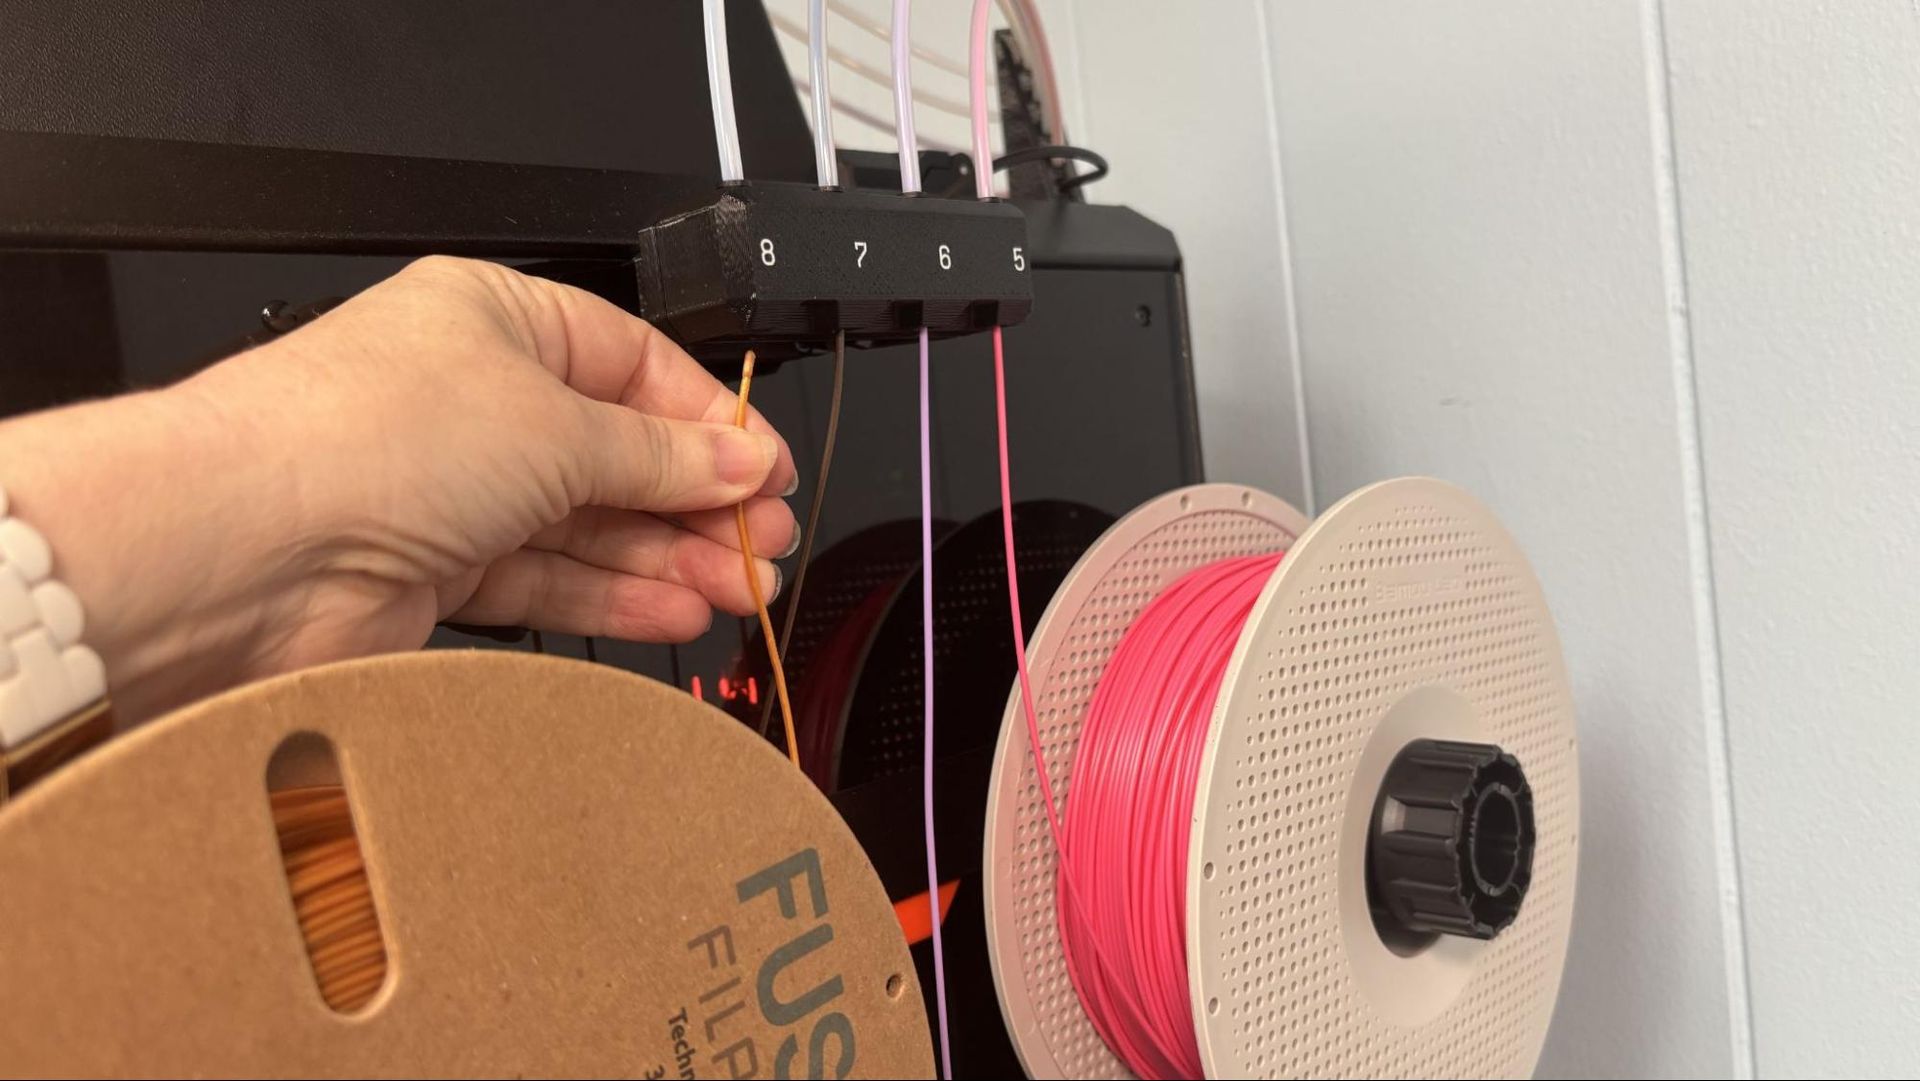
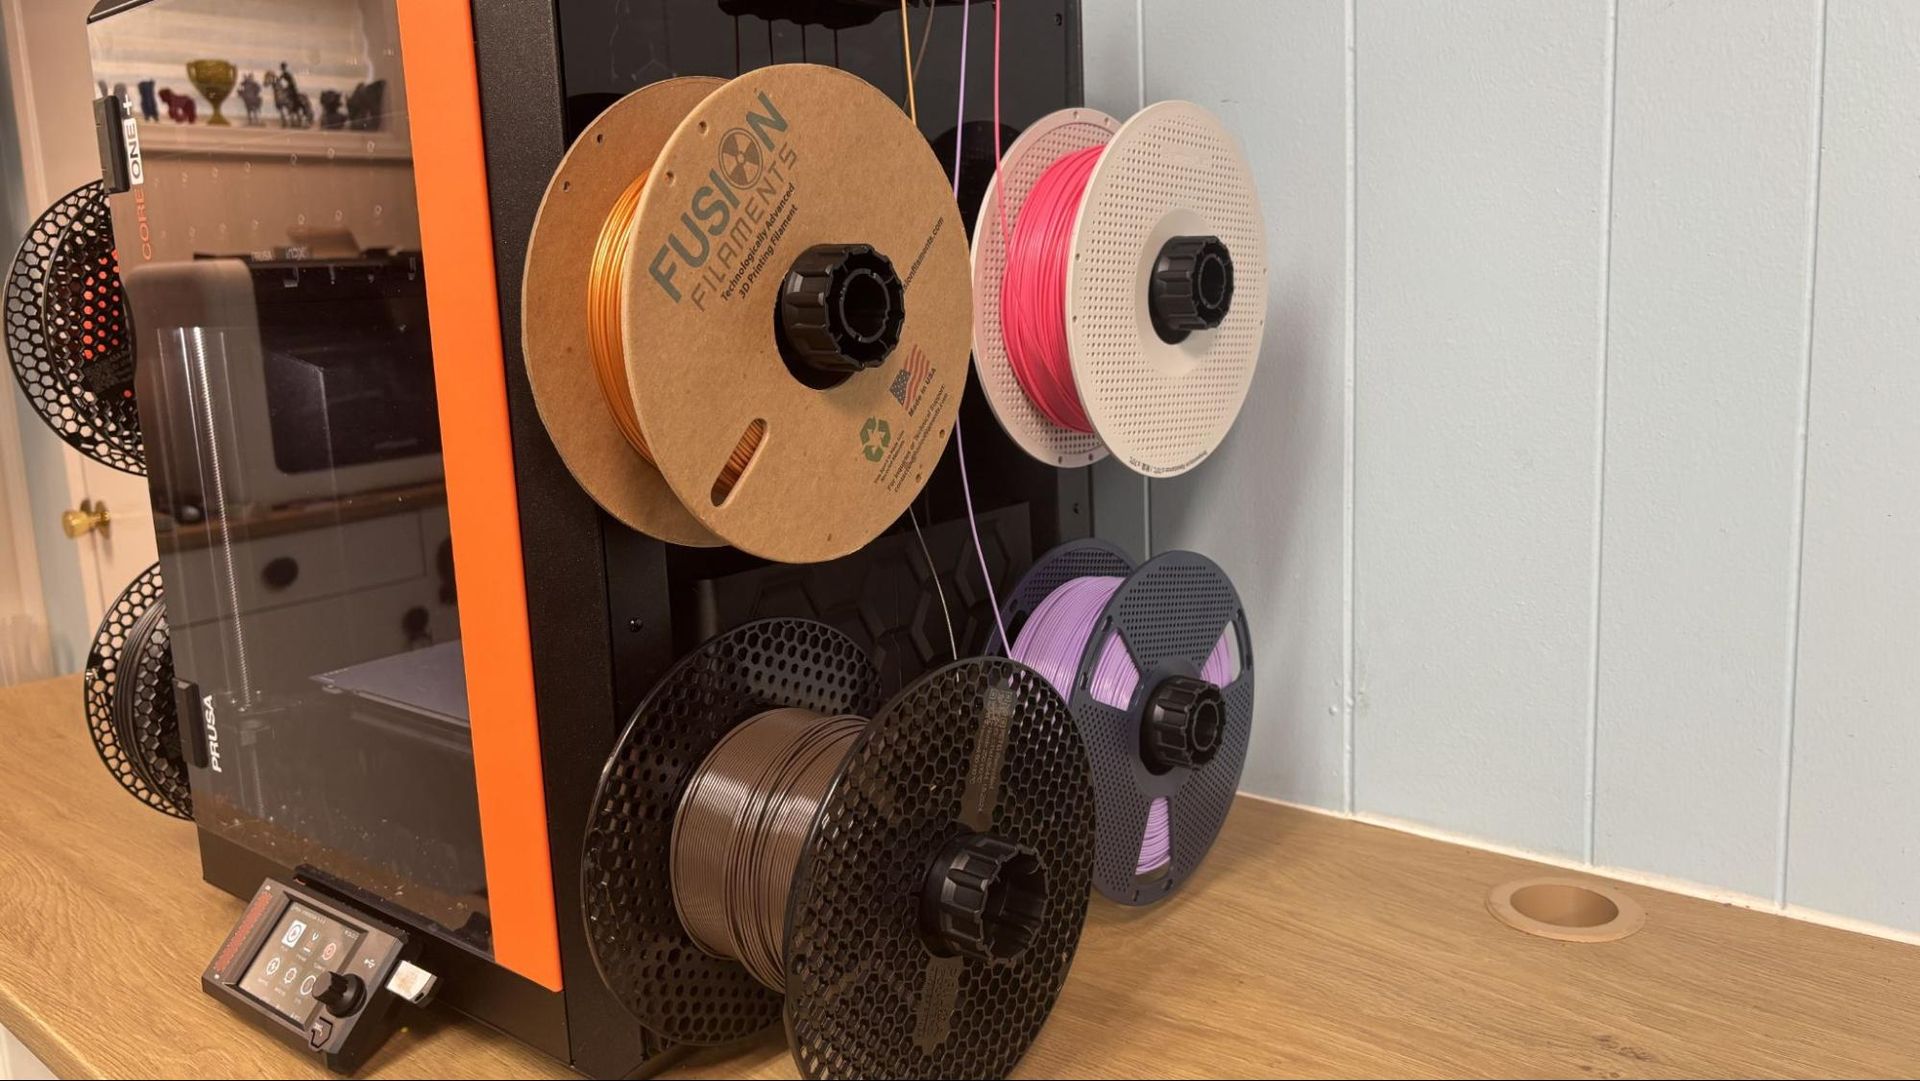
Loading filament is very simple. Simply place the spools on the side-mounted rack and feed the plastic into the reverse Bowden tube until it reaches the hotend. You’ll need to open the printer menu and tell it which toolhead you’re loading, since the toolheads themselves are passive. The carriage will zip over, grab the requested tool, and take it to the nozzle wiper to purge a small amount of filament into the cup. It will wipe the nozzle and park the toolhead when you’re done.

The inductive heater brings each nozzle up to temperature in a matter of seconds.

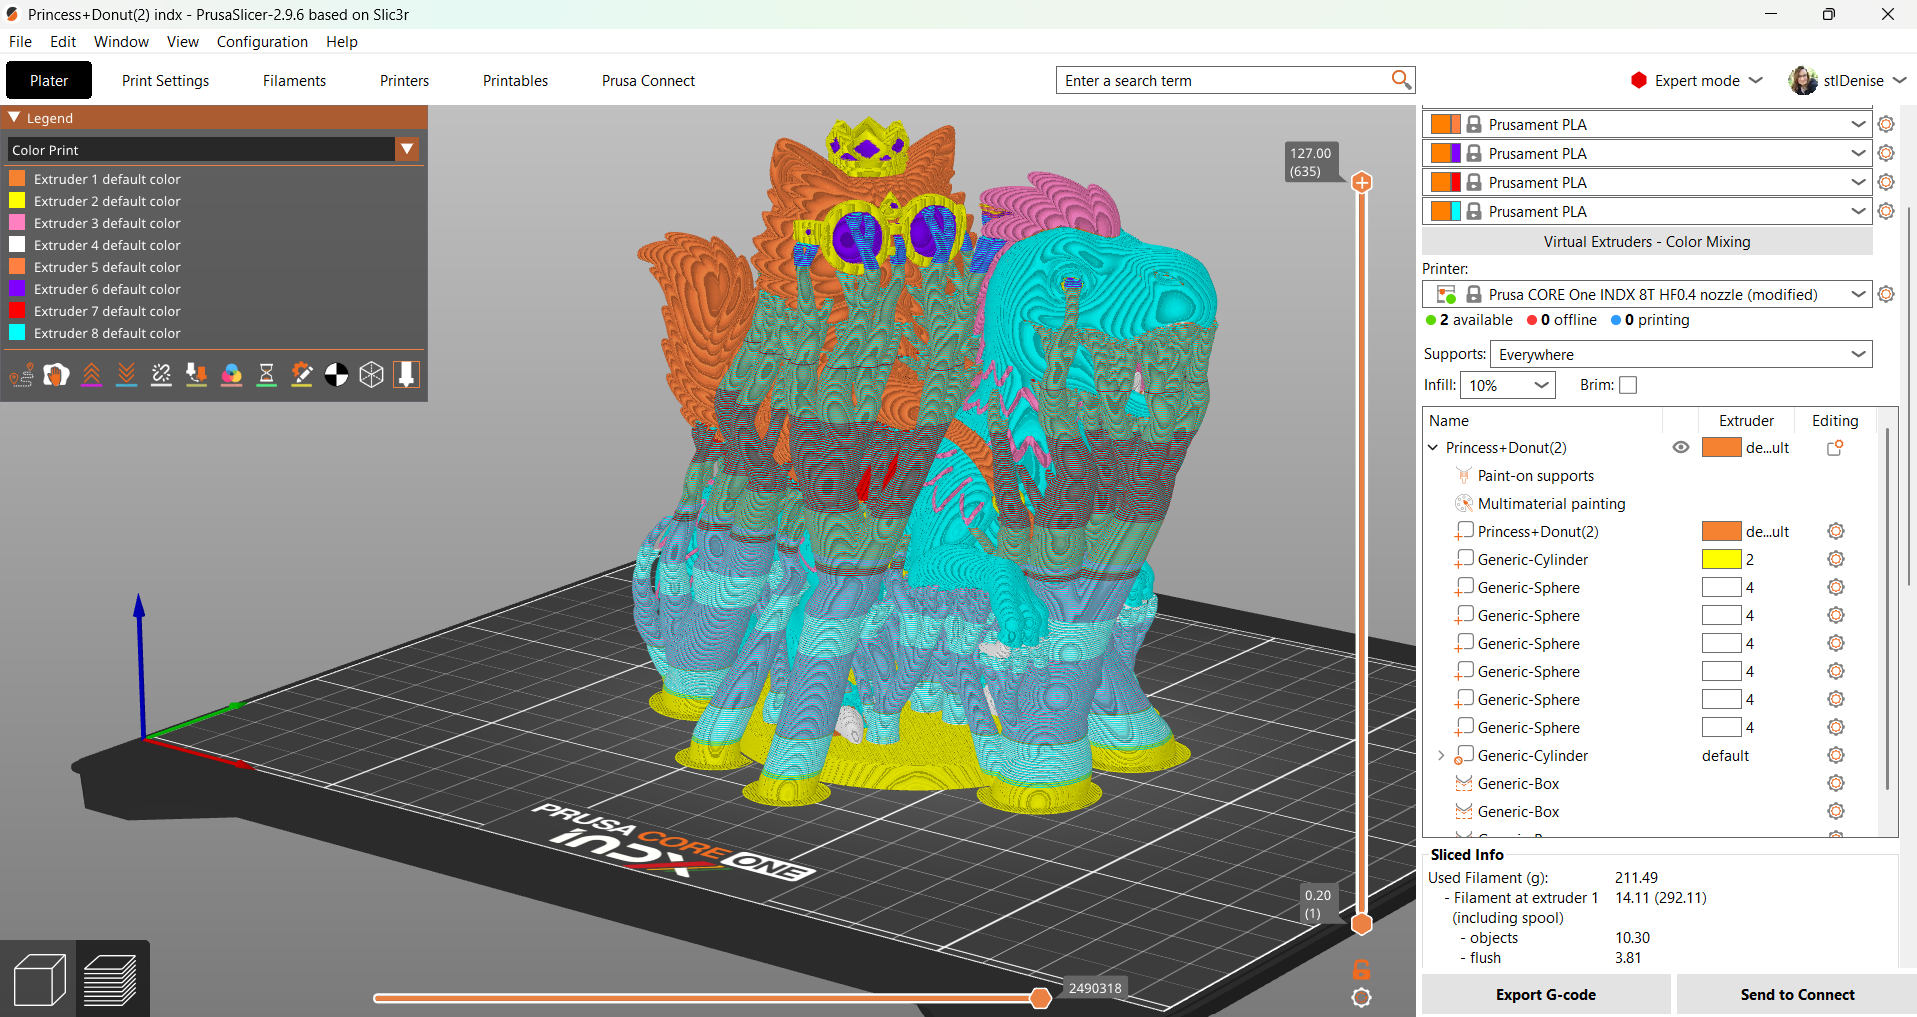
Unfortunately, the printer only asks what kind of filament you’re loading (PLA, ASA, Flex, or more) but not what color. This is probably due to the fact that the slicer does not constantly communicate with the printer over the cloud, but I’m hoping that this feature will become available with a future firmware update. For now, you’ll have to manually enter your filament colors into the slicer. There is a remapping option on the control screen, but shifting around eight spools' worth of information in this fashion is tedious.

The spoolholders are sturdy manual devices that can hold literally any brand of filament you might be using. They even expand to hold 3KG spools.
Prusa CORE One+ INDX

(Image credit: Tom's Hardware)

Preparing Files / Software for Prusa CORE One+
Prusa CORE One+ INDX

(Image credit: Tom's Hardware)

The Prusa CORE One+ uses its native slicer, PrusaSlicer. This open-source slicer is developed by Prusa Research and serves as the foundation for many other slicers. It comes with dozens of profiles for every material and nozzle size that Prusa Research makes.

The slicer also has built- in Color Mixing, which allows you to blend two or three colors with ultra-fine layers to create the illusion of more colors.

The CORE One+ can also use Prusa’s web-based slicer, EasyPrint, to print directly from Printables, Prusa’s free library of files, or from a mobile device.

Printing on the Prusa CORE One+ INDX

The fully assembled CORE One+ comes with a full 1 KG roll of Prusament PLA Galaxy Black. If you want more colors and materials like silks and multicolor filaments, you should check out our guide to the best filaments for 3D printing for suggestions.

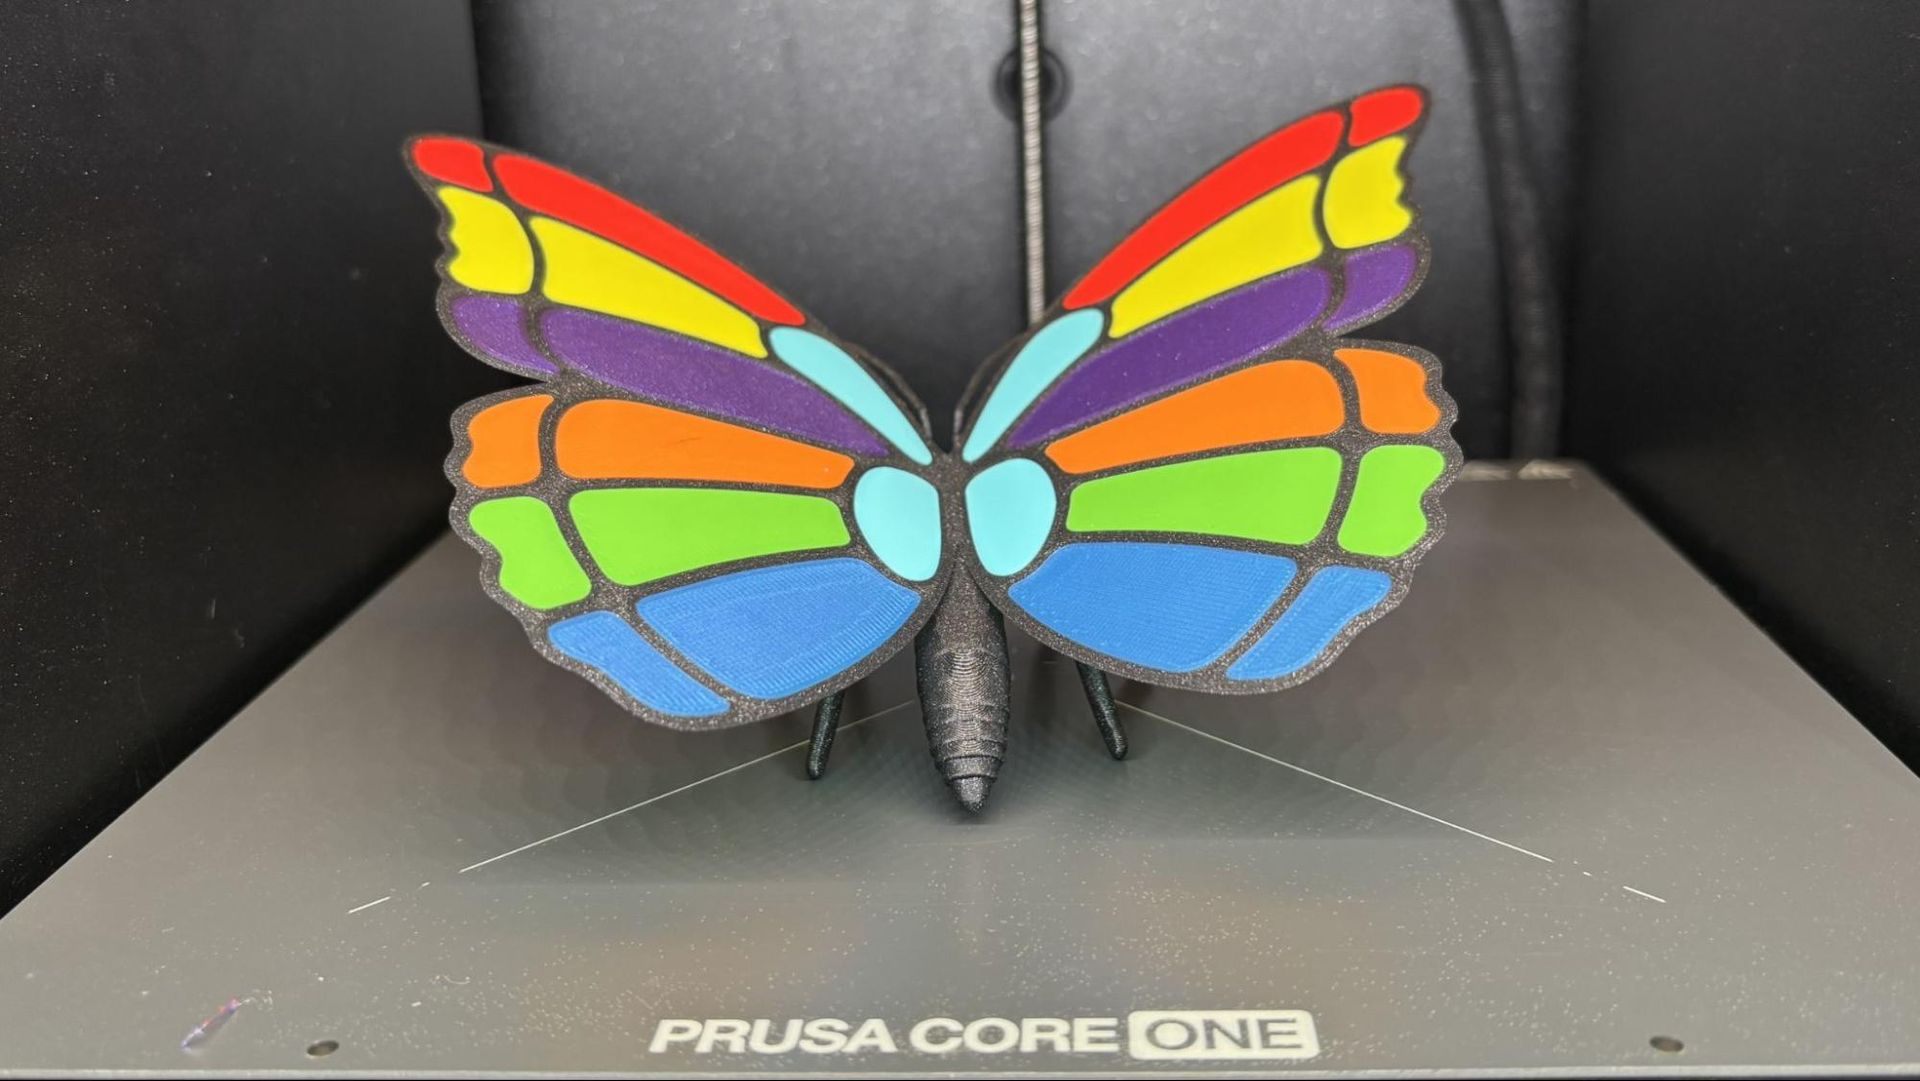
I used some of the sample rolls sent my way, plus a couple more lying about the workshop, to Prusa’s new calibration butterfly, Otto. This eight-color sample test print took 1 hour and 14 minutes. The wings are a first-layer test and are only two layers thick. A tab on the wing slots into the body to prove that tolerances and extrusion flow are correct. The multi-colored wing segments act as a visual test for first-layer quality, belt tension, and toolhead alignment, as any tiny offset in color boundaries or axis motion will show up instantly. This is a lot more useful than a Benchy for multicolor printing, and it makes a cool decoration you can keep on the shelf.
Prusa CORE One+ INDX

Prusa Research, Otto the Calibration Butterfly (Image credit: Tom's Hardware)

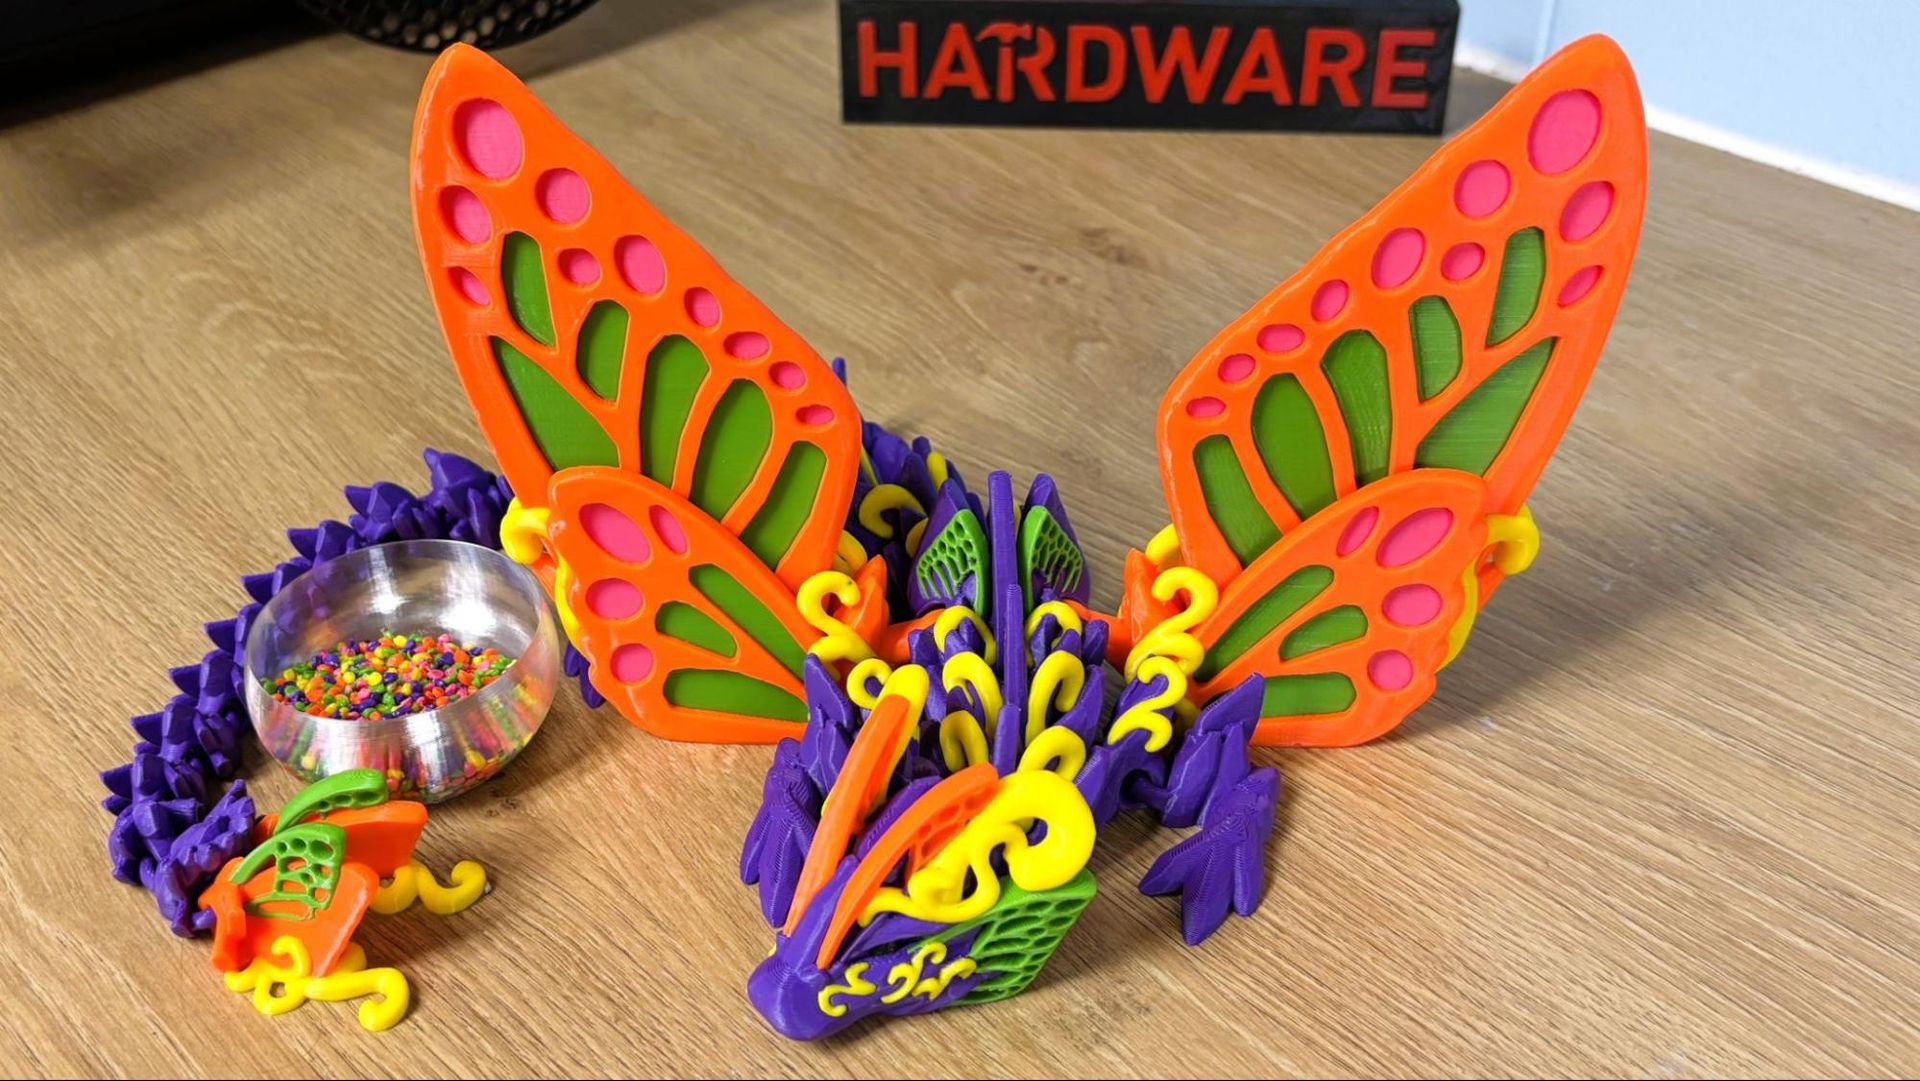
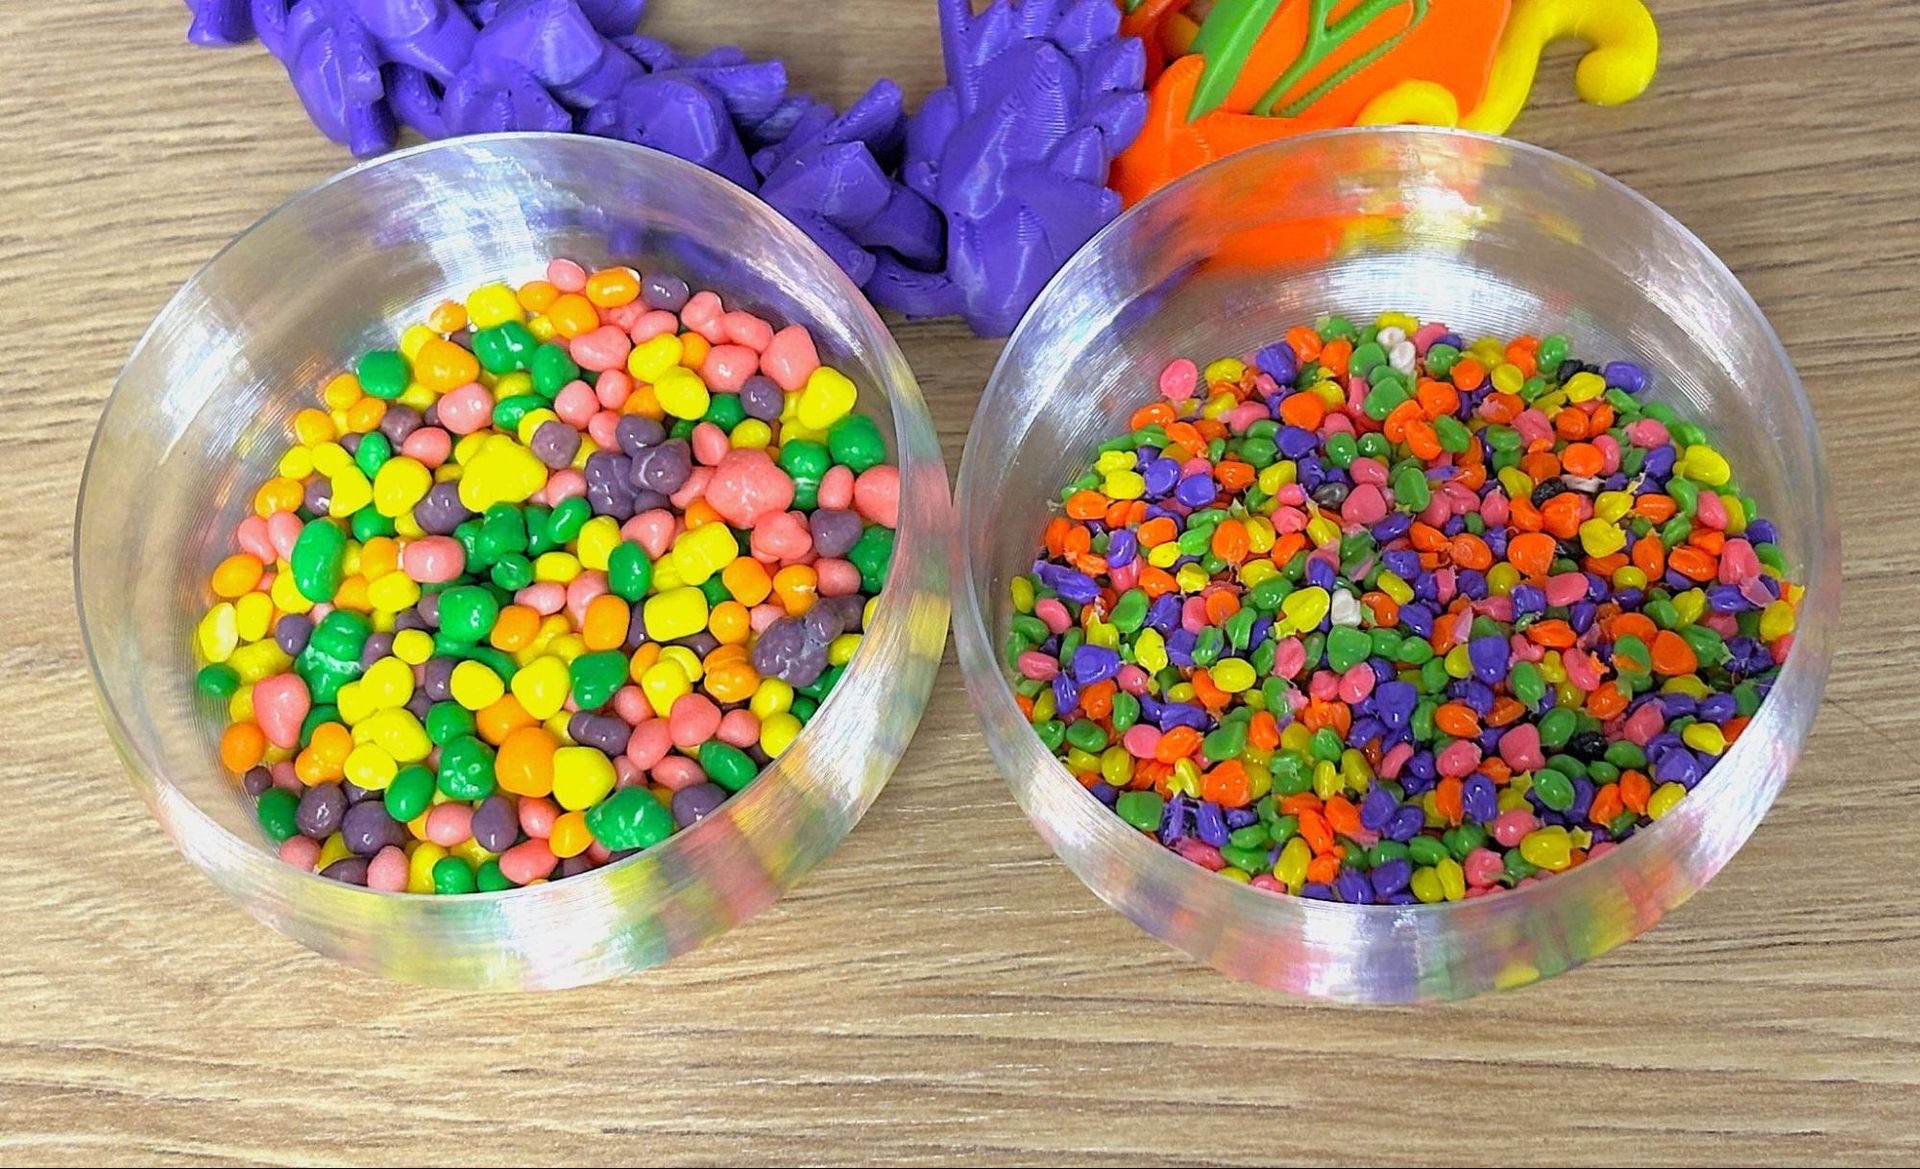
I printed this 100%, 150mm tall, Cinderwing3D Butterfly Dragon that I could never get to stick to the bed with other multicolor machines. Sitting next to it is a small container with all the waste this print produced from 1646 tool changes: 18 grams. When you look really close, they look like Nerds candy.

This printed in 25 hours, 41 minutes, using a .2 mm layer height, 3 walls and 10% gyroid infill. It took a little longer to print because I slowed it down to 100mm/s across the board due to the precarious wing situation. The filament is Prusament PLA in Orange, Yellow, Simply Green and Galaxy Black; Inland Purple, and Bambu Lab Basic Pink.
Prusa CORE One+ INDX
Cinderwing3D Butterfly Dragon and 18 grams of Nerds candy.Tom's Hardware
Prusa CORE One+ INDX
Cinderwing3D Butterfly Dragon and 18 grams of Nerds candy.Tom's Hardware

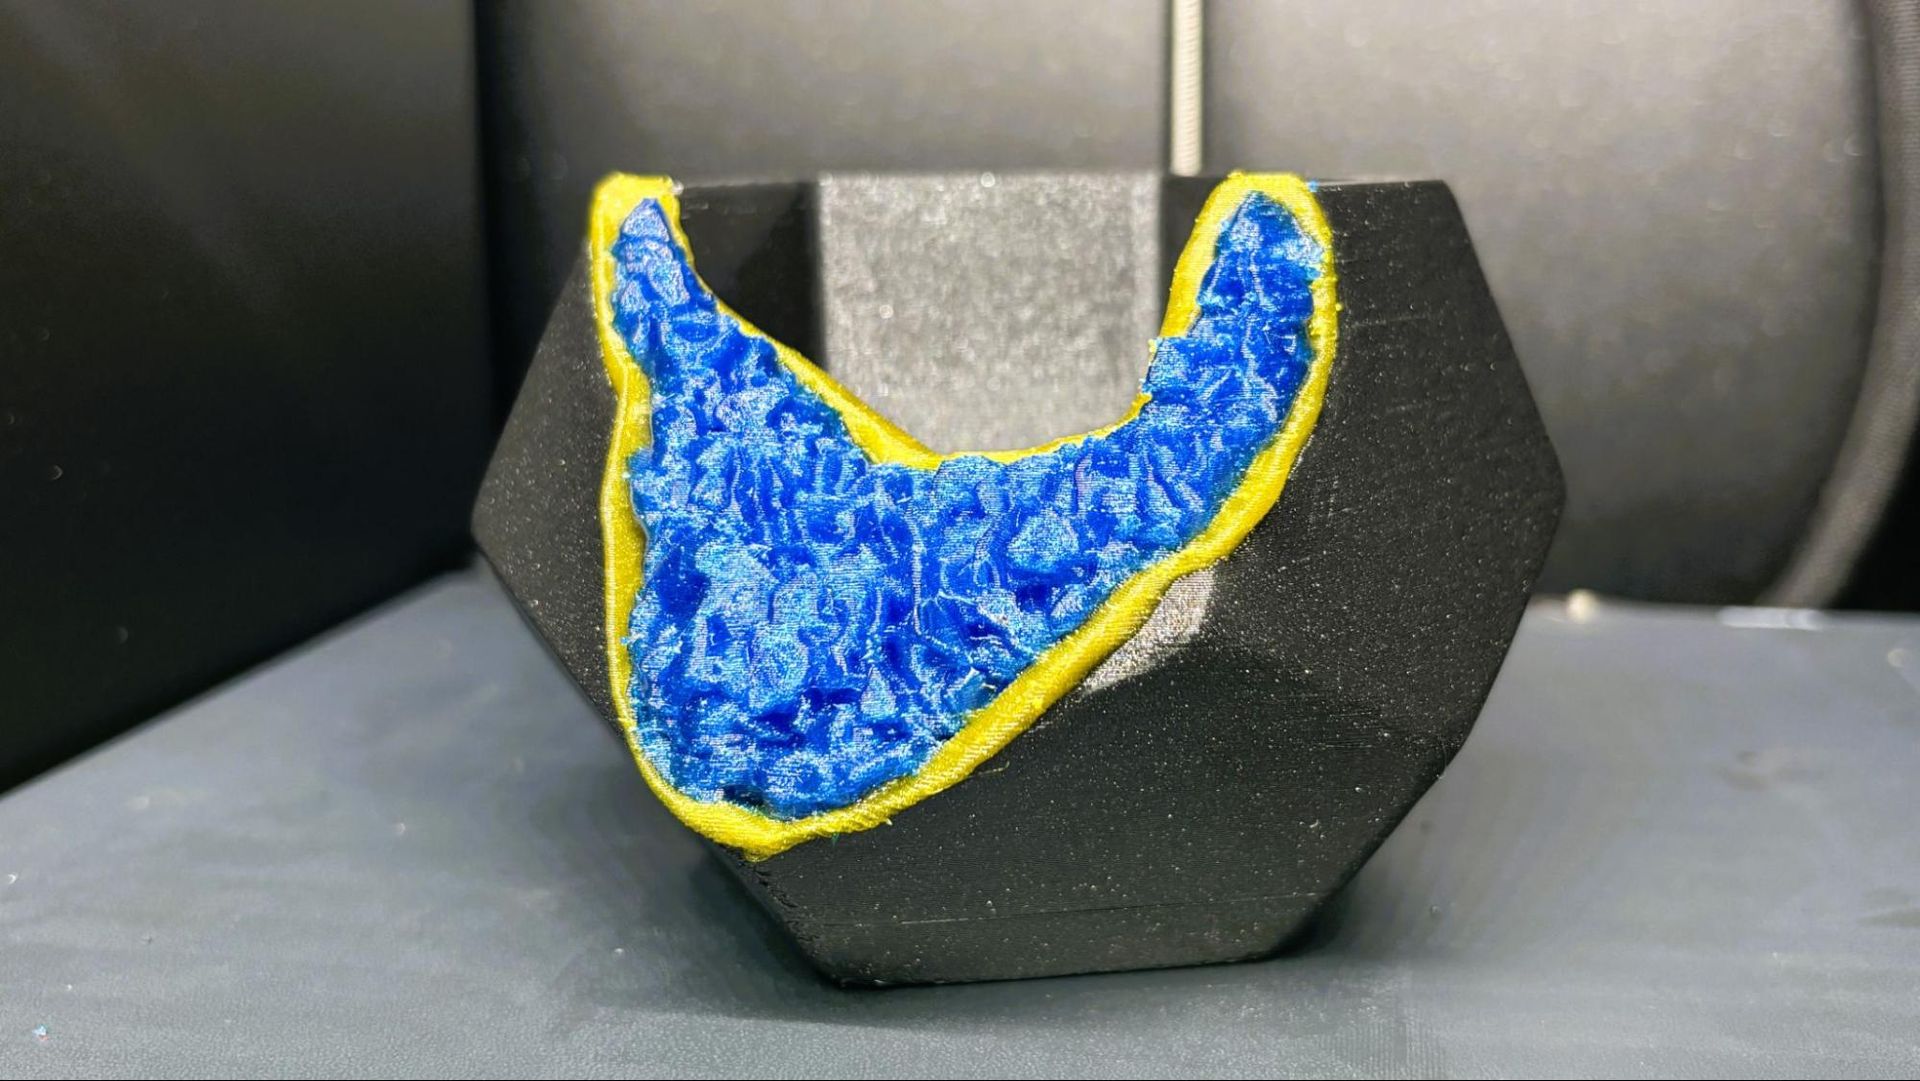
For PETG, I printed a planter I designed. I’ve been trying to learn Nomad Sculpt, but I still need to rough things out in Tinkercad. For that reason, please excuse the rough layer line near the bottom, which is entirely a design flaw and not the printer’s fault. PETG doesn't color swap quite as cleanly as PLA, and I had to pick a few stray flecks off the print. Otherwise, it’s pretty darn good. This is printed in Prusament Galaxy Black and Yellow Gold PETG, with Deepwater Blue from Greengate. This print took 6 hours and 14 minutes to print using default settings and a .2mm layer height. There was 6.84 grams of filament wasted with 537 tool changes.
Prusa CORE One+ INDX

(Image credit: Tom's Hardware)

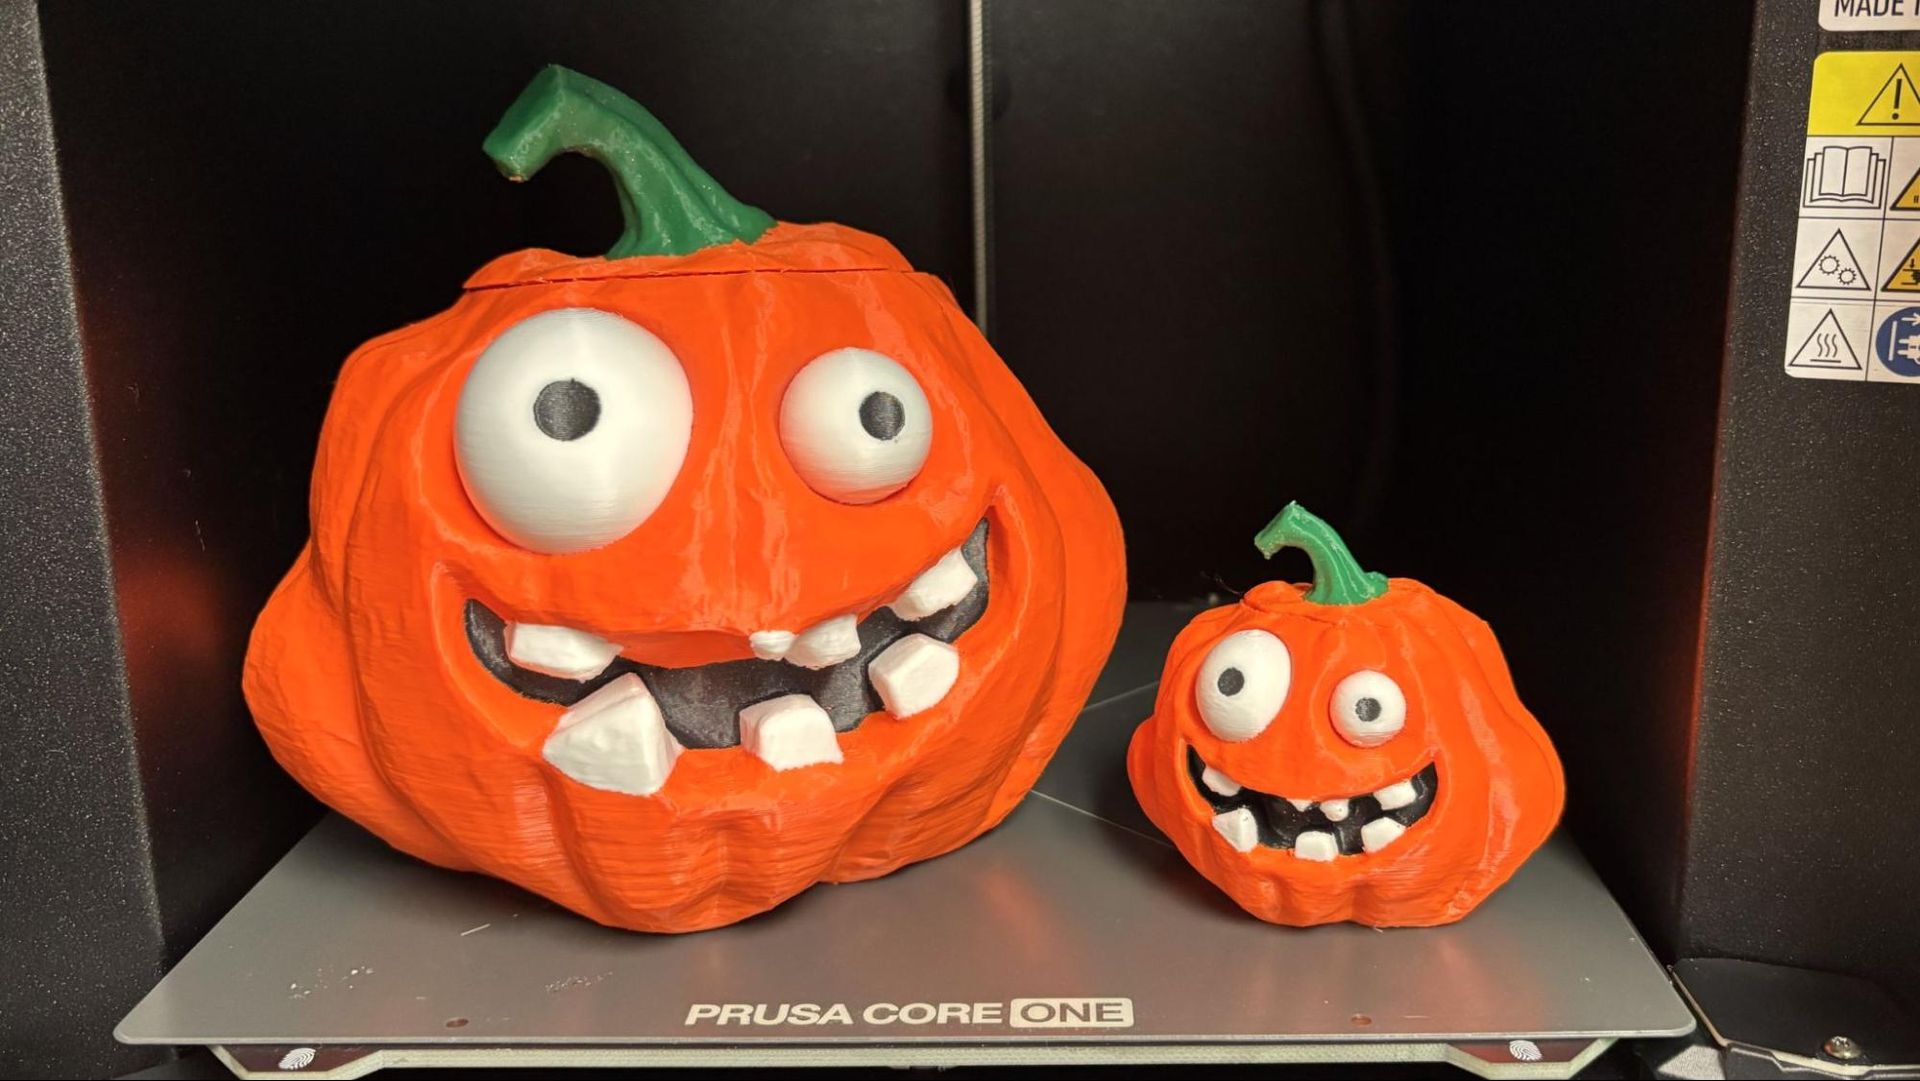
For high-temperature testing, I made these pumpkin containers, again with a mash-up of Tinkercad and my fledgling Nomad Sculpt skills. You really don’t want to see the insides of these things. But they printed really well in Prusament ASA Orange and Galaxy Black, with Ambrosia Armored Turtle Green ASA. I couldn’t find any white ASA, so I found a random spool of white ABS to fill in. The printer had no problem mixing the two materials as they are quite similar. I don’t think this photo does the orange justice; it’s possible it’s a bit fluorescent. Most importantly, there was no odor while these ran, as the printer remained closed and filtered. The large pumpkin took 13 hours and 45 minutes to print using a default .2mm layer height. It had 9.4 grams of waste over 632 tool changes.
Prusa CORE One+ INDX

(Image credit: Tom's Hardware)

A note on TPU: The Prusa INDX does not have an official profile for flexible materials as yet, but it is listed as being TPU-capable. I wrote up my own profile, copied from a standard CORE One+, and had mixed luck. It had difficulty with oozing and would occasionally jam up when trying to print with more than one color. This needs further work and experimentation.

Bottom Line
Prusa CORE One+ INDX

(Image credit: Tom's Hardware)

The Prusa CORE One+ INDX is the machine Prusa Research needs right now to compete in the modern marketplace. Is it a bit of a splurge? Yes, but the company’s reputation for reliability, right to repair, data security, and continued support through the years makes it a safe splurge.

Starting at $749 for a four-tool conversion kit and going to $2,119 for a fully assembled machine with the works, the CORE One+ INDX offers flexible price points for Prusa fans. Once assembled, the 3D printer itself is easy enough for families and school kids to use, but capable enough for small businesses and workshops. Plus, the ability to take the machine completely offline means it's a secure work partner for those who are mindful of data security or simply have unreliable internet service.

If you're a tinkerer and already have a CORE One or heck, even a MK4S, there is an upgrade path that could be a fun project that will net you the latest printer at half the cost.

If a Prusa machine seems just a bit too spendy for your budget, the $849 Snapmaker U1 is an awesome four-color toolchanger with an evolving ecosystem and a thriving community of users. The Bambu Lab H2C nozzle swapper is a touch more expensive at $2,499, but has a larger 330 x 320 mm build plate, even if it only does five colors.

MORE: Best Budget 3D Printers
MORE: Best Budget 3D Printers for Beginners
MORE: Best Multicolor 3D Printers

  •  

Prusa CORE One L+ review: More precise

How do you make a really good printer even better? How about a $25 upgrade kit? Recently, Prusa Research rolled out a series of upgrades to the big three: the CORE One, CORE One L, and the XL 3D printers. Since the CORE One L is the newest printer of the batch, it only needed a tweak rather than a full overhaul to earn a “+” designation. No one was surprised by this update, as Josef Prusa has a reputation for upgrading his machines rather than letting them fall by the wayside. In fact, the CORE One L is only the third major variation of Prusa-designed printers since the company was founded in 2012.

As we were wrapping up this review, Prusa Research announced the CORE One L+ is now compatible with the Prusa INDX conversion kit, which is $799 for four tools, or $1,079 for eight. We’re currently reviewing the INDX on a standard-size CORE One + (Gen 2), and spoiler alert: it’s running spectacularly.

The Prusa CORE One L never left my workshop since its introduction nearly a year ago. In over 1000 hours of hard use, it’s been quietly printing abrasives like carbon and glass fiber, and even a pinch of Prusa Ultra Glow, with no problems. It’s been a real workhorse for practical prints.

The “plus” upgrade removes a super annoying flaw that has spoiled an otherwise perfect machine: nozzle wiping failures. Before this upgrade, all Prusa machines would clean the nozzle before bed leveling by tapping the bed, leaving little dots of filament on the plate. When you’re running higher-temp filaments, oozing is a real problem and nozzle wiping fails are more frequent. The error itself isn’t a big deal, and I would often choose to ignore it as I still get excellent prints. The problem is the time I’d lose if I wasn’t watching the printer like a hawk, as the printer would shut down bed heating while it waits for you to come tend to it.

We’ve had nozzle wipers on other brands of 3D printers for years now, and it’s a relief that Prusa has finally gotten on board. With a simple addition of a silicone brush, the CORE One L+ is now one of the few printers I trust to set it and forget it.

The Prusa CORE One L+ upgrade also came with a set of GT1.5 timing belts. The tighter tooth spacing on the belts and drive gears makes an already precise system more precise, resulting in smoother surfaces.

Prusa CORE One L+

(Image credit: Tom's Hardware)

Another update is that this 3D printer is finished at the factory. When firing up the Prusa CORE One L+ for the first time, you’ll notice one thing right off the bat. A winking Josef Prusa pops up to help you set up your printer (as usual), but now there isn’t much set up to do. All the calibration has been done at the factory, and you get your first print going in about five minutes after ripping into the box. You can eat your complimentary package of Gold Bears while watching the first layer go down.

One thing that Prusa Research did not change is the 290 °C hot end limit. Most printers in this class can go 300 °C, with the Bambu H2S good to 350 °C and the Qidi XPlus 5 capable of 370 °C. Prusa offers an HT hotend upgrade that hits 400 °C and is listed at $199, but it's currently out of stock. 400 °C is hot enough for PEKK and more than enough for PPS CF. But I’d like to see the CORE One L+ do at least 300°C from the get go.

This is one of the few printers that can be operated entirely offline, making it the 3D printer of choice for businesses and government entities who need to keep data extra secure. Yet the machine itself is mostly online and open source, to make sure users can freely repair and mod their own devices.

Plus, the CORE One L+ has an optional Advanced Filtration Module with HEPA and Active Carbon filters to make sure whatever fumes your filament produces stays out of your home or office. That same vent can also be attached to an HVAC system.

For these reasons, we’re happy to put the Prusa CORE One L+ on the list of best 3D printers we’ve tested as the best Cloud Free/Open Source 3D Printer we’ve seen so far. The CORE One L+ is retailing at $1,999, the same price as before the upgrade. It’s only being offered as a fully built machine, no kits this time.

Specifications

Prusa CORE One L+

Prusa CORE One L

Prusa CORE One

Build Volume

300 x 300 x 330 mm (11.81 x 11.81 x 12.99 in)

300 x 300 x 330 mm (11.8 x 11.8 x 12.99 in)

250 x 210 x 270 mm (9.84 x 8.3 x 10.6 in)

Material

PLA/PETG/Flex/PVA,ABS/ASA/PA/PC (up to 290C degrees)

PLA/PETG/TPU/ABS/ASA /PC (up to 290 degrees)

PLA/PETG/TPU/ABS/ASA /PC (up to 300 degrees)

Extruder Type

Direct drive

Direct drive

Direct drive

Nozzle

.4mm (Brass CHT Installed, Abrasive Resistant Included)

.4mm (Highflow CHT & Hardened Steel)

.4mm (Highflow CHT)

Build Platform

Double-sided PEI flex plate

PEI spring steel flex plate

PEI spring steel flex plate

Bed Leveling

Automatic, Loadcell

Fully automatic

Automatic

Filament Runout Sensor

Yes

Yes

Yes

Connectivity

LAN, WiFi, USB Flash Drive

USB, LAN, Wi-Fi, App

USB, LAN, Wi-Fi, App

Interface

Color touch screen

3.5-inch color screen touch screen with additional knob

Color touch screen with knob

Machine Footprint

469 x 521x 635 mm (18.5 × 20.5 × 25 in)

469×521×635 mm (18.5×20.5×25 in)

415 x 444 x 555 mm (16.3 x 17.5 x 21.8 in)

Machine Weight

21.9 KG (48.21 lbs)

21.9 KG (48.28 lbs)

22.5 KG (49.6 lbs)

MSRP

Starts at $1,999

$1,999

$1,199

Release Date

August 2026

November 19, 2025

November 19, 2024

Prusa CORE One L+: Included in the Box

Prusa CORE One L+

(Image credit: Tom's Hardware)

The Prusa CORE One L+ is 99% assembled at the factory. Also included are a bag of Haribo Goldbears, a toolkit, a USB stick, country specific power cord, a PEI flex plate, a spool holder, and a full spool of Galaxy Black Prusament PLA.

Design of the Prusa CORE One L+

Prusa CORE One L+

(Image credit: Tom's Hardware)

The CORE One L+ is a tank of a machine, weighing almost 50 lbs and built with a rigid metal frame, metal side panels, a plexiglass door, and top and side windows. The side panels jut into the interior of the machine to both allow clean lines on the outside and to get rid of useless space on the interior that would need to be heated. The filament spool nests neatly inside the recessed panel.

With a build volume of 300 x 300 x 330 mm, the CORE One L+ has a lot of heat area. This is accomplished with a thick aluminum heatbed that runs on line current, switching automatically from 110V to 220V. The chamber is heated with two fans mounted under the bed to create a convection effect, blowing cold air over the bed. The toolhead is now driven by finer-toothed GT1.5 belts that run on a linear rail for the X-axis and two linear rods for the Y-axis. The bed is driven by three independent stepper motors with lead screws.

The toolhead has a planetary-geared Nextruder, which does a great job pushing plastic. A large cooling fan is on the front, and a large parts cooling blower on the back leads to a duct that wraps almost completely around the nozzle.

The CORE One L+ comes with a .4 brass CHT high flow nozzle installed, and a bonus hardened steel nozzle included. The first thing I did after a quick test print was to switch to the hardened nozzle. These nozzles are not exactly quick release, but are fairly easy to replace. The two thumb screws on the left side of the tool head release the nozzle, which then must be unscrewed from the heater block. Care must be taken since, once the nozzle is removed, the only thing holding the heater block is the wiring. I haven’t run into any issues yet, but I’m very careful with the wiring.

Prusa CORE One L+

(Image credit: Tom's Hardware)

The hotend can reach a temperature of 290 °C, and as mentioned earlier, there's an optional HT hotend that hits 400 °C if you really need the extra heat.

The door on the Prusa CORE One L+ has a switch, which can be disabled, to safely stop the printer if it is opened while running. I really love that the door can be mounted on the opposite side of the machine, in case that works better for your setup.

The top vent on the printer is opened and closed automatically as needed. There are two fans on the back of the case to help ventilate the chamber. This is quite enough to run lower-temp filaments like PLA with the door shut. There is an optional HEPA filter that mounts over the rear case fans.

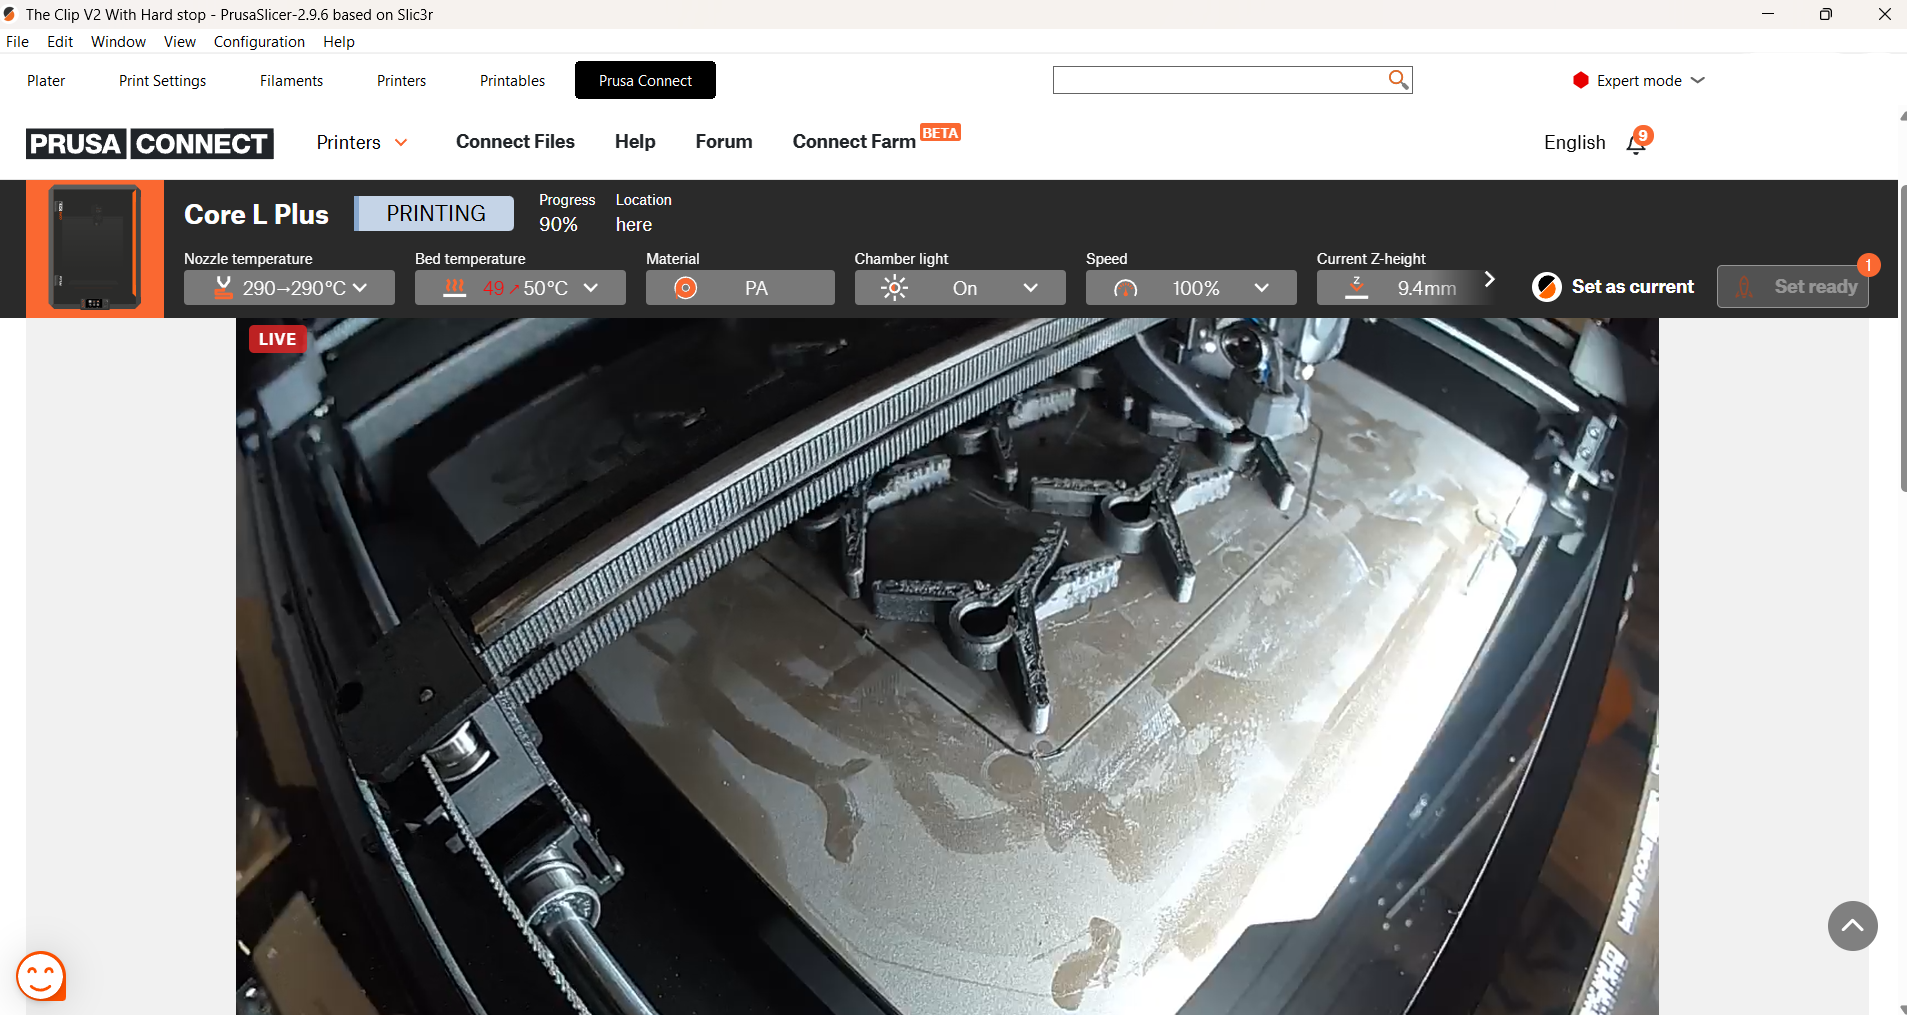
The Buddy3D camera provides excellent video for monitoring your prints from Prusa Connect and the Prusa App. The one thing it can’t do is send a timelapse video to your computer. To record a timelapse video, you must add an SD card to the camera.

Prusa CORE One L+

(Image credit: Tom's Hardware)

Assembling the Prusa CORE One L+

Prusa CORE One L+

(Image credit: Tom's Hardware)

The Prusa CORE One L+ arrives mostly assembled. After removing three screws holding down the bed, you can put the tool kit away. The screen and trim panel slot into the front of the printer and are held in place with magnets. The wiring for the buddy cam is preinstalled, and the camera mounts to the printer’s inner wall with magnets. The spool holder attaches to its base with a quarter turn. The toolhead is freed by removing the cardboard holding it in place. Within just a minute or two, you are ready to print.

Leveling the Prusa CORE One L+

Prusa CORE One L+

(Image credit: Tom's Hardware)

The Prusa CORE One L+ is calibrated at the factory. So there is no need to run through the usual 30 minutes of calibrating and leveling when powered on. The printer does check the level before each print.

Loading Filament on the Prusa CORE One L+

Prusa CORE One L+

(Image credit: Tom's Hardware)

Loading filament on the Prusa CORE One L+ is simple. Filament is pushed past the runout sensor and into the toolhead, where it is grabbed automatically by the extruder. The printer then asks what kind of filament you are loading and heats the nozzle to the appropriate temperature.

Loading TPU is the same, but there is a switch to disengage the filament runout sensor. This really helps loading noodly TPU. I tried TPU from several companies, and 95A TPU loaded just fine. For softer TPU, I couldn’t push it past the 90 degree bend in the Bowden tube at the toolhead. I needed to remove the Bowden tube and load the filament directly.

Prusa CORE One L+

(Image credit: Tom's Hardware)

Preparing Files / Software for Prusa CORE One L+

Prusa CORE One L+

(Image credit: Tom's Hardware)

Prusa printers run on PrusaSlicer, an open-source slicer based on Slice3r that serves as the foundation for most of the other slicers out there. While the Prusa CORE One L+ can be run completely offline, PrusaSlicer can directly access Printables, Prusa’s vast and curated file-sharing service, and can directly control and upload files to the printer through Prusa Connect.

Prusa CORE One L+

(Image credit: Tom's Hardware)

Initially, the buddy camera only produced still photos that were updated frequently, but after a firmware update (which was already present on the camera for this printer), the live video quality is excellent. Prusa has also developed its web-based EasyPrint slicer, which can be used for slicing files on mobile, and it offers a more comprehensive set of options than any other app or online slicer I’ve seen.

Printing on the Prusa CORE One L+

The CORE One L+ comes with a full 1 KG roll of Prusament PLA Galaxy Black. If you want more colors and materials like silks and multicolor filaments, you should check out our guide to the best filaments for 3D printing for suggestions.

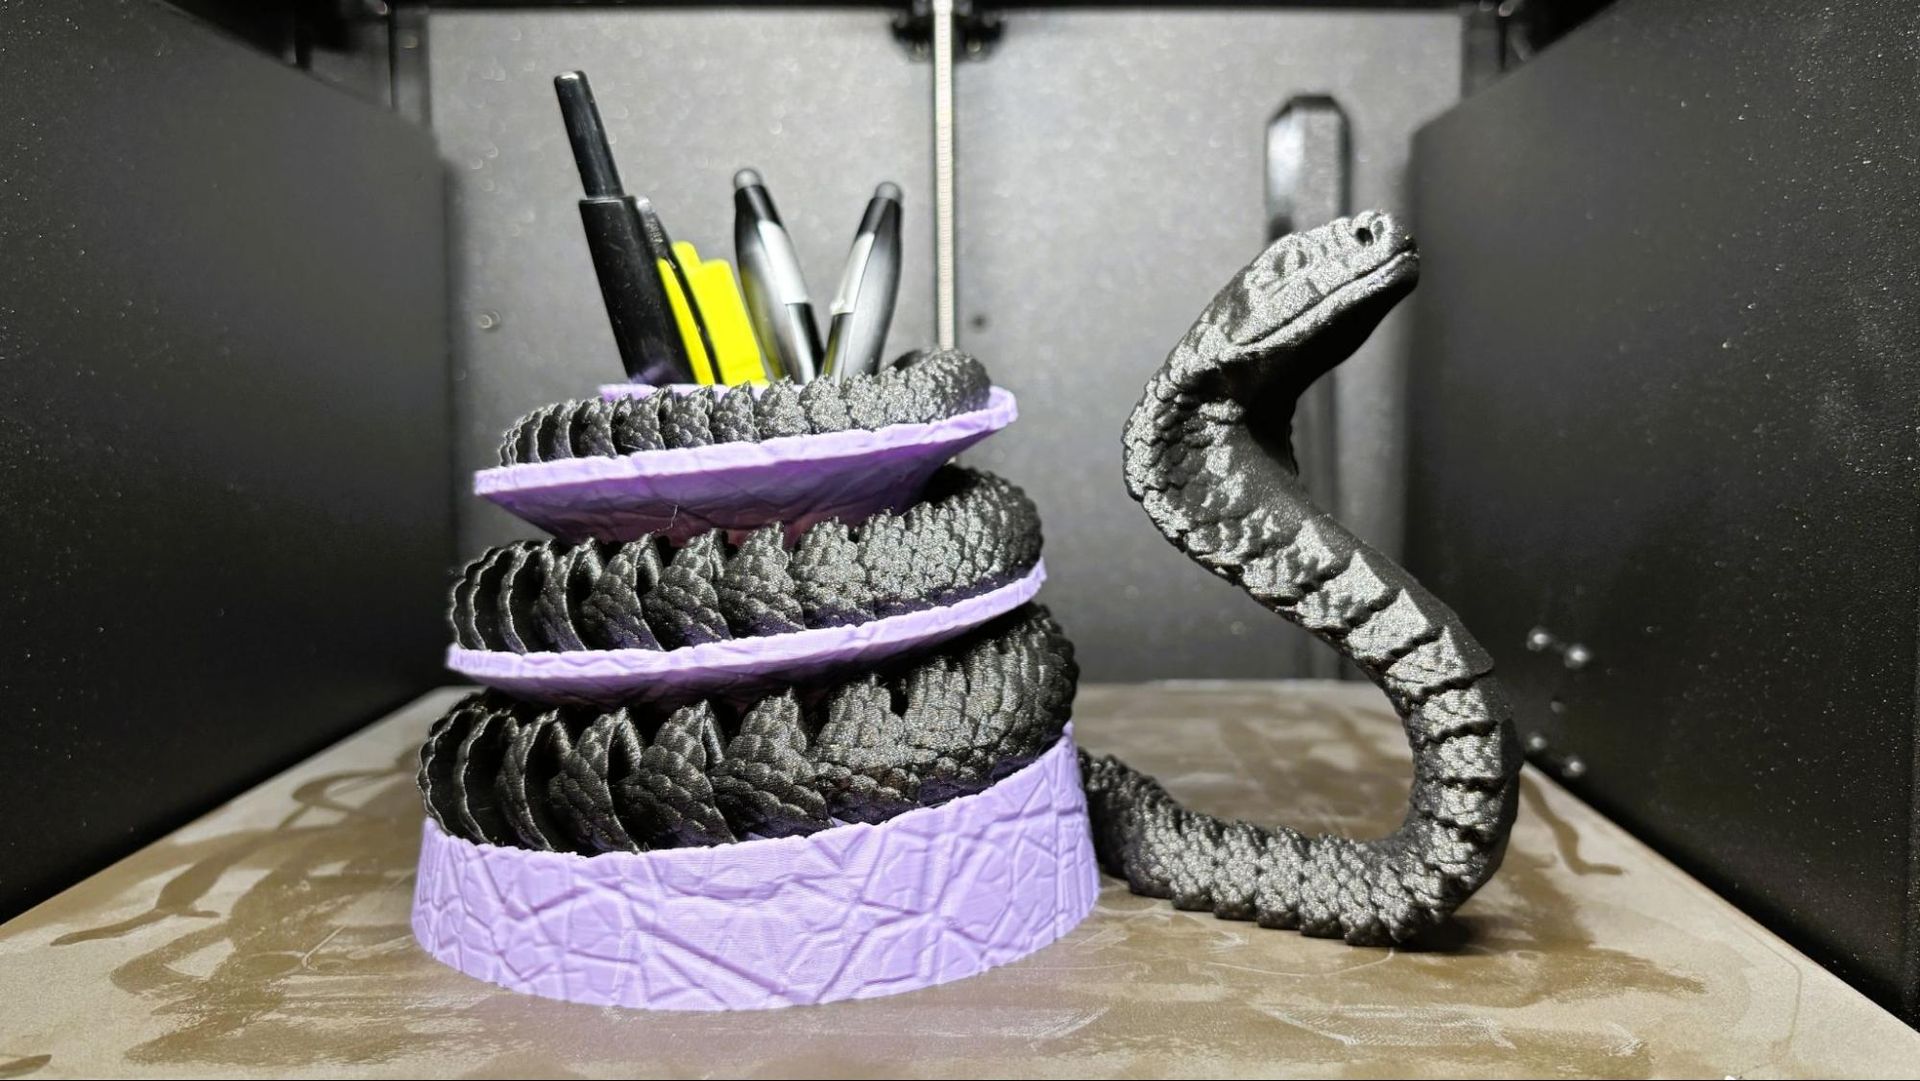
First, I printed an Articulated Cobra + Pencil Holder from McGybeer. I used the provided Galaxy Black PLA for the snake, and the pencil holder was run in Meta Taro Purple PLA from Sunlu. Both were printed with a .2 layer height with an average print speed of 100 mm/s. The pencil holder took 9 hours and 44 minutes to print, with the cobra taking 16 hours and 44 minutes. The snake is wrapped around the pencil holder when you’re not playing with it. Both look absolutely perfect.

Prusa CORE One L+

Cobra Pencil Holder by McGybeer. (Image credit: Tom's Hardware)

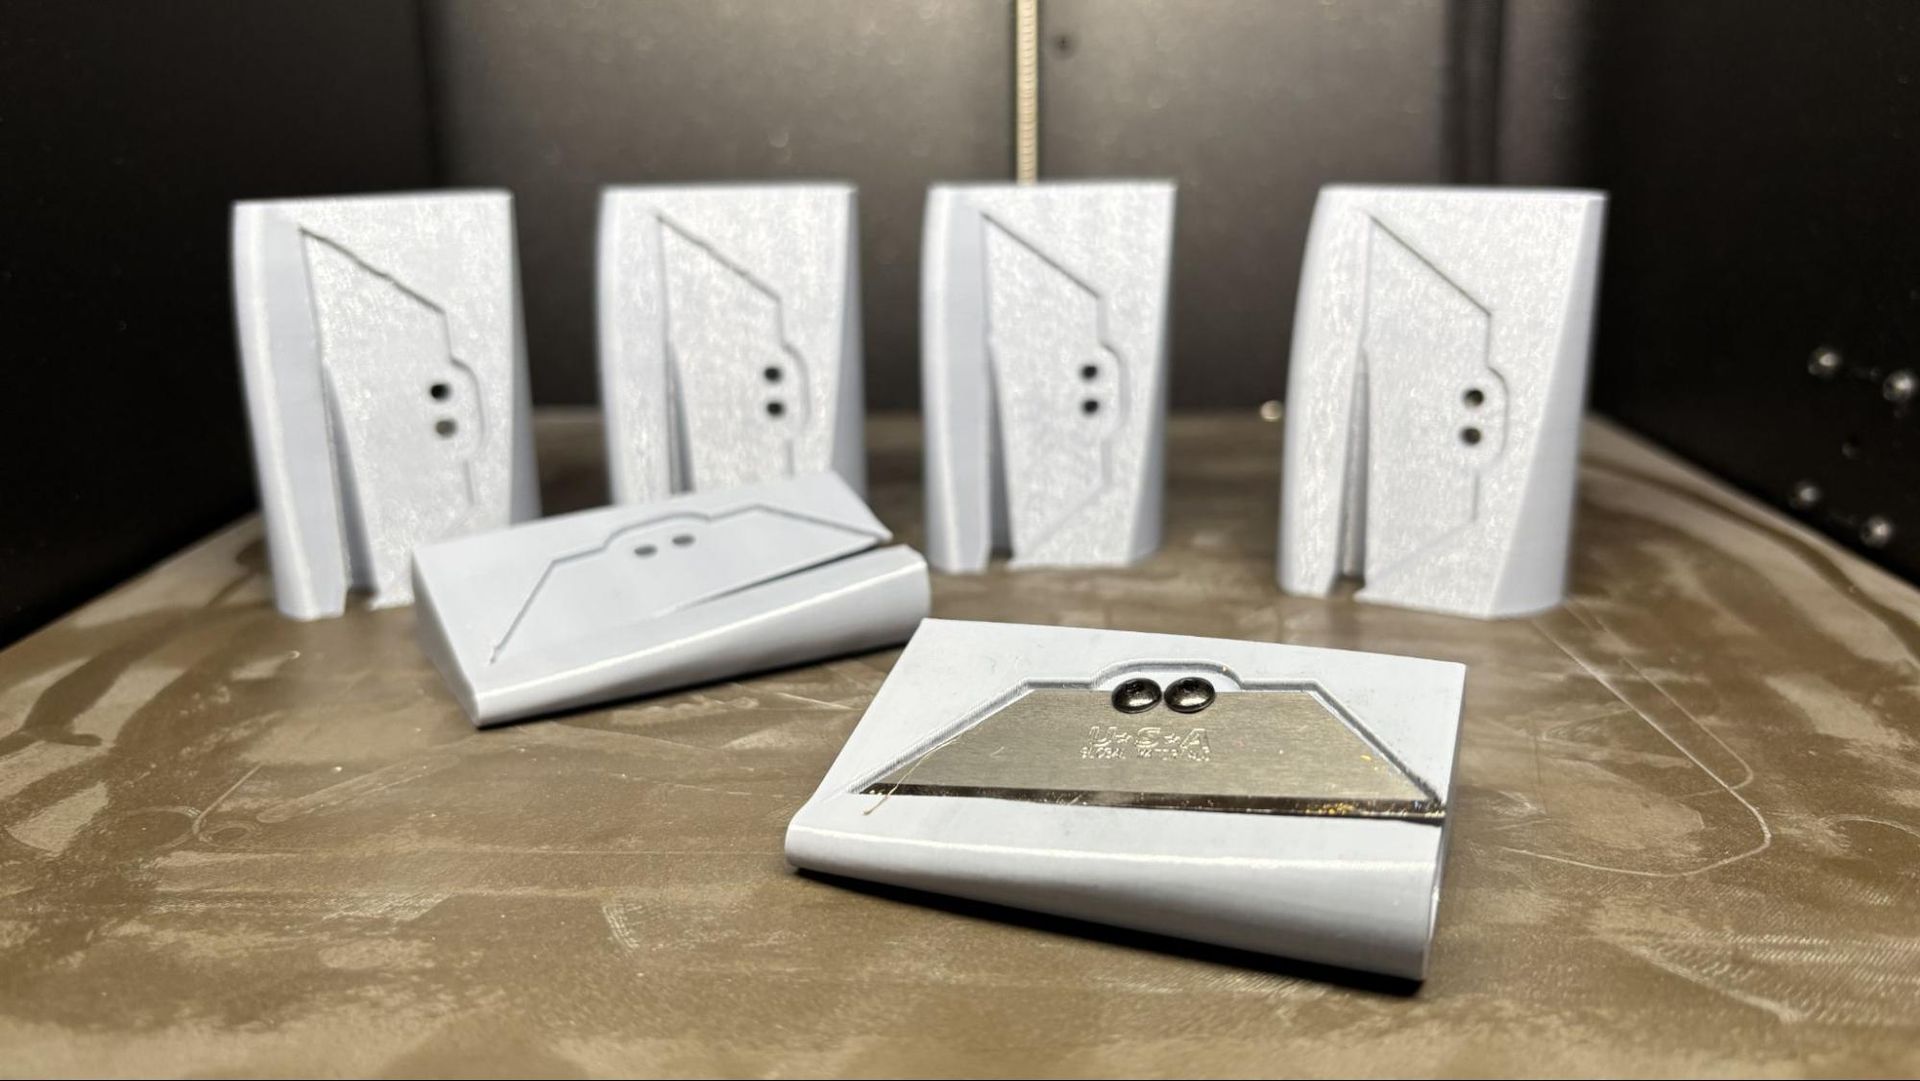
I printed a plate of carpenter pencil sharpeners from Anakel. They use a standard utility blade and work really well. Printed at a .2 layer height and an average print speed of 120 mm/s, they were completed in 3 hours and 35 minutes. They look great in grey high-speed PETG+ filament from Inland.

Prusa CORE One L+

Pencil Sharpeners by Anakel. (Image credit: Tom's Hardware)

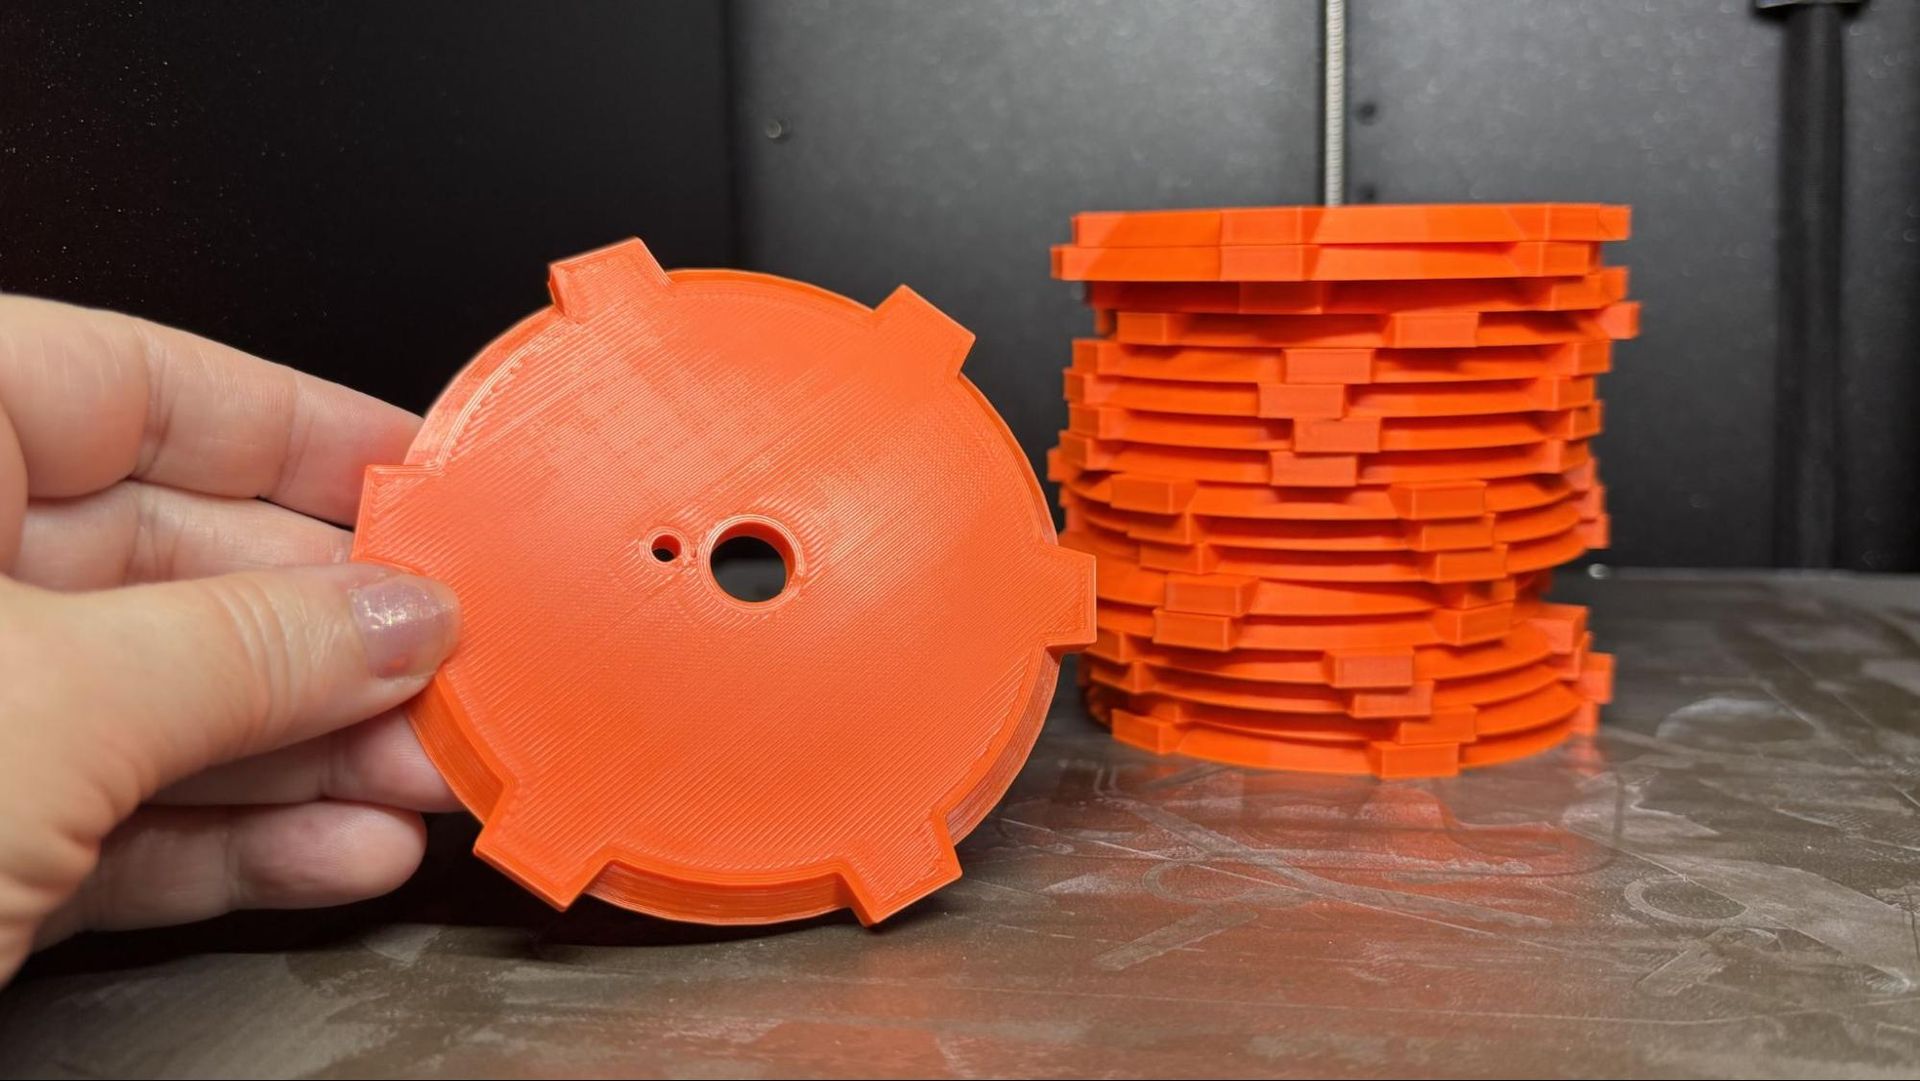
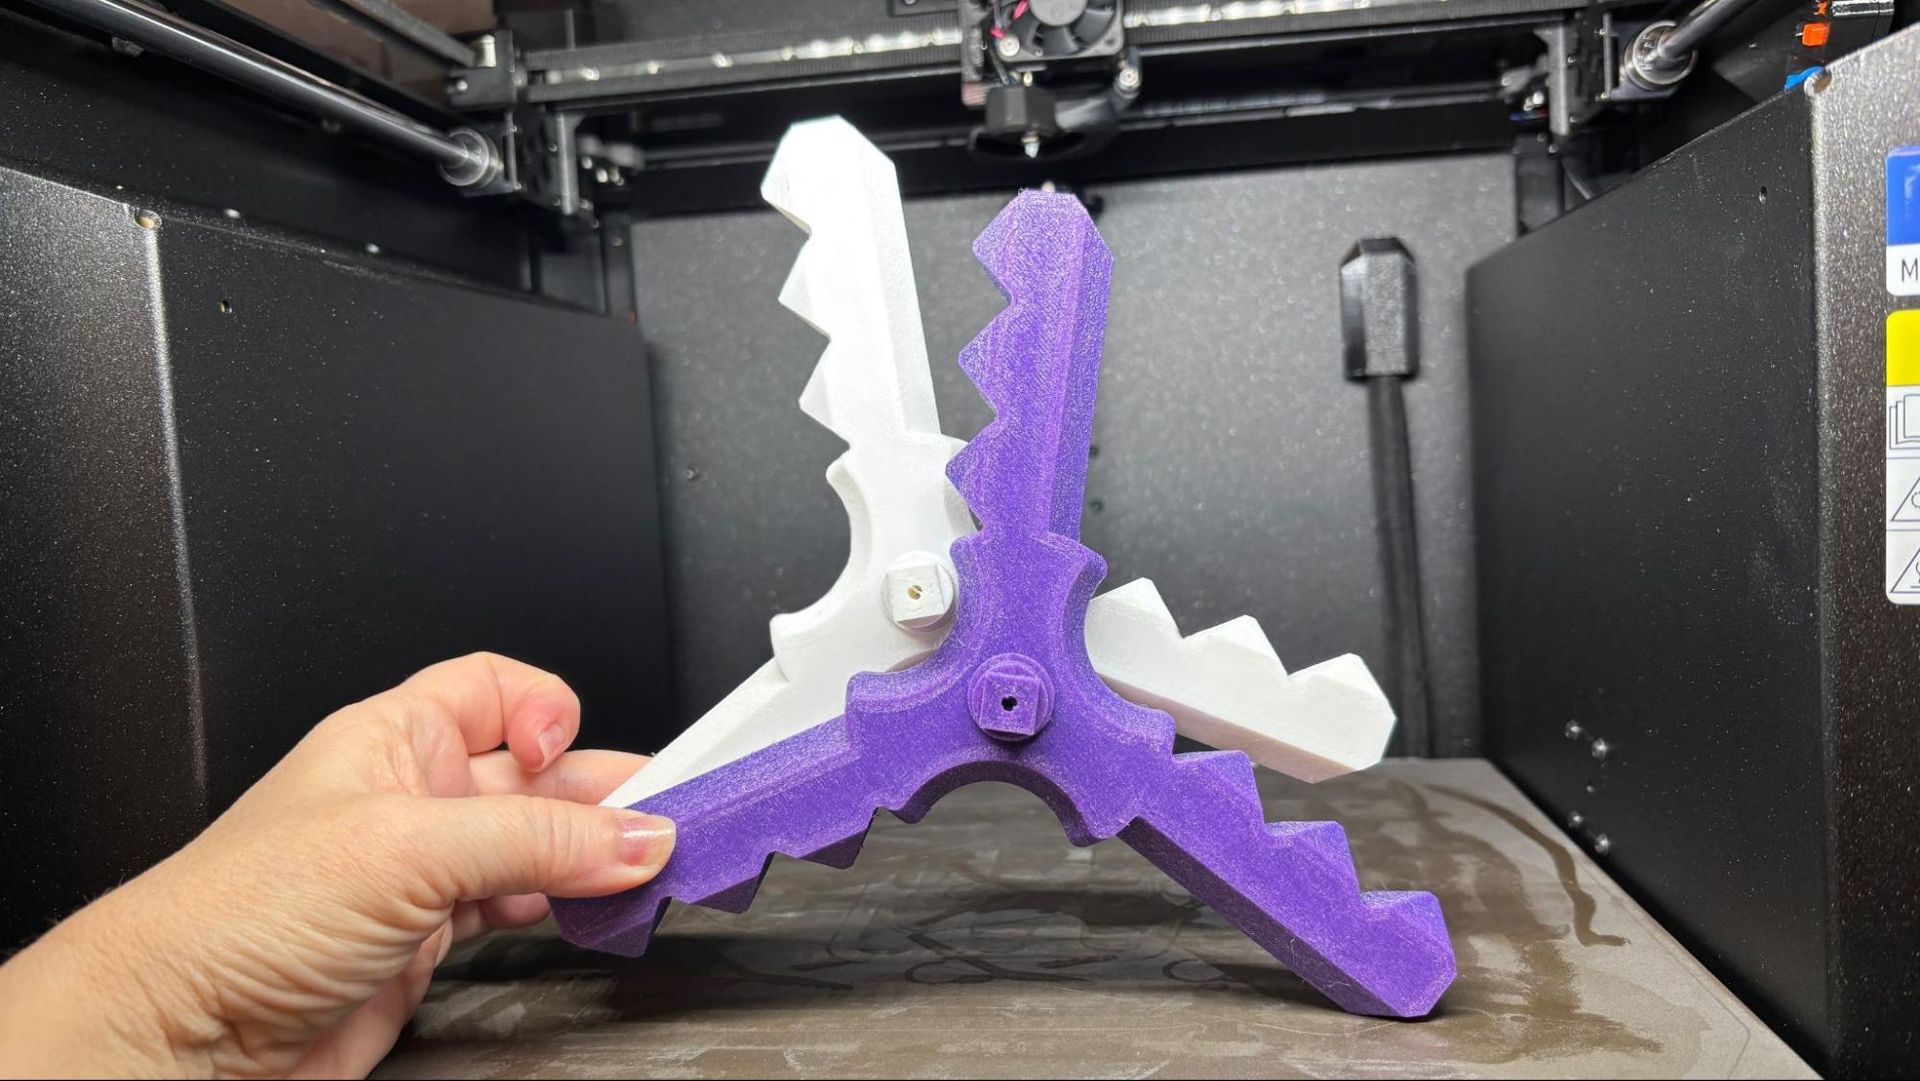
Next, I ran two plates of weapons for our battle tops, which are listed on Printables.com. Printed in Prusa Orange ASA with a .2 mm layer height and running at an average of 120 mm/s, the plates took a little over 5 hours each. They are printed solid with a bit of overextrusion to lock everything together and look really good, if I do say so myself. The bed leveling and adhesion were perfect out to the edges of the build plate.

Prusa CORE One L+

Battle Tops by Denise Bertacchi (Image credit: Tom's Hardware)

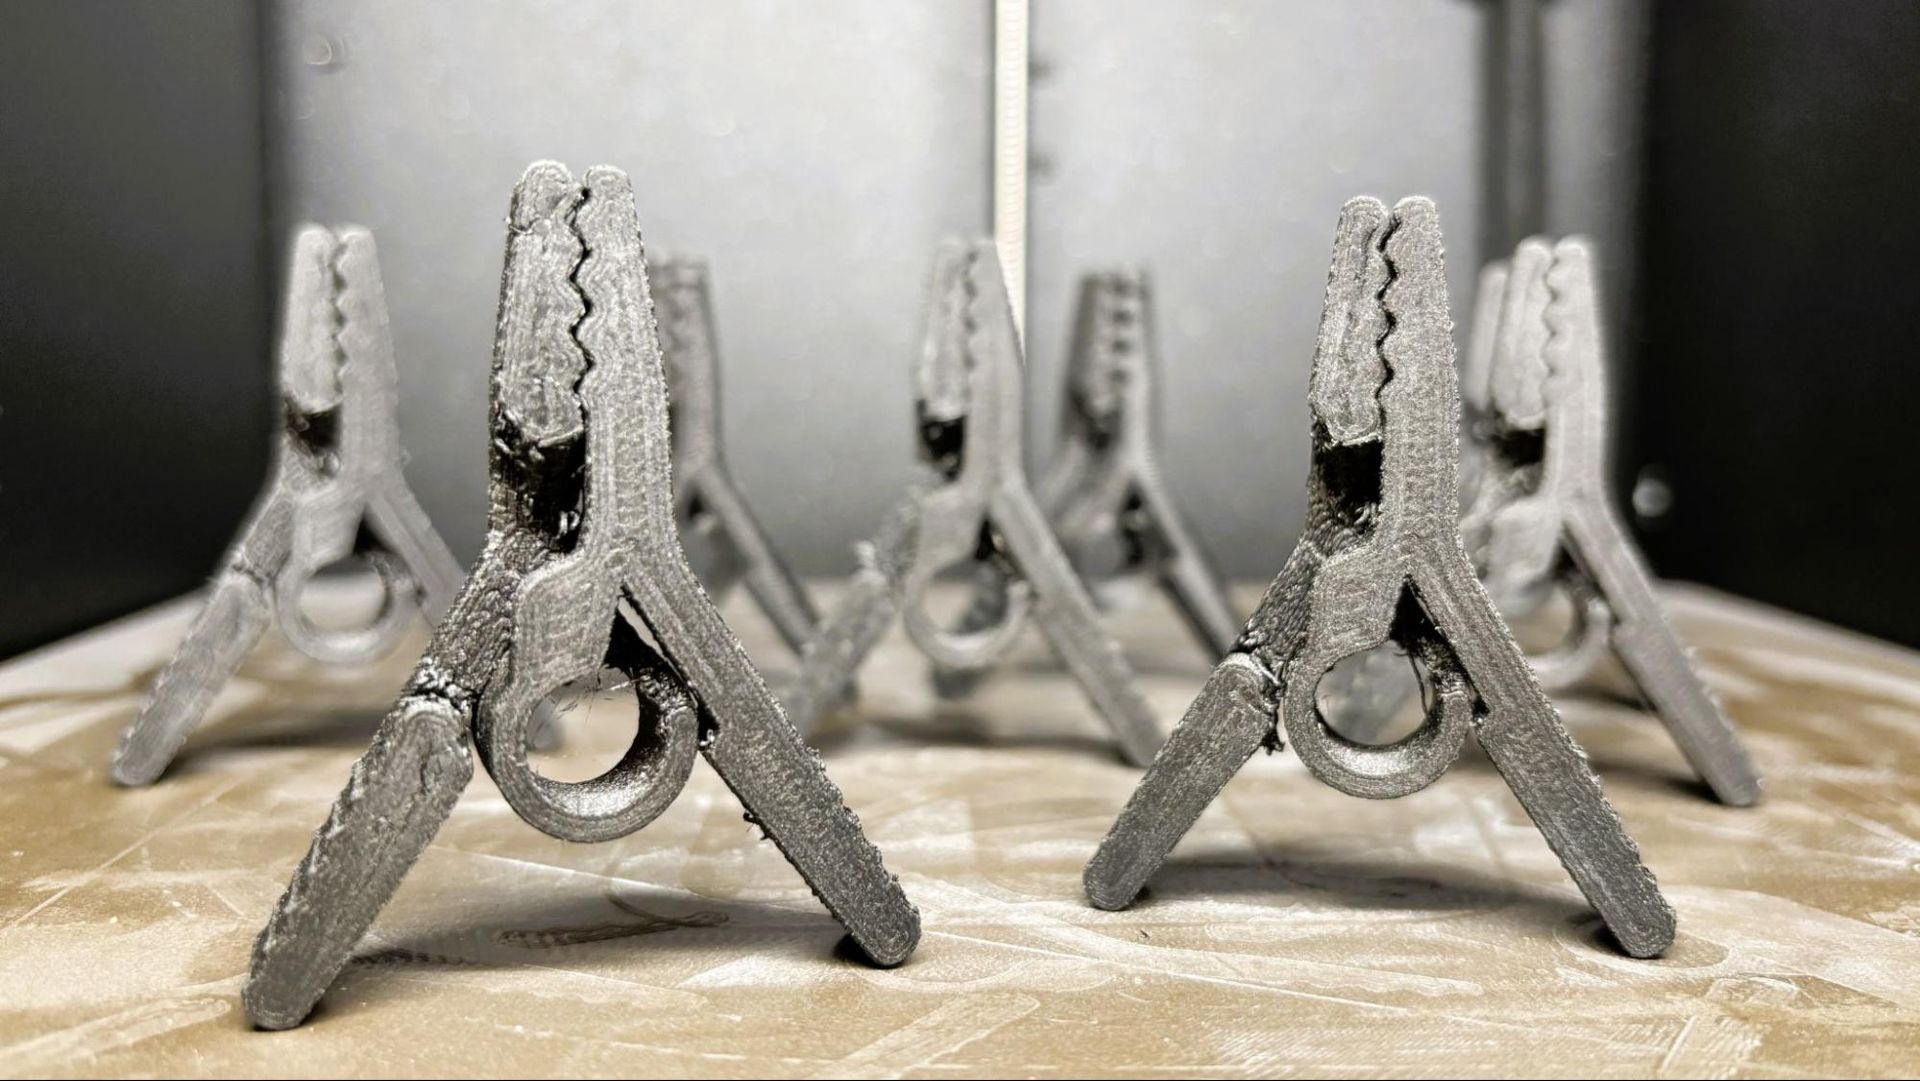
To test the Prusa CORE One L+ on a more technical filament, I printed a plate of clips from Afrie using PA6-CF20 from Polymaker. This is not the easiest filament to print, and one that I normally run at 300C, which is hotter than the CORE One L+ can go. Using a .2mm layer height and an average speed of 50 mm/s, the clips took almost four hours to print. The parts are print-in-place, and there is some roughness on the unsupported overhangs, but for PA6-CF they still look fantastic. After a few hours of annealing, they are in use all over my house at this point.

Prusa CORE One L+

Clips by Afrie. (Image credit: Tom's Hardware)

TPU is easier to print on the CORE One L+ than on many printers on the market today. I printed weapons for our DeathRacer combat robots using Cookiecad Witches Blue 95A TPU and white Polymaker Polyflex TPU 90A. With a .2mm layer height and an average print speed of 35 mm/s, these blades took a little over 6 hours each and look great with just a tiny amount of stringing.

Prusa CORE One L+

DeathRacer parts by Mr. Baddeley. (Image credit: Tom's Hardware)

Bottom Line

Prusa CORE One L+

(Image credit: Tom's Hardware)

The CORE One L+ is a fast, quiet, easy to set up printer that is a joy to use. If it could get a little hotter on the nozzle without an upgrade, it would be nearly perfect for a wider range of practical filaments.

With a retail price of $1,999, the CORE One L+ is a significant investment when compared to the more budget-friendly Core XY machines from other brands. However, the legendary 24 hour 7 days a week, English speaking customer service and rabid fan base willing to share tips and tricks are a huge perk. So is the knowledge that when you buy a Prusa today, you’ll still be running it in 10 years or more because it is infinitely repairable and moddable.

If a Prusa CORE One L seems just a bit too spendy for your budget, the smaller Prusa CORE One comes in at $999 for a kit. The slightly more budget-friendly, but equally sized Bambu Lab H2S Combo is currently on sale for $1,399, and if you need some massive CORE XY size, the Creality K2 Plus is worth checking out at $1,199.

  •  

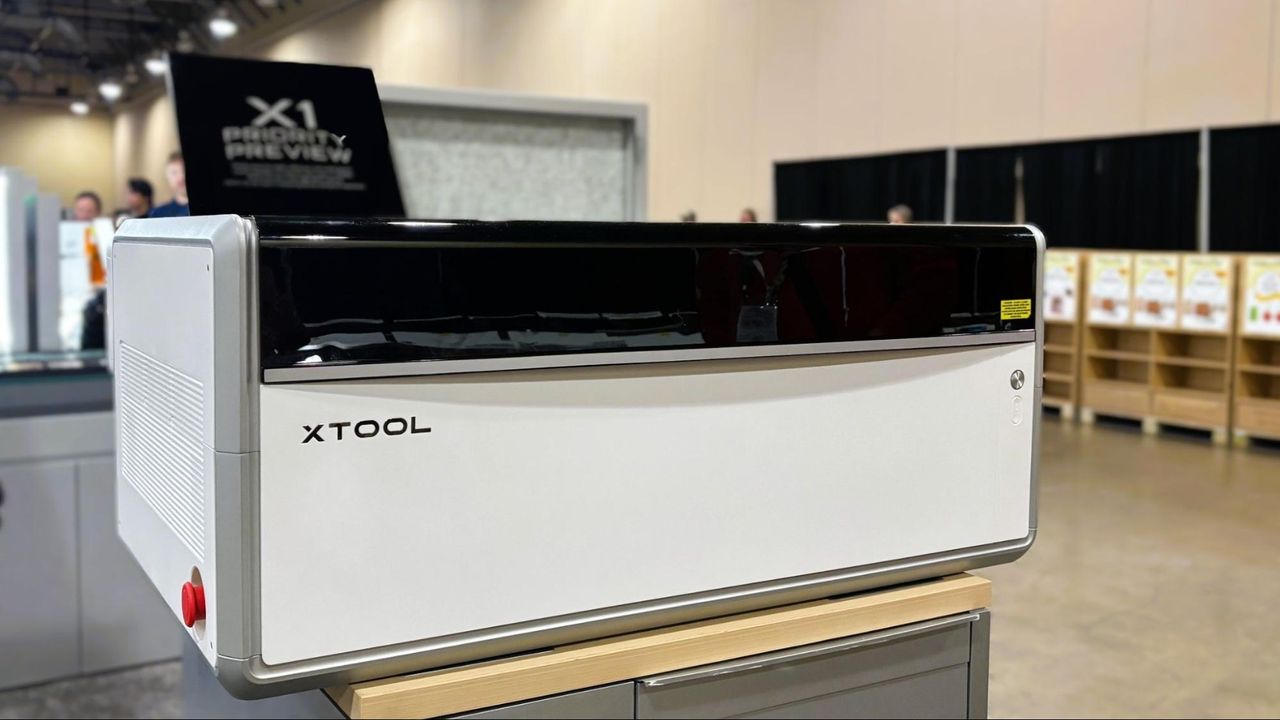
xTool reveals its next generation of lasers — modular X1 supports CO2, Diode, UV, Fiber, and MOPA lasers

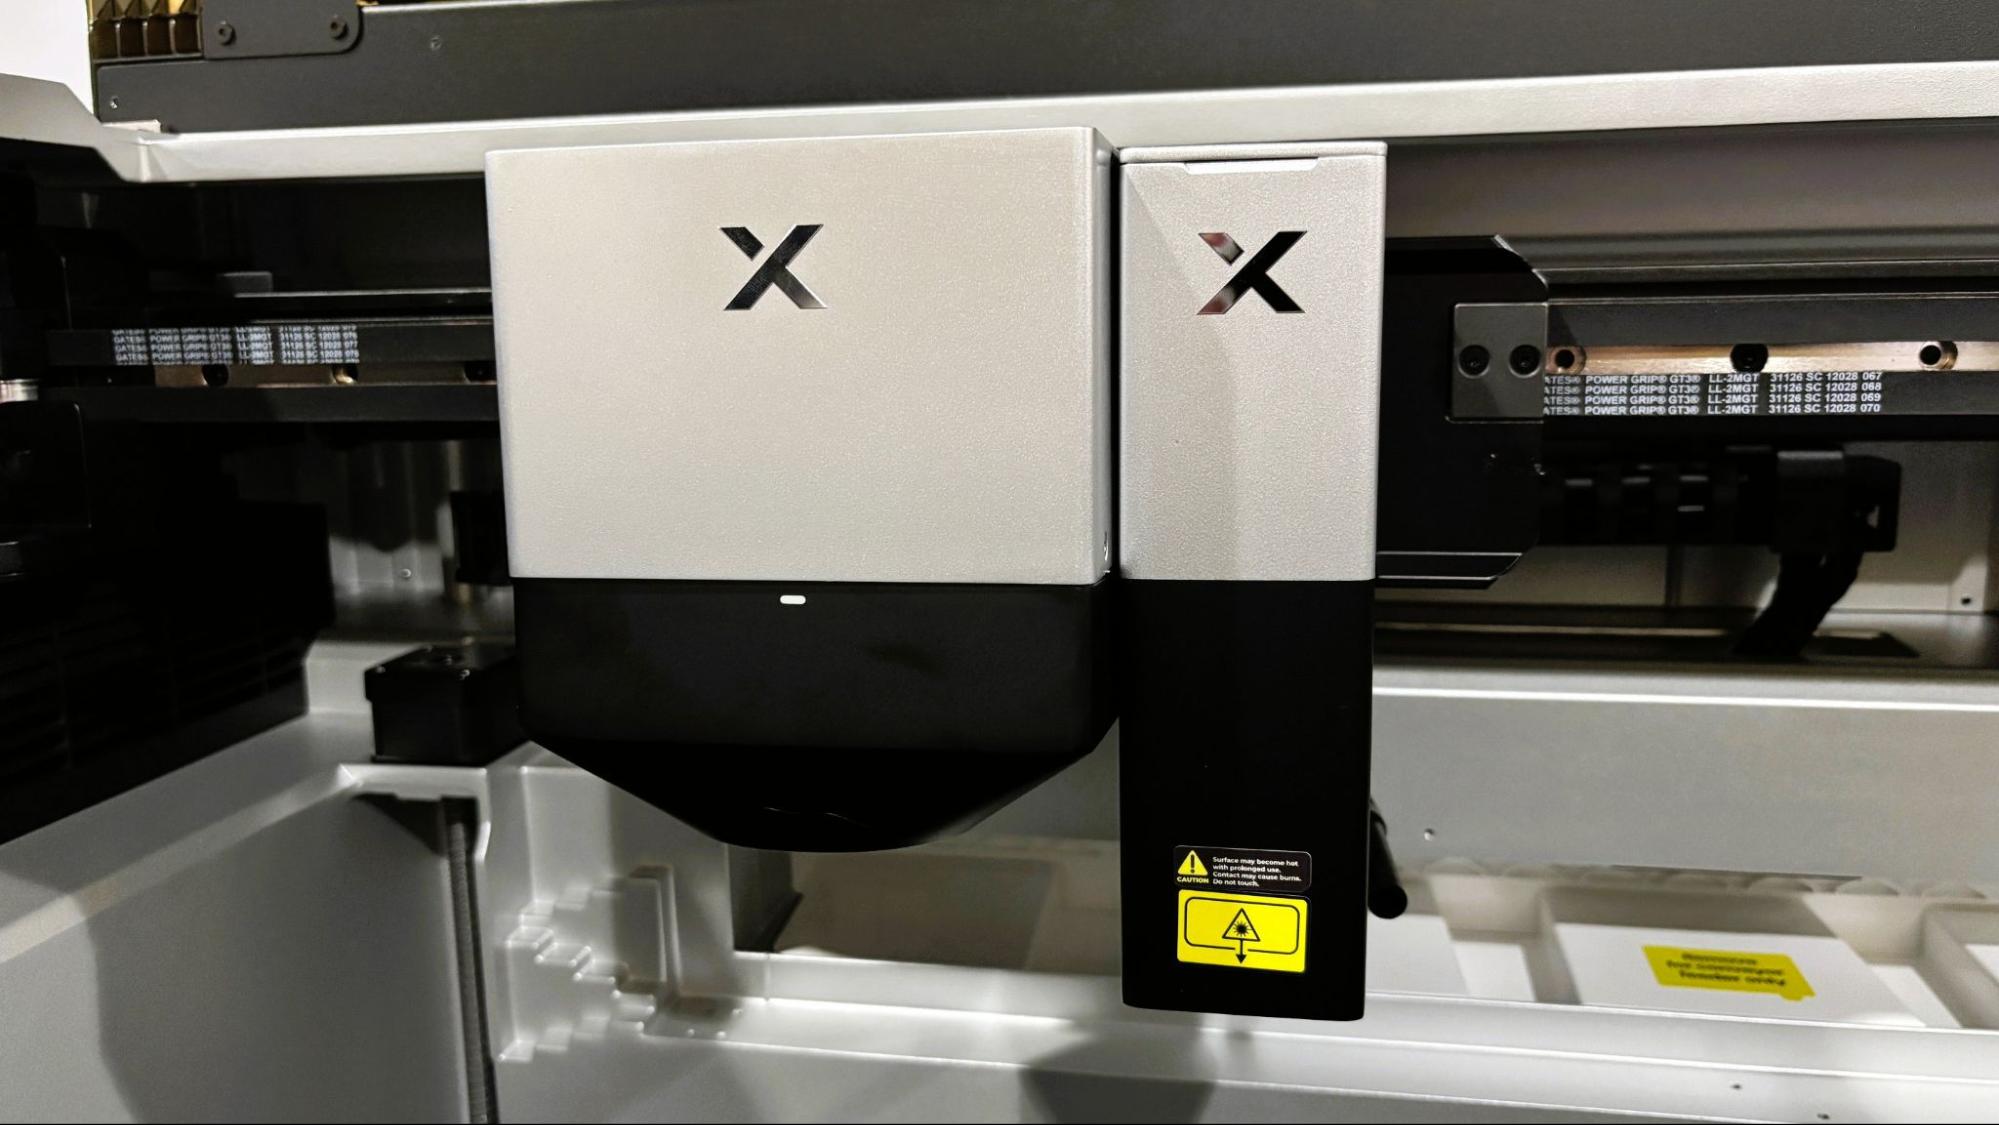
xTool says its new X1 laser will be the last one you’ll ever need. The machine is modular, allowing users to add every style of laser xTool makes to the system: CO2, Diode, UV, Fiber, and MOPA. It will also be xTool’s first flying-galvo unit, combining the large size of a gantry system with the speed of a galvo.

And if that isn’t interesting enough, it's also a dual-head system, meaning the galvo will sit side by side with a CO2 laser. The unit will be able to pick and choose which head to deploy for the job – both if needed.

xTool

(Image credit: Tom's Hardware)

The announcement was made at The Next Level Maker Conference in Grapevine, TX. The event is a combination of maker retreat and expo, with a wide variety of classes and motivational talks by experts who have turned maker hobbies into successful businesses.

Disclaimer: xTool provided travel accommodations for this trip. Coverage remains editorially independent.

Previous “all in one” machines have used swappable toolheads, but these have been limited to various powers of diode and IR lasers. The X1 will use a swappable backpack system to provide the different laser frequencies routed to the galvo toolhead. This means the galvo can be a wood-burning diode, a crystal engraving UV, or a metal etching MOPA.

The machine’s default build will be a powerful 55w CO2 laser paired with a 20w diode for the galvo head. No price was mentioned at the reveal, so we’ll have to wait until closer to the laser’s October launch date to learn more.

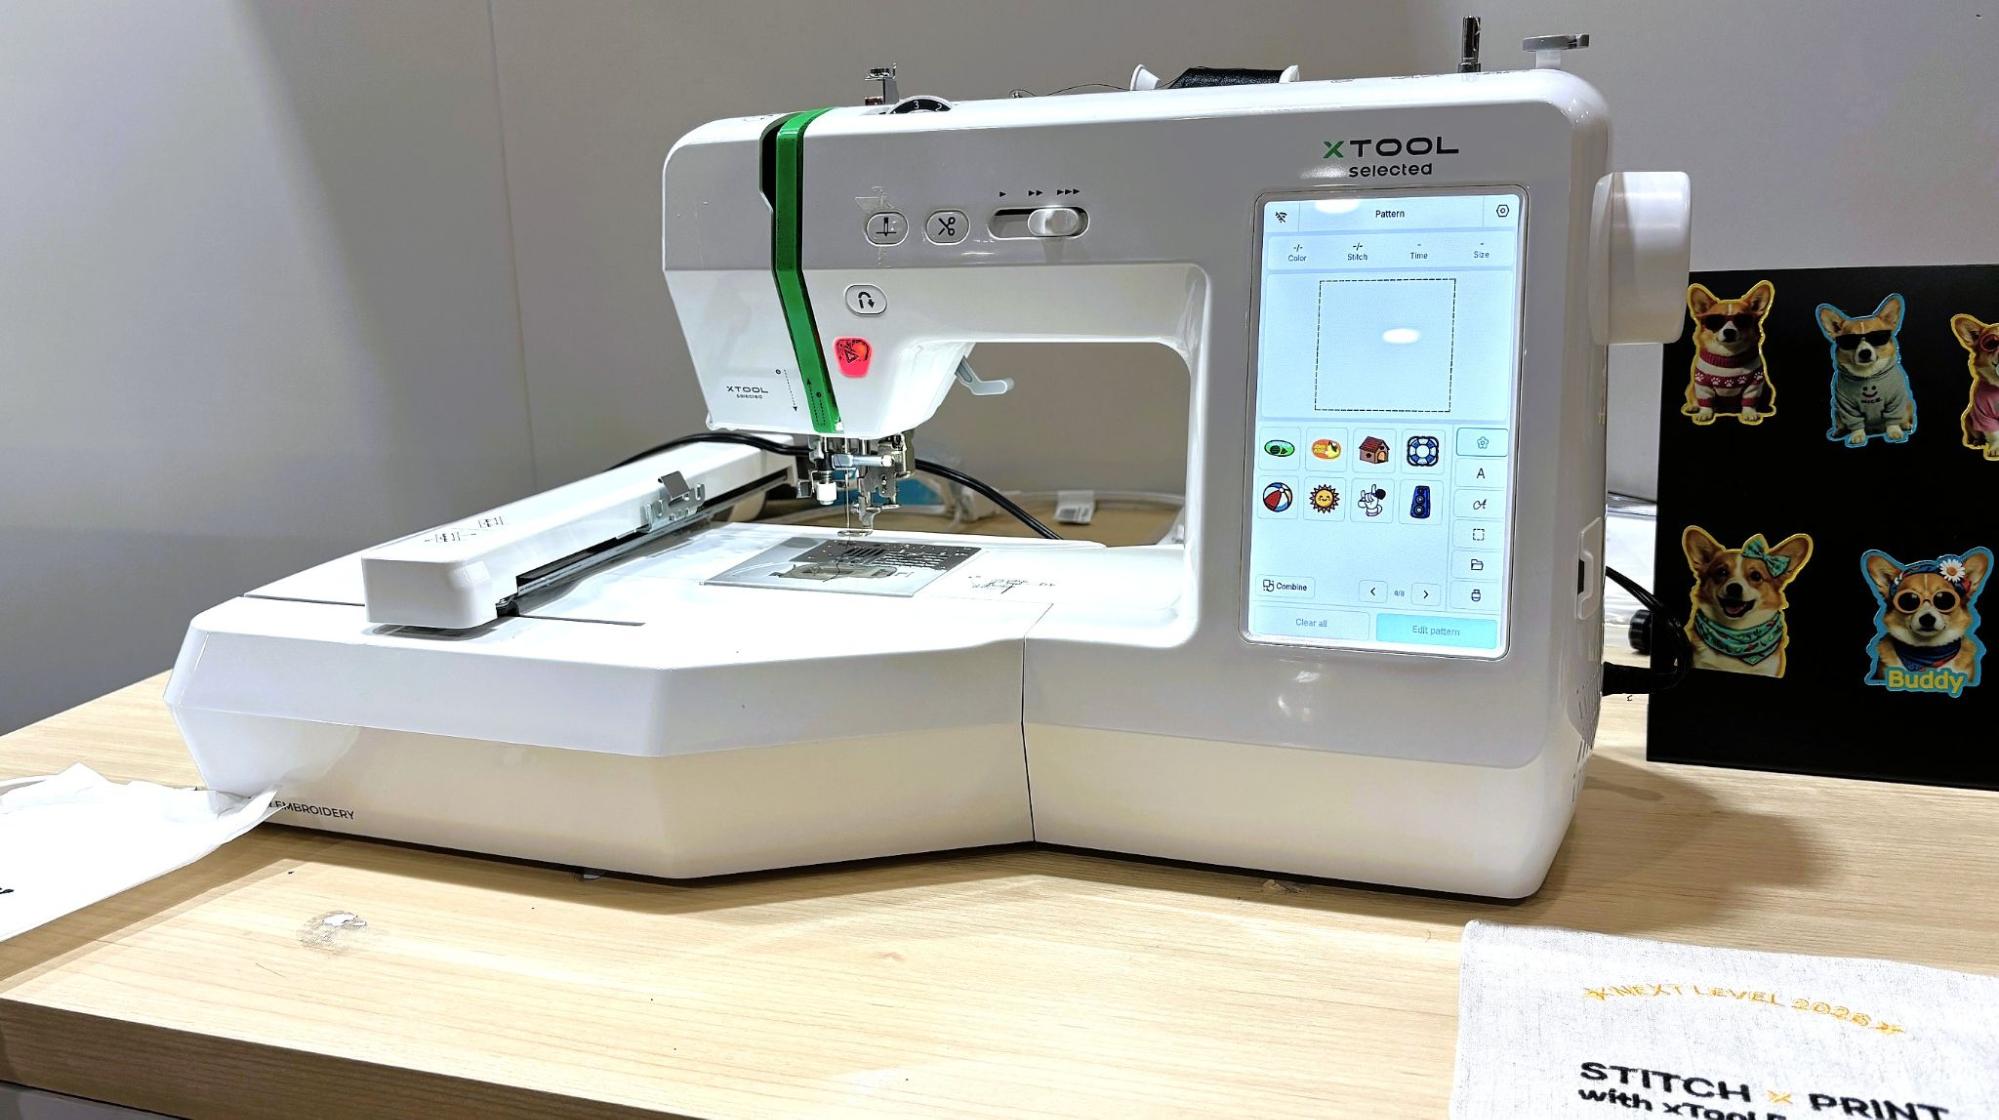
A representative from xTool said the company wanted to embrace all forms of making, and be more than “just” a laser manufacturer. To that end, they announced an upcoming embroidery machine, the SE1. The machine, capable of both normal stitching and single-color embroidery, is presented as an entry point to embroidery for those already within the xTool ecosystem. The machine can be paired with the O1 Omni to paint the threads with DTG color.

xTool

(Image credit: Tom's Hardware)

This may seem to be an overly complex way to achieve colorful stitching, until you consider that full-color embroidery is accomplished with multi-needle machines costing thousands of dollars. They are also insanely complex and require high levels of skill to manage and maintain, whereas a single-color embroidery machine can be purchased for way less and operated by a beginner.

The SE1 will also use the xTool design suite, which makes transferring designs between the sewing machine and UV printer fairly straightforward. During the demo, a piece of fabric was stitched on the SE1, removed from the hoop, then placed inside the UV printer to add color. It was finished with a heat press to set the DT ink.

xTool wasn’t the only company presenting at the show. The vendor hall was full of makers turned small business owners, something that xTool actively encourages with its products and ecosystem.

Makerflo

xTool

(Image credit: Tom's Hardware)

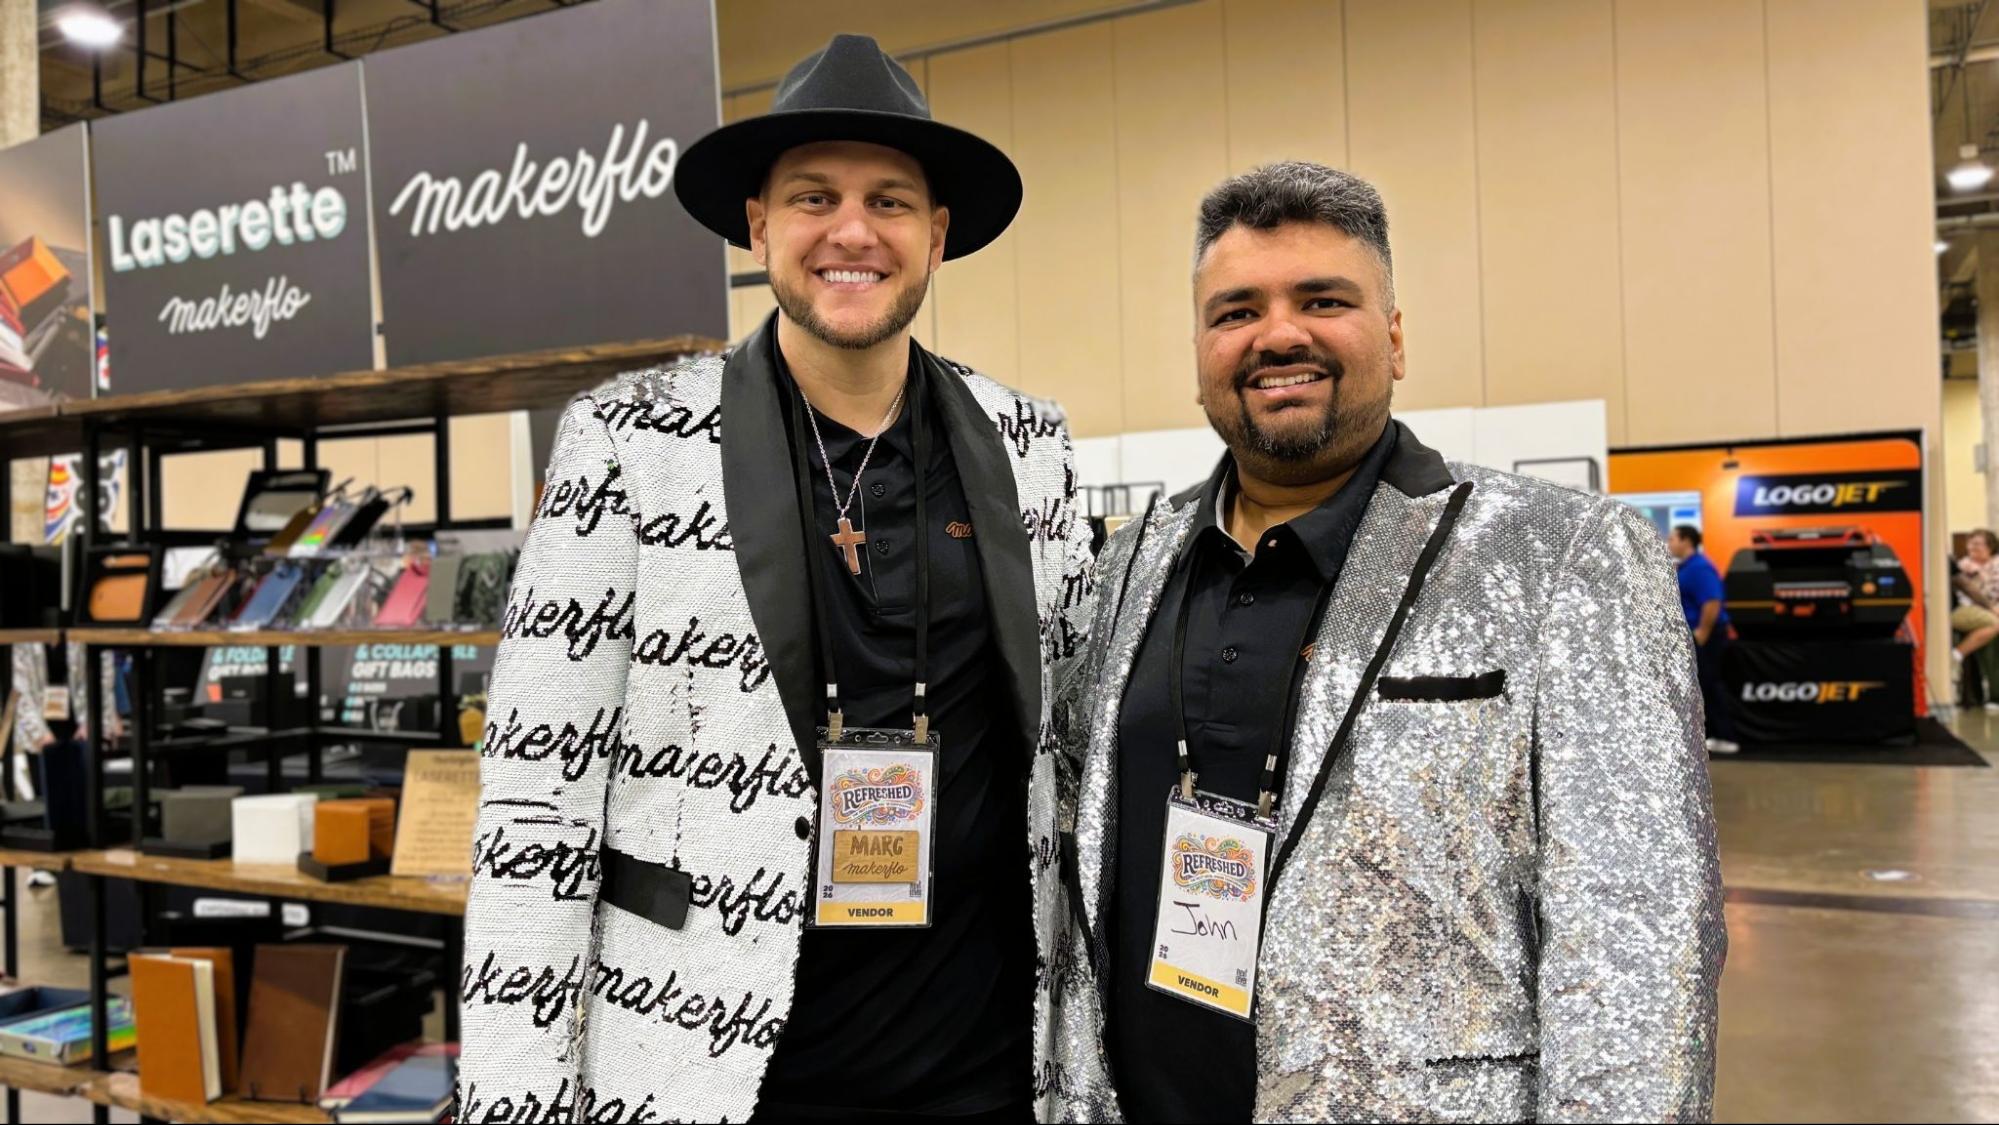
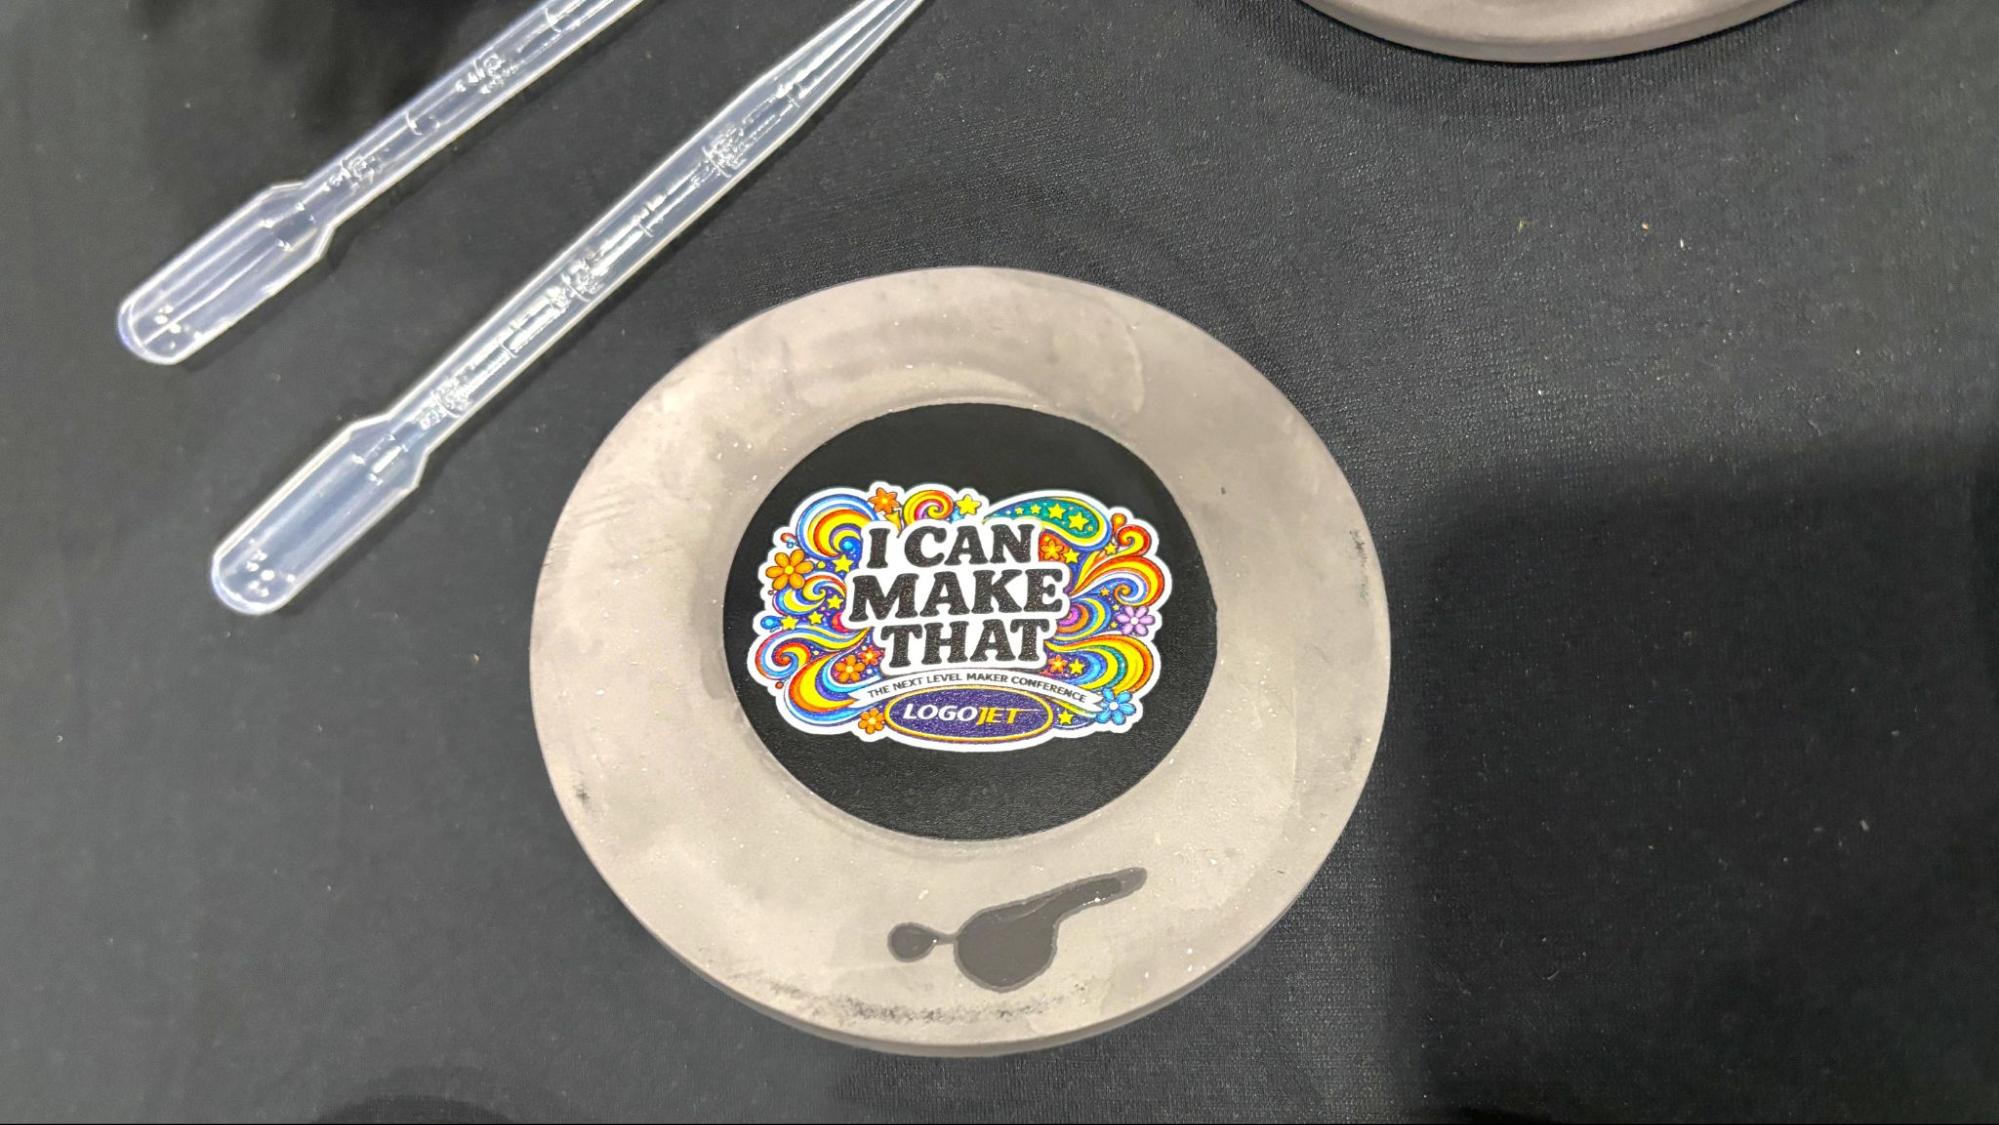
Marc Pendergraft and John Modi started selling laser-cut products right out of college, and now own Makerflo, a wholesaler that provides “the kind of materials we wish we had.” They sell premium laser-ready merchandise that comes with upscale gift packaging. Their booth also has several new items seeking feedback from shoppers. I was impressed with a coaster that consisted of absorbent stone with a laser-ready metal disc embedded in the center.

Marc and John also led several popular breakout sessions on running a successful laser business.

xTool

Diatomite stone coaster under going beta testing at Makerflo. (Image credit: Tom's Hardware)

Smokey Hill Designs

xTool

(Image credit: Tom's Hardware)

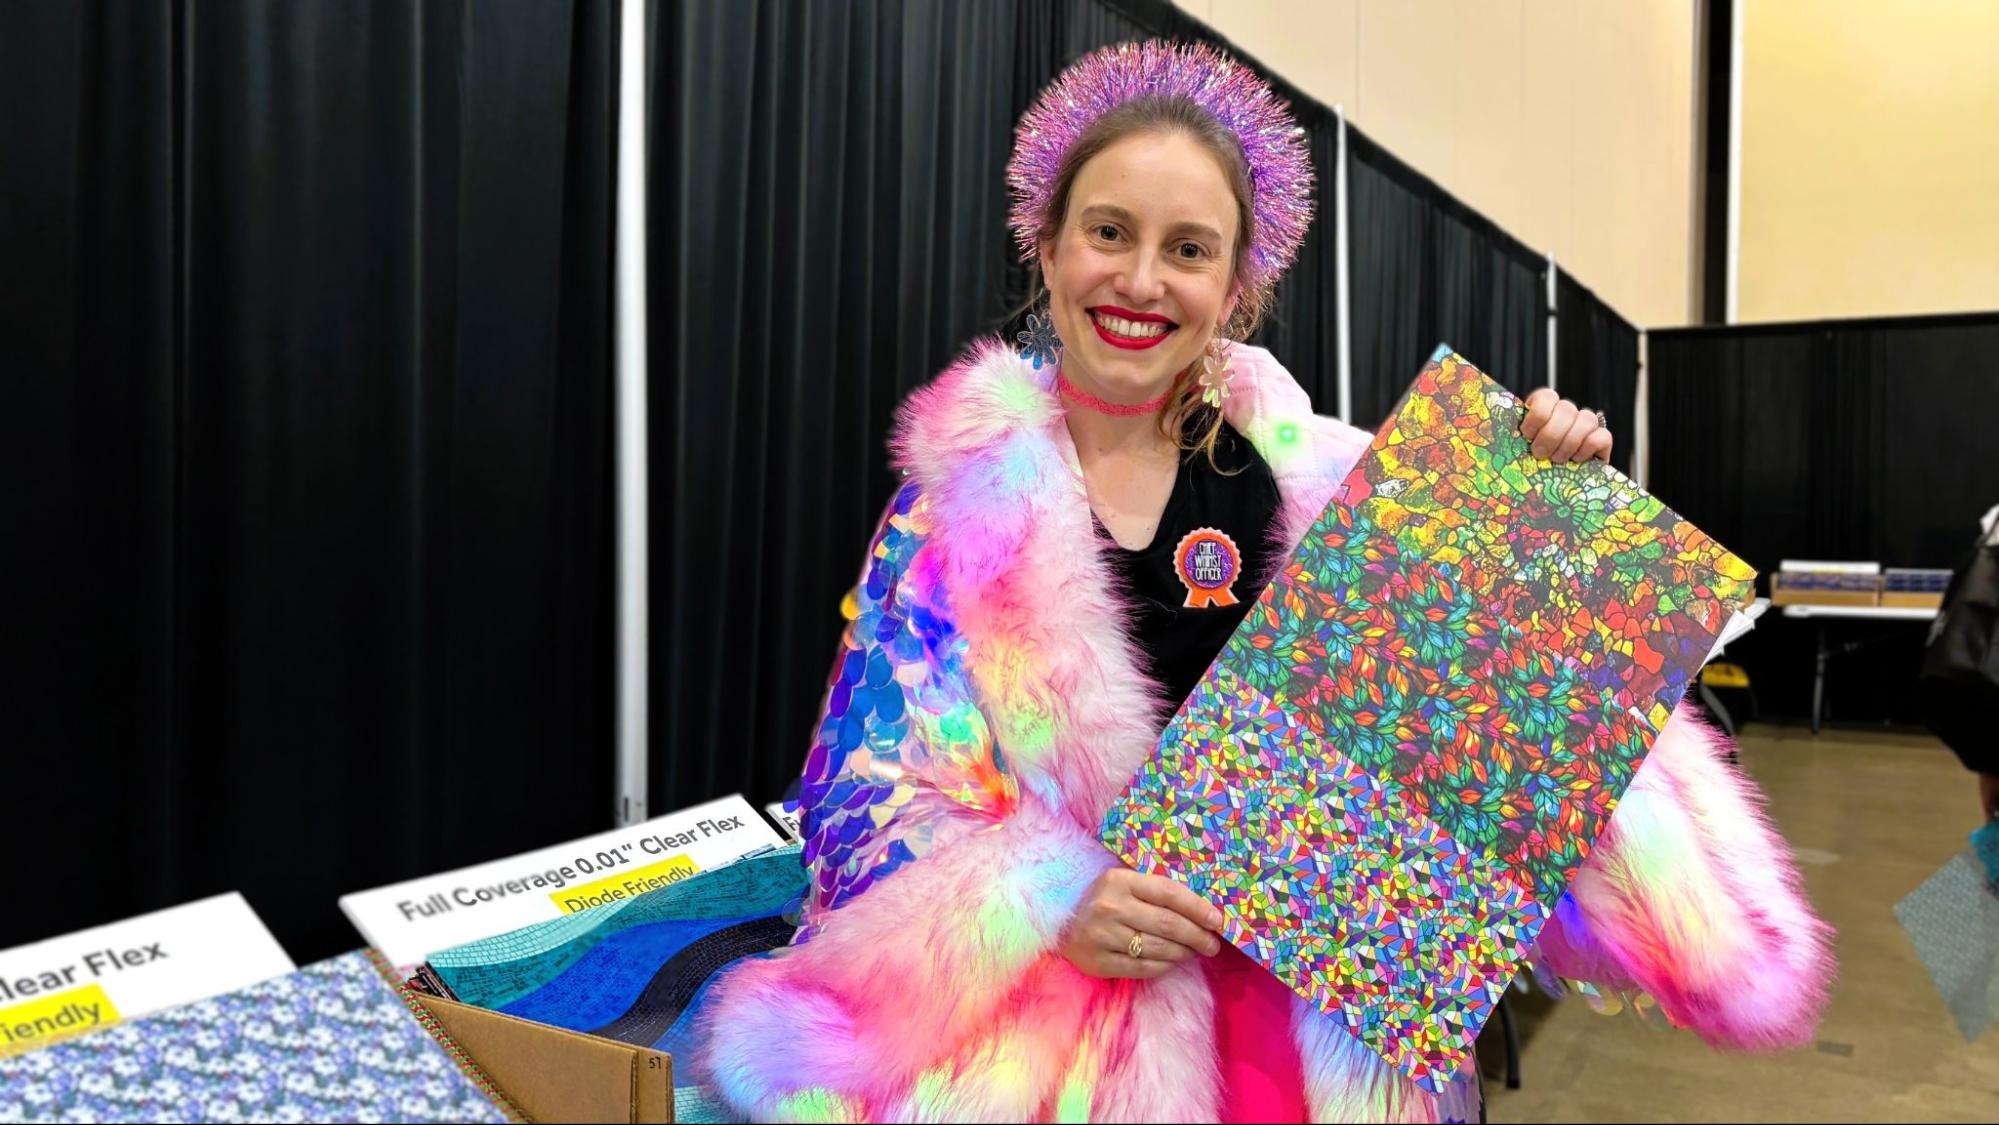
Angela Cruise, owner of Smokey Hill Designs, brought pallets full of high-quality plywood, acrylic, leatherette, and other sparkly laser substrates. Most were custom printed in eye-catching designs using a diode-safe material. Her goal is to use premium materials, like natural wood and pre-finished acrylics, that require less effort to turn into amazing, high-value products. Nearly everything she sells is manufactured in-house at her company’s North Carolina shop and is held to strict quality standards for use in lasers.

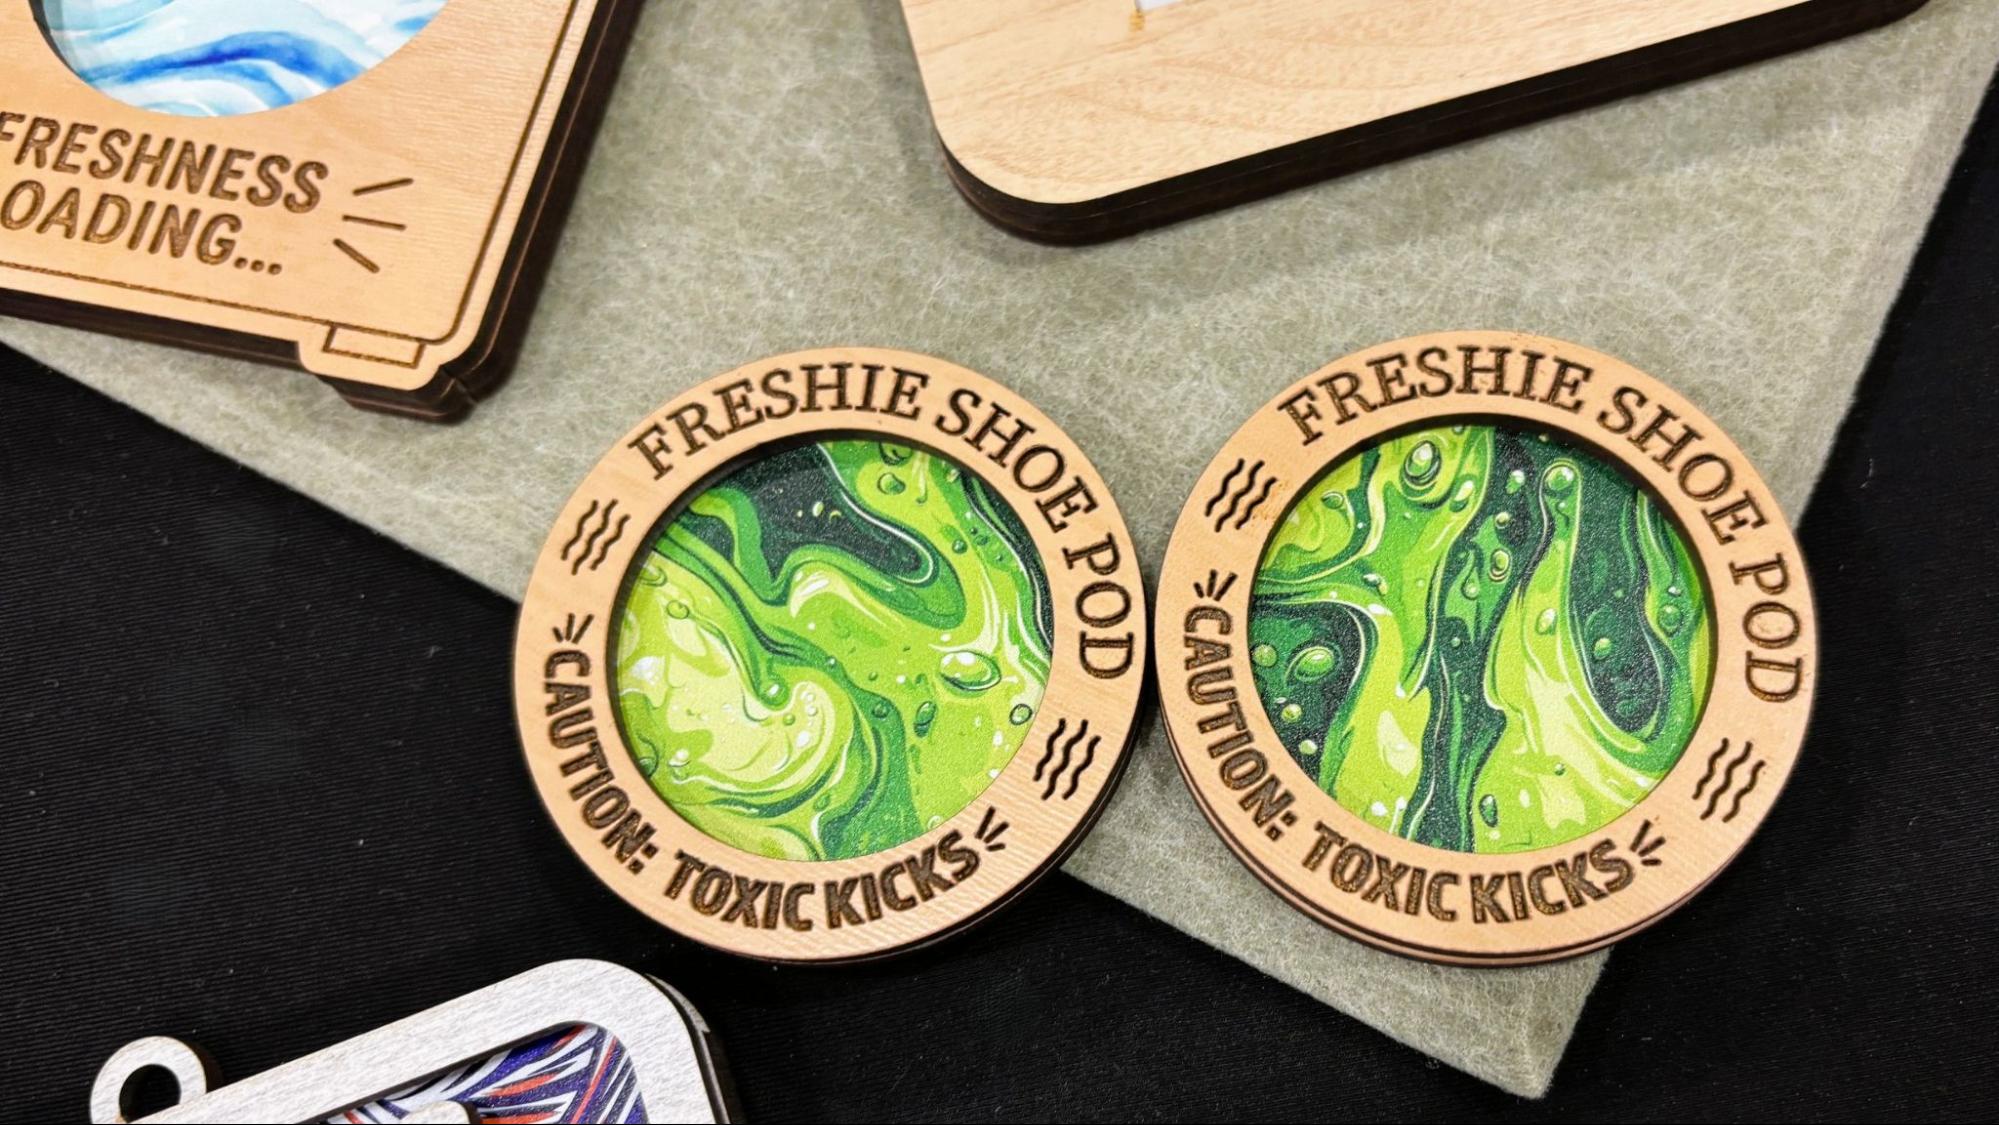
One of the unique materials they had for sale was Freshy Sheets, a thick absorbent material with a colorful printed surface, designed to hold essential oil and act as an air freshener. Naturally, the sheets are designed to be cut in shapes and encased in laser-cut designs.

xTool

(Image credit: Tom's Hardware)

BurnForge Software

xTool

(Image credit: Tom's Hardware)

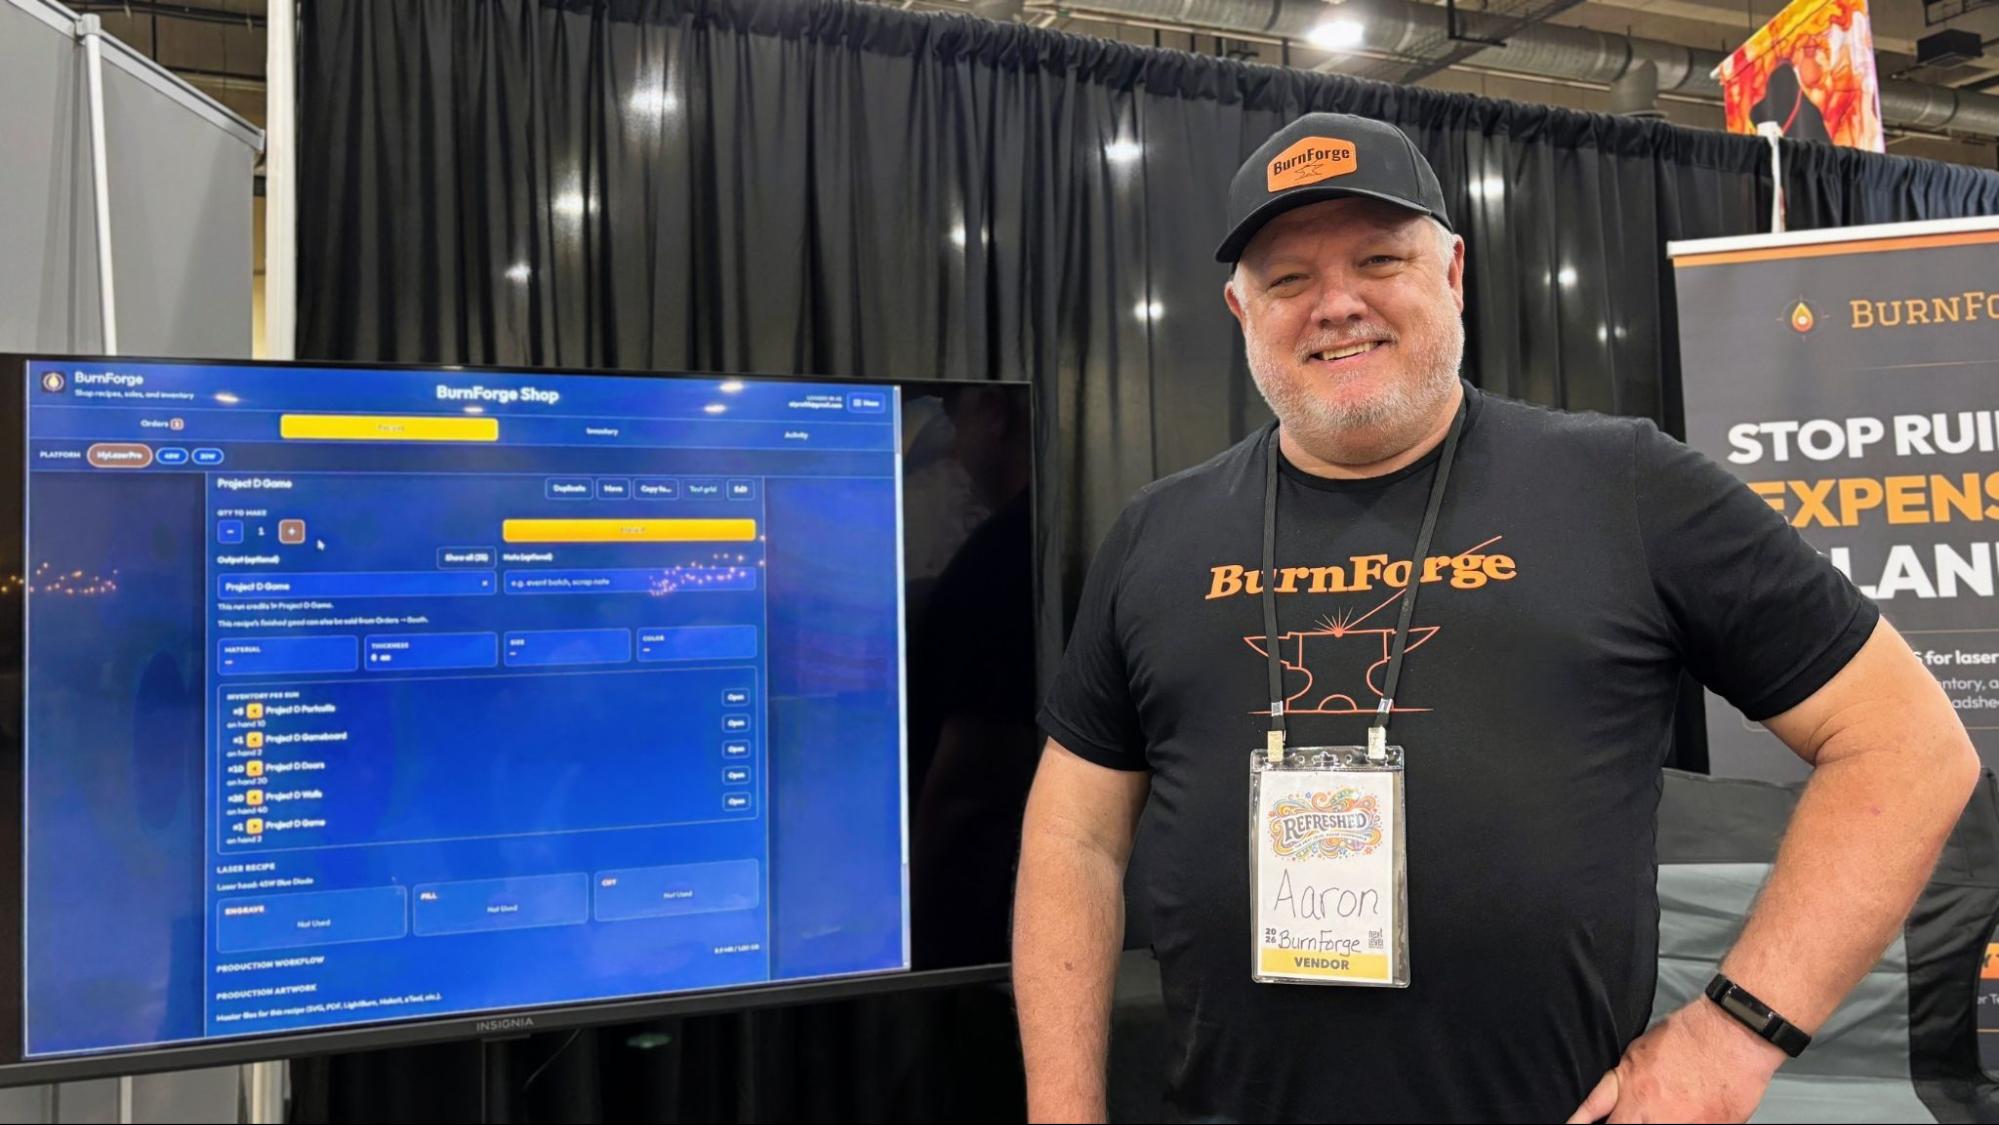
Aaron Pratt created BurnForge, a subscription-based business tracking system for crafters. The app lets makers track customer orders every step of the way so you stop “ruining expensive blanks.” The program helps you remember machine settings and tracks your inventory and orders. He’s offering a 30-day free trial with the code NEXTLEVEL30 for a limited time.

xTool

(Image credit: Tom's Hardware)

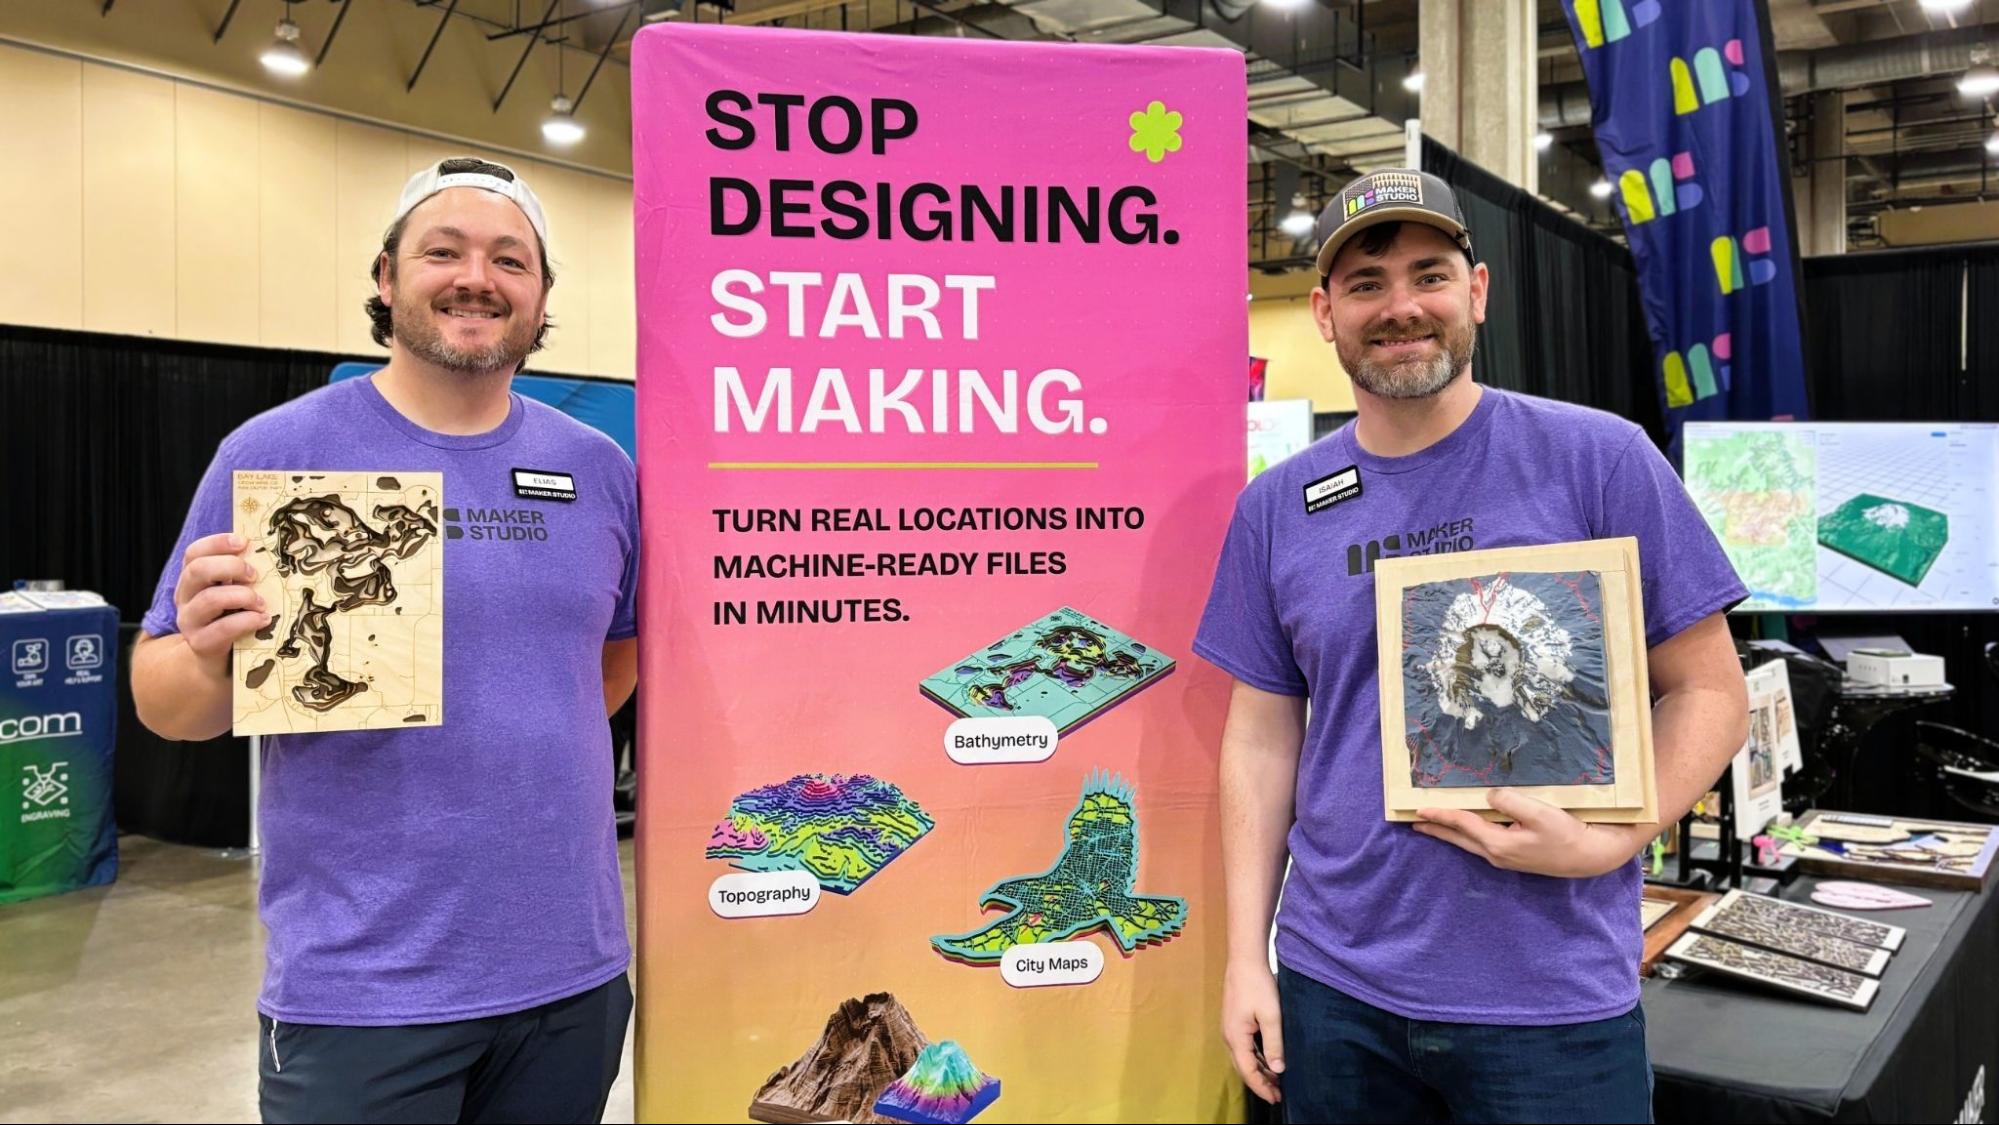
Brothers Elias and Isaiah Grey designed Maker Studio, a suite of apps that create custom maps you can reproduce with a laser cutter, CNC, or 3d printer. The maps come in either a layered style that looks great when laser cut and stacked, or 3D terrain relief maps that can be 3D printed or CNC carved. Their product lets makers easily turn real locations into design files without needing CAD skills.

Maker Studio is a subscription service that will soon include a box maker, a fit sheet for help with packaging, and a tumbler art maker. You can sign up for a 14-day free trial to test out the program before you commit.

  •