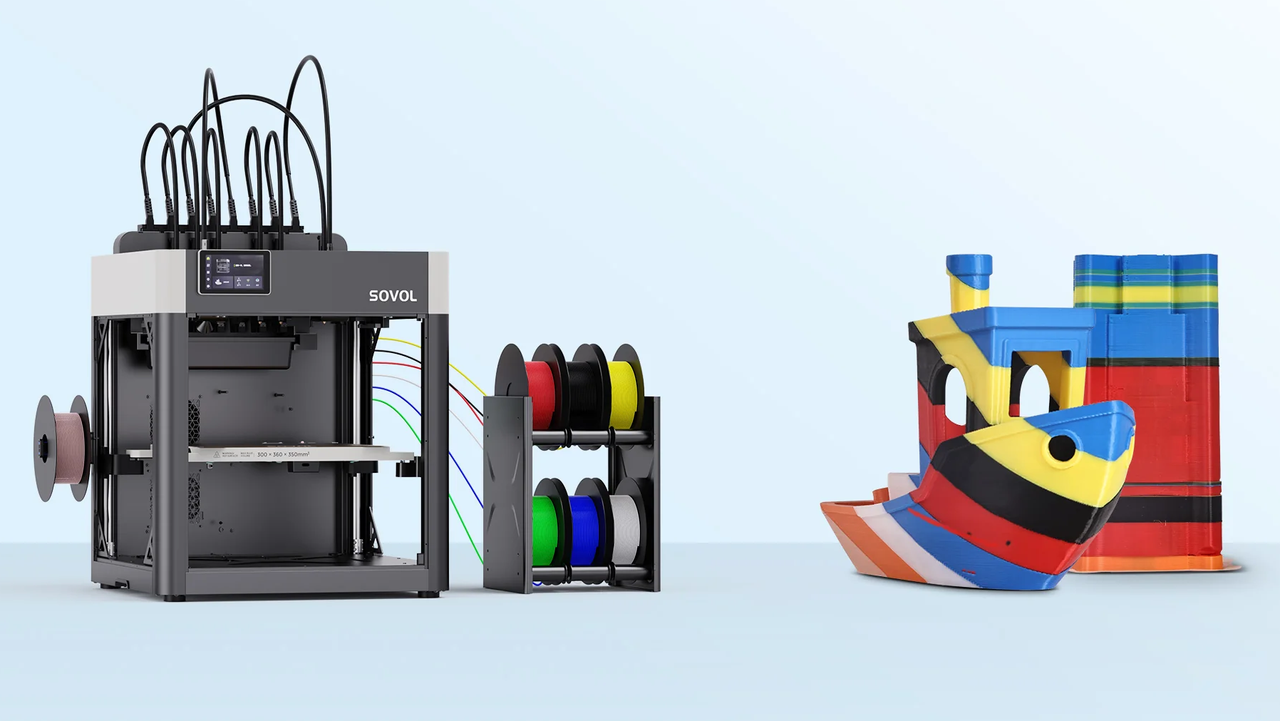
We're quite familiar with Sovol 3D printers around these parts, having reviewed several models over the years and finding that pretty much all of them produce high-quality prints. The company is now stepping up its game with the Sovol M1D, an open-source, independent dual-extruder (IDEX) printer with two nozzles and seven toolheads, a maximum print volume of 300 x 300 x 350 mm (11.81" x 11.81" x 13.78").
This bit o' kit can operate its nozzles in true independent mode (rather than alternating between them), letting users copy prints for easily printing duplicates and mirror them for doing left-right versions. In multi-head mode, each nozzle can output a different material. The first nozzle has a fixed toolhead, while the second can swap between heads independently. The open-source nature of the printer ought to let it be easy to mod, and as expected, it relies on the OrcaSlicer software by default rather than proprietary software such as Bambu's offerings.
The M1D comes in two variants, Essential and Advanced, with the higher-end model having the same basic specs but coming in a heated enclosure that keep inside air at 60°C (140°F). Sovol says each nozzle can print at up to 600 mm/s, and accelerate at 10,000 mm/s². The nozzle-and-toolhead interface seems quite nifty, as the M1D ought to swap toolheads in just five seconds, and keeps the standby heads warm so they're ready for printing the second they attach to the nozzle. One of the heads is fixed, and the other six are interchangeable.
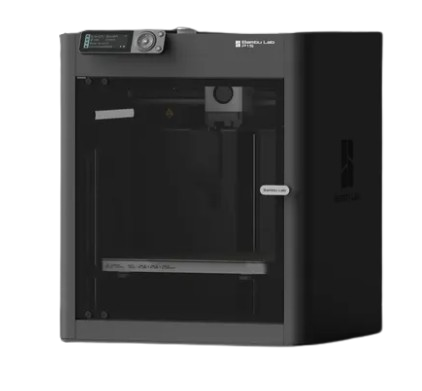
The combination of the speed and tool-swapping technology has Sovol claiming the M1D can perform multi-colored prints five times faster than "others," displaying what appears to be a Bambu P1S in the comparison pictures. Likewise, said multi-color or multi-material prints supposedly produce "almost zero waste."
The M1D has a number of measures to prevent failed prints, including automatic bed leveling with nozzle Z-axis compensation thanks to an eddy current sensor, X/Y nozzle cameras, vibration compensation, and a 720p chamber camera that will have AI obstruction and spaghetti detection in a future firmware update.
The seven toolheads allow for easily integrating water-soluble materials for printing sacrificial supports and molds, movable mechanisms, and hollow parts, while the enclosure of the Advanced version lets the M1D print particularly resistant materials like ASA (acrylonitrile styrene acrylate), PA (polyamide), and PC (polycarbonate).
The Sovol M1D is available through a Kickstarter project that's already pulled in over $2.8 million — many times over the initial $191,254 goal. Buying into a crowdfunded project frequently elicits concern, but Sovol's track record has historically been pretty good. With early bird pricing and not accounting for shipping costs, the M1D Essential goes for $1,299, while the Advanced version with the heated enclosure costs $1,599. The printers are expected to start shipping in November.
In the 3D printing community, there’s a common saying: buying a 3D printer is easy—learning modeling, mesh repair, and slicer settings is the real challenge.
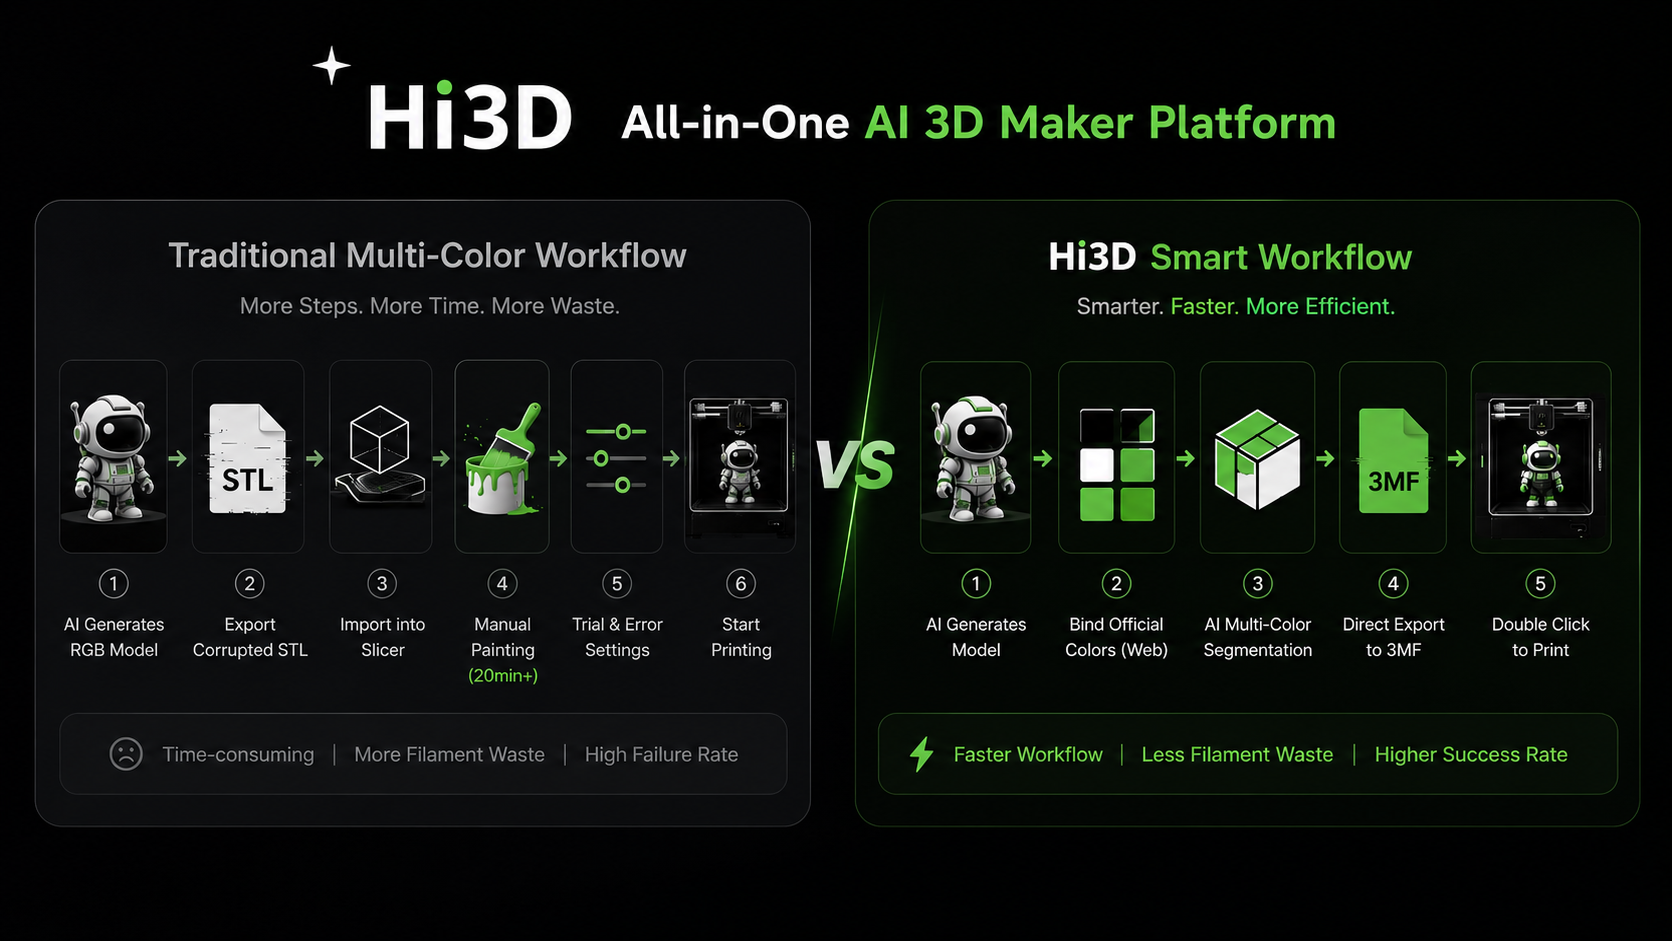
While AI-powered 3D generation has made it possible to create detailed models in minutes, turning those models into successful prints still requires significant technical work. From mesh repair and model splitting to print optimization and multi-color workflow management, many AI-generated models never make it beyond the screen.
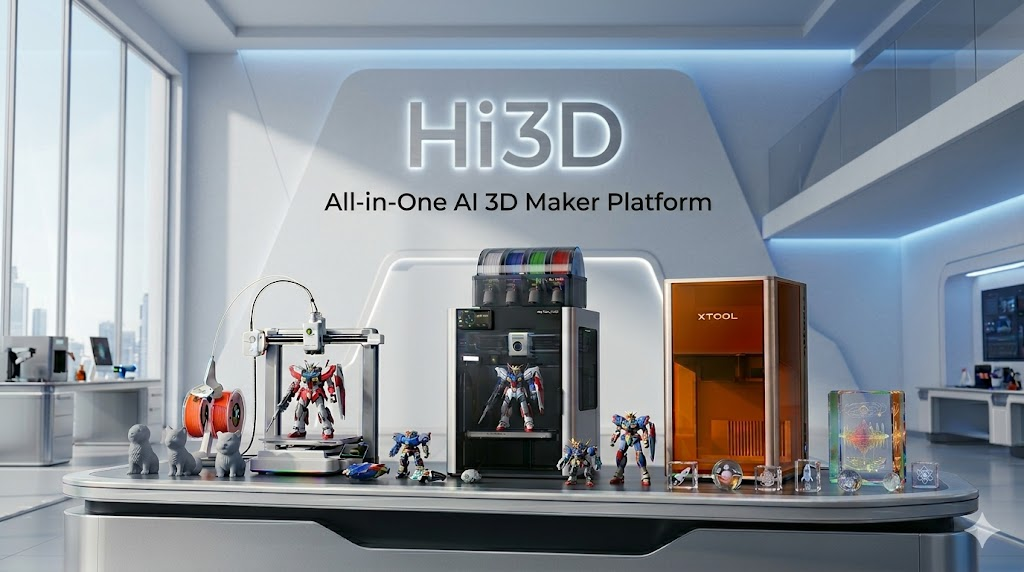
Hi3D was built to close that gap between AI creation and physical manufacturing. Over the past year, the company has expanded beyond AI model generation, developing an end-to-end workflow designed specifically for 3D printing.
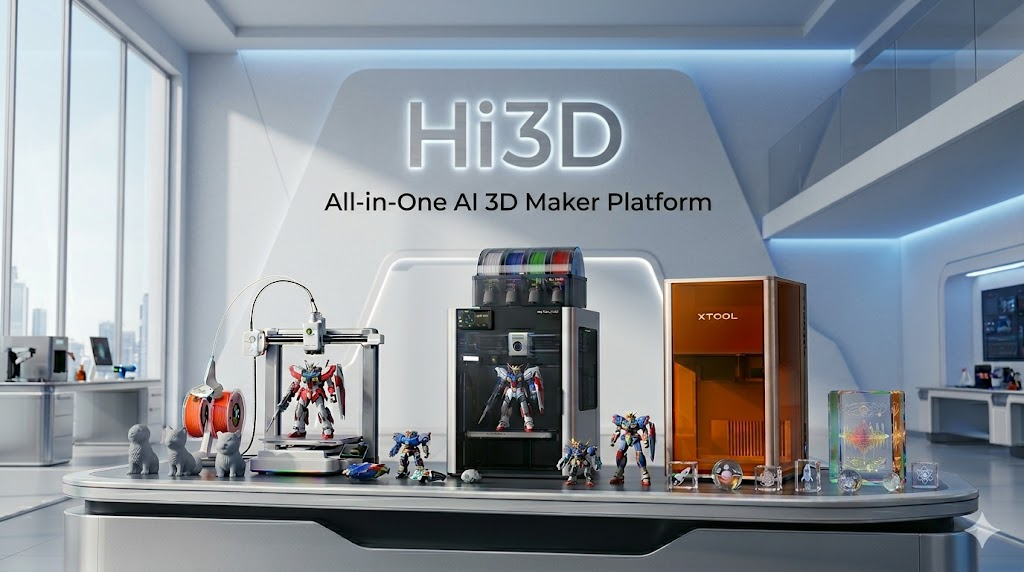
Today, Hi3D has established partnerships across the digital fabrication ecosystem, including Creality, MakerWorld within the Bambu Lab ecosystem, and xTool. These collaborations enable deeper integrations for printable model generation, AMS multi-color workflows, enhanced 3MF output, and broader digital manufacturing applications.
(Image credit: Hi3D)
With its anniversary release, Hi3D takes another step forward. Automated part separation, multi-color optimization, color cleanup, material-saving algorithms, intelligent model orientation, and print parameter generation are now unified into a single AI-driven workflow.
The result is simple: tasks that once required multiple software tools and hours of manual work can now be completed automatically—helping creators move from image to printable object faster than ever before.
Hours to 2 Minutes: Auto Character Split with Built-In Print-Ready Tolerances
For makers printing large models—or working with smaller build volumes such as the A1 mini—model splitting is often one of the most time-consuming steps. Traditional workflows require manually cutting meshes, creating connection structures, and adjusting tolerances, often resulting in assembly issues after printing.
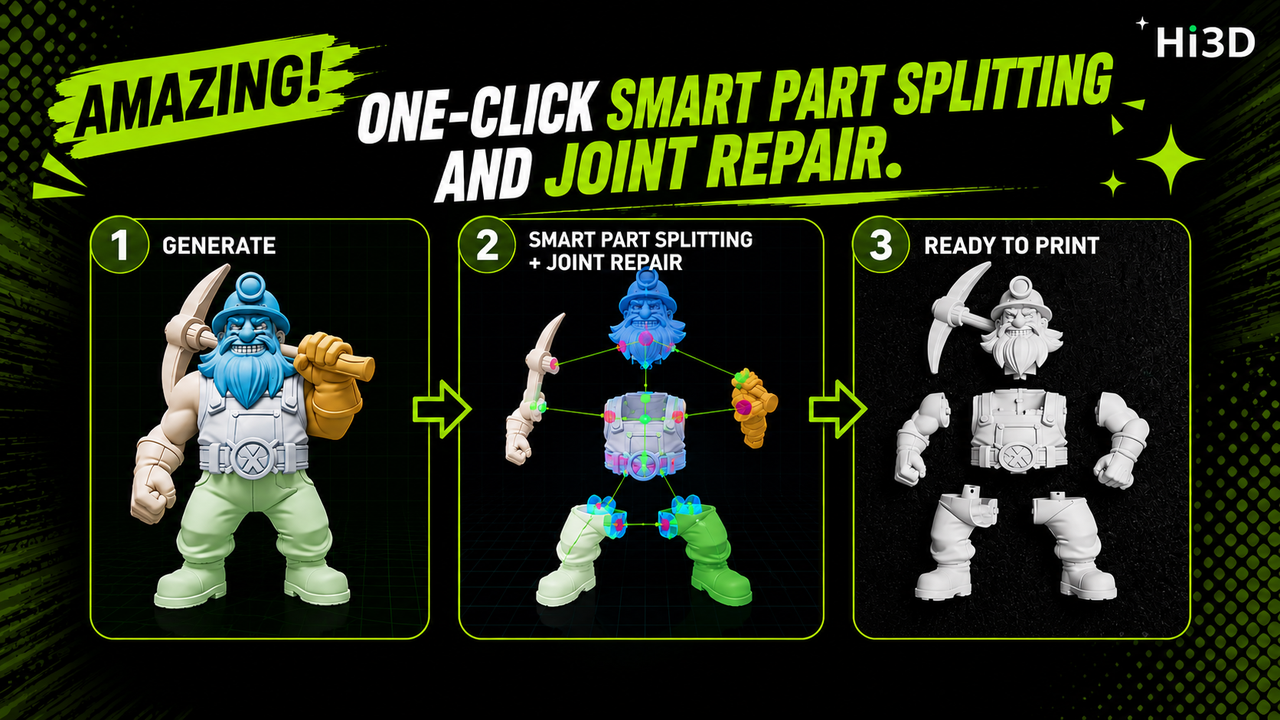
Hi3D’s Auto Character Split automates the entire process:
Intelligent Topology Recognition – Automatically identifies heads, torsos, limbs, and other structural components, generating optimized printable segments.
Watertight Mesh Generation – Every separated part is exported as a closed, watertight mesh ready for slicing and printing.
One-Click Joint Creation – Users can instantly add snap-fit connectors, mortise-and-tenon structures, or articulated ball joints for movable figures.
AI-Optimized Assembly Tolerances – Mechanical clearances are automatically calibrated for FDM printing, enabling reliable assembly directly off the build plate with minimal post-processing.
Tasks that previously required hours of manual modeling and adjustment can now be completed in just a few minutes.
(Image credit: Hi3D)
Deep Integration with the Bambu/AMS Ecosystem: From AI Model to Print-Ready 3MF
Multi-color printing often requires extensive manual color painting and parameter adjustments, especially for complex AI-generated models. Color data can be lost during export, and preparing a print-ready file typically involves multiple software steps.
Hi3D streamlines this process through deep integration with the Bambu Lab ecosystem, featuring an official filament library, automatic color mapping, and enhanced 3MF generation.
Once a model is created, Hi3D automatically maps on-screen colors to official Bambu Lab filament profiles and exports an optimized 3MF file containing print settings such as temperatures, layer heights, infill density, wall parameters, and support configurations.
(Image credit: Hi3D)
Instead of manually preparing files in a slicer, users can send the generated 3MF directly to Bambu Studio or OrcaSlicer and start printing immediately.
Reduce Multi-Color Waste by Up to 50% with AI Color Cleanup
For users of Bambu AMS and other multi-material systems, excessive filament purging remains one of the biggest challenges in multi-color printing. AI-generated textures often contain tiny color fragments and gradient noise, triggering unnecessary filament swaps that increase print time and material waste.
Hi3D addresses this with its Color Cleanup algorithm:
Noise-Aware Color Merging – Automatically detects and removes insignificant color fragments generated by AI textures.
Reduced Filament Swaps – Minimizes unnecessary color changes during slicing.
Lower Cost, Faster Prints – Reduces purge waste by up to 50% while improving print efficiency by 30–50%.
Smart Build Plate Layout for Higher Print Success Rates
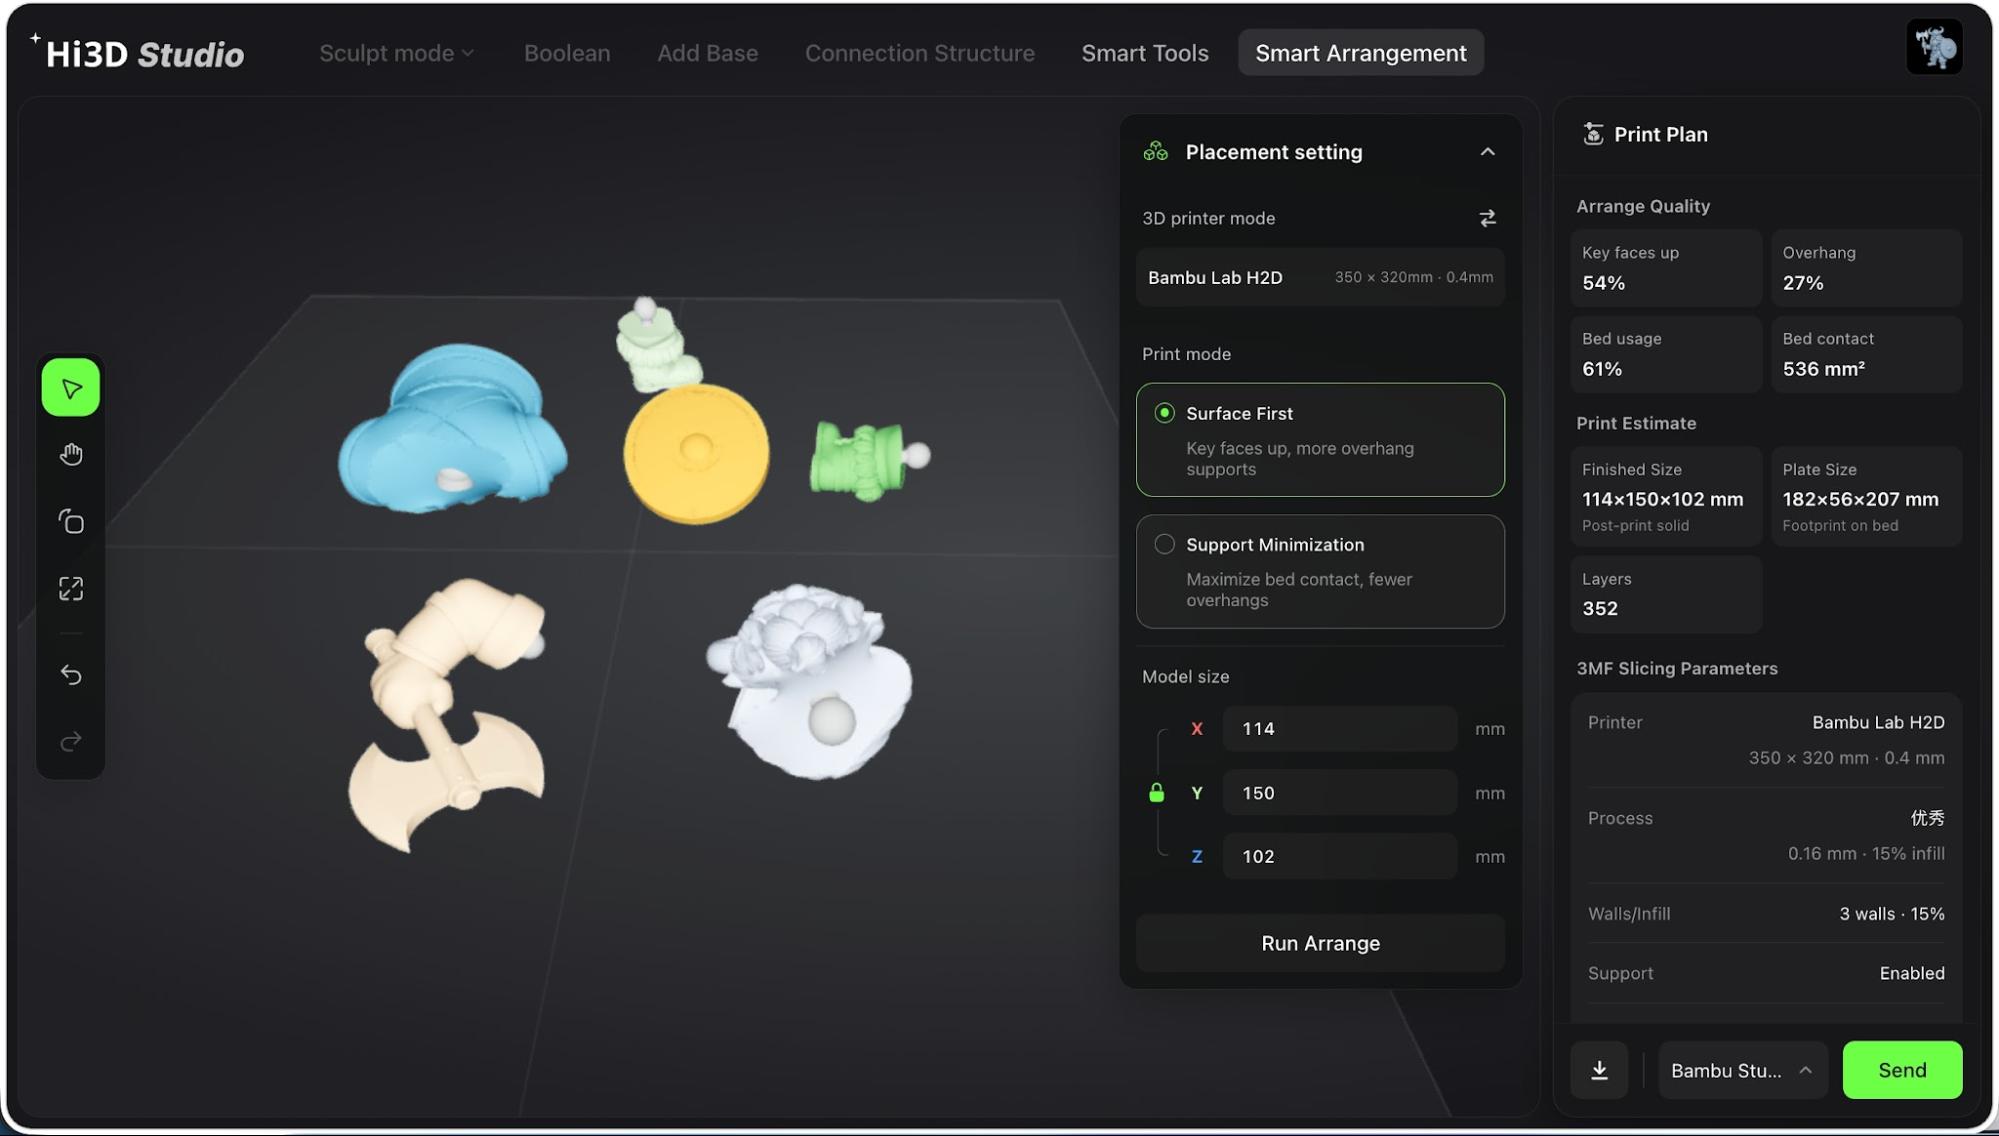
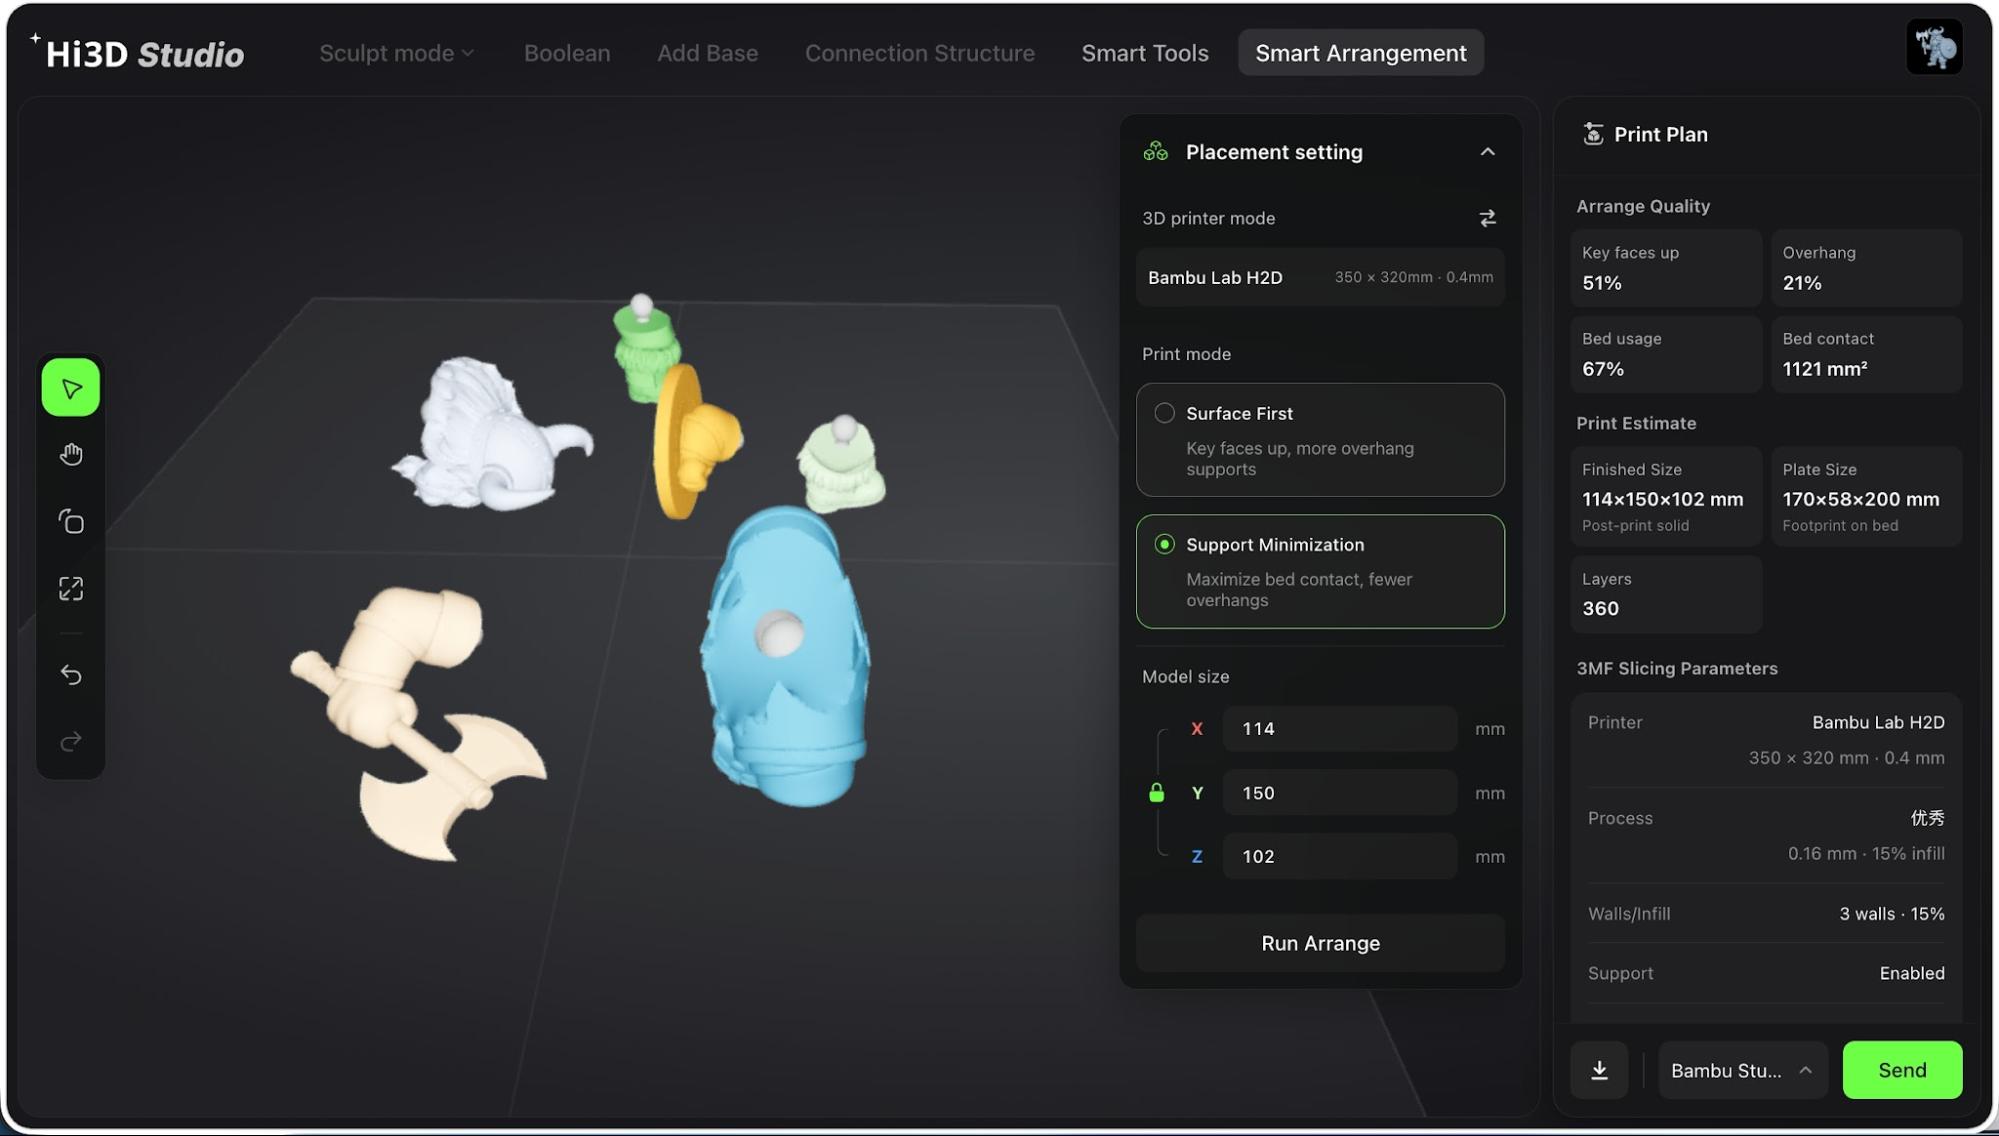
Model orientation is often the deciding factor in print quality and reliability. Hi3D’s Smart Build Plate Layout system automatically analyzes geometry, center of gravity, and support requirements to optimize model placement.
Surface-First Mode – Prioritizes visible surfaces to reduce support marks and post-processing.
Eco-Support Mode – Minimizes support usage while maximizing bed adhesion and print stability.
By automating decisions that traditionally rely on maker experience, Hi3D helps users achieve better print quality with less trial and error.
Hi3DHi3D
Bridging the Gap: From Beginner-Friendly Creation to Advanced Manufacturing
Beyond advanced tools for model splitting, multi-color optimization, and print preparation, Hi3D also lowers the barrier to entry through its Maker Templates. Users can upload a photo to generate printable figurines, pet models, or custom keycaps that are automatically optimized for 3D printing.
With its anniversary release, Hi3D is expanding beyond AI model generation into a complete AI-powered workflow built specifically for physical manufacturing. By combining AI creation, print optimization, and hardware-aware automation in a single platform, Hi3D helps creators move from idea to finished object with significantly less manual work.
As AI 3D technology continues to mature, the industry is shifting from simply generating models to generating manufacturing-ready models. Hi3D’s latest update represents another step toward that future, making 3D printing more accessible for beginners while providing greater efficiency for experienced makers.
Ready to experience a smoother workflow from AI-generated models to successful 3D prints? VisitHi3D.ai and see how AI-powered creation, optimization, and printing come together in a single platform.
New users can receive 300 free Hi3D credits through the link below and experience the complete AI-to-3D-print workflow for themselves—from concept generation to printable 3MF files.
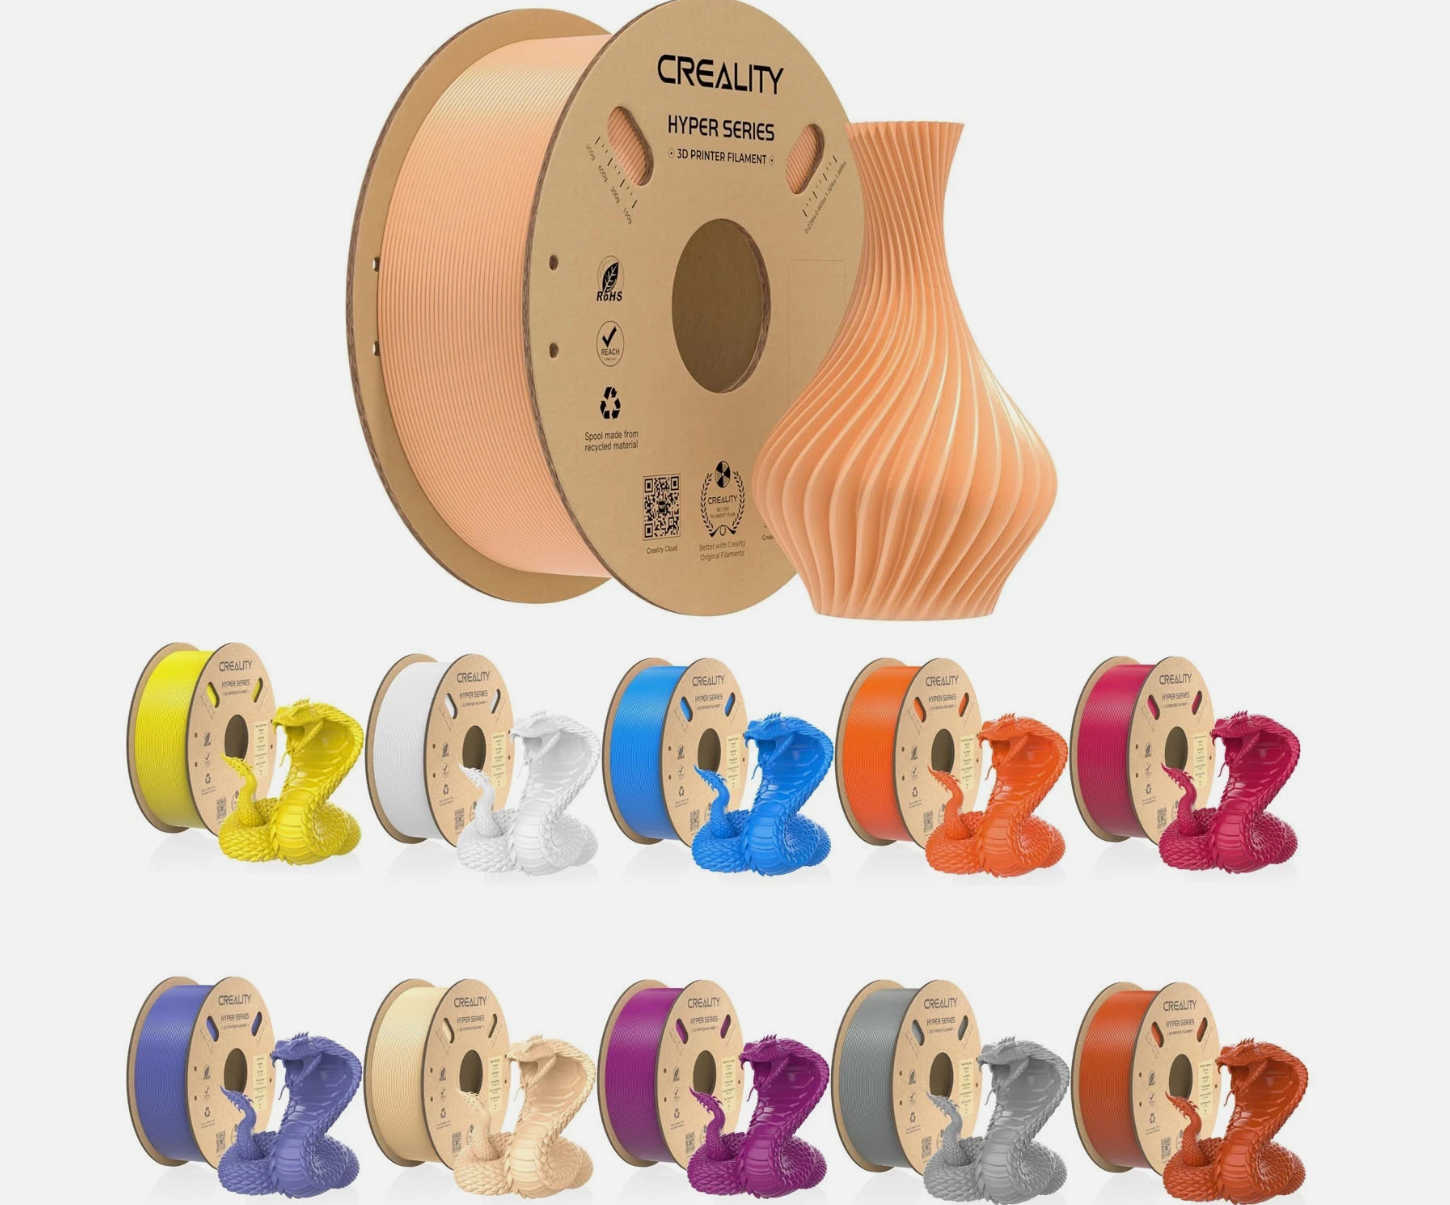
3D printing is a fantastic hobby to have. The amount of creativity you can explore is only confined to your imagination, and of course, the amount of filament you have. Once you are the owner of a 3D printer, the main ongoing cost of enjoying it is the expense of constantly refilling your printer's spool with a roll of filament. Today's deal is here to help you continue to bring your printed creations to life, but highlighting an almost too good to be true deal on 10 spools of Creality's Hyper PLA filament for just $86.32. That's just $8.63 a spool, which is insane, considering they cost $17.99 each from eBay and $19.99 each, direct from the Creality store.
If you click on one of our links to this fantastic deal, you will find that you can mix and match a selection of colors to complete this deal. The colors available are white, black, red, blue, gray, skin, yellow, green, orange, brown, gold, purple, multicolor, multicolor-short gradient, multicolor-long gradient, strawberry red, peach powder, and peri blue. It doesn't change the price if you select different colors, but you must pick 10 spools in total.
Creality's Hyper PLA filament is designed to be used with 3D printers that have high printing speeds up to 600mm/s. The filament will be less likely to warp, will have better fluidity at higher temps, and will also cool faster. Giving you a better overall finish on your 3D-printed creations. Each spool contains 1KG of 1.75mm Hyper PLA filament.
Grab 10 spools of Creality's Hyper PLA filament. Each spool contains 1KG of 1.75 mm filament in a color of your choice. Designed for use in fast 3D printers with a print speed of up to 600mm/s. Buy 6 spools and get 4 free.
Now, to be able to buy these 10 spools of Creality Hyper PLA filament for just $86.32, you first have to choose 10 spools of filament and add them to your eBay cart. This will automatically enable a "buy 6, get 4 free" deal, bringing the initial $179.90 total down to $107.90. Now go to the checkout and add code NEWFINDS20 in the coupon box, and watch the price drop a further 20% to just $86.32. This is the perfect deal for stacking up on your filament stockpile, or for filling up a multicolor feeder system on your printer.
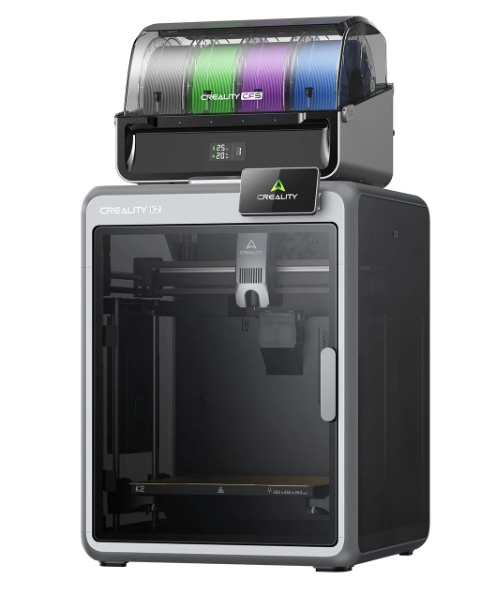
If you're looking for a new hobby to get into, you can't go far wrong with some 3D printing. It's no longer a small fringe hobby, as the barrier to entry has all but disappeared. You can find many brands and different models of printers to suit a wide variety of hobbyists, varying widely in price and size. You can even pick up multicolor printers at reasonable prices as the new tech becomes more mainstream. Today's deal highlights a great bargain in Creality's Summer Mega Sale, where you can grab the K2 Combo 3D Printer and the included CFS multicolor system can be bought directly from Creality's online store for $499; that's the cheapest we've ever seen for this combo, and $48.99 cheaper than the same deal on Amazon.
The Creality K2 Combo is the smaller printer in Creality's K2 Plus and K2 Pro lineup of 3D printers. It still manages to provide a fully enclosed 260 x 260 x 260 mm print bed, which is an ample size for 3D printing, especially if you're a beginner and want to have the K2 placed on a nearby desktop. Further enhancing its in-office appeal are quiet step-servo motors on the X and Y axis, and dynamically balanced fans that keep the K2 running in a "Silent Mode" with noise levels around 45 dB. Meaning you can have this machine printing away in the same room as you without it causing a distraction.
This K2 3D printer comes in a Combo and includes Creality's CFS system, a 4-way multicolor filament-switching component. The CFS module is a powerful add-on that makes the K2 printer a much more enticing option for 3D printing hobbyists and professionals, and it can be combined together with up to four other CFS units for 16-color print projects if you're a professional working on larger 3D printing creations.
Creality's K2 Combo is a formidable 3D printer. The smallest of the K2 family of printers, the K2 Combo still has a 260 x 260 x 260 mm print size, allowing users to print large objects inside its enclosed frame without worrying about having to glue together multiple prints. The ultra-sturdy frame holds an auto-leveling print bed and three step-servo motors for fast, consistent prints.View Deal
We haven't had the chance to review the Creality K2 Combo 3D printer, but we have reviewed its slightly bigger brother, the K2 Pro, back in December of 2025. With the K2 Pro commanding a high price, we were happy to see that the launch of the K2 Combo made the K2 lineup much more accessible for beginners to jump on board the 3D printing hobby train. With several price reductions since, and the current summer sales event happening on the Creality store, this $200 discount on the K2 Combo makes this 3D printer a very attractive prospect.
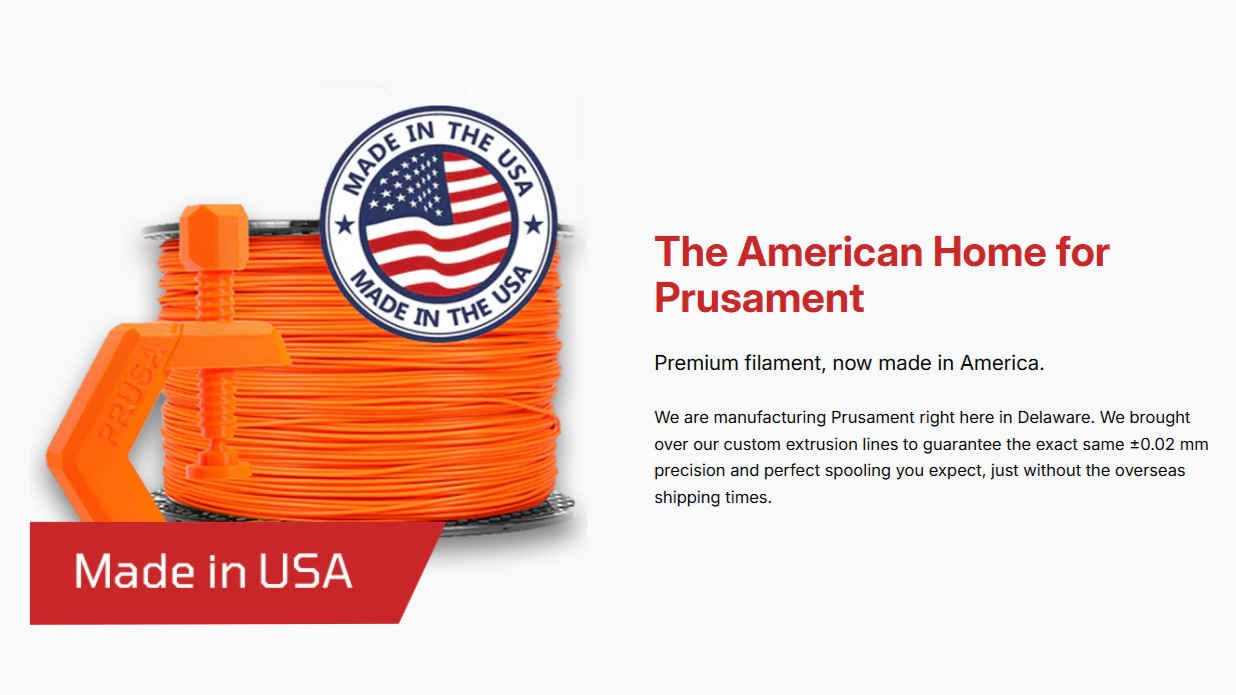
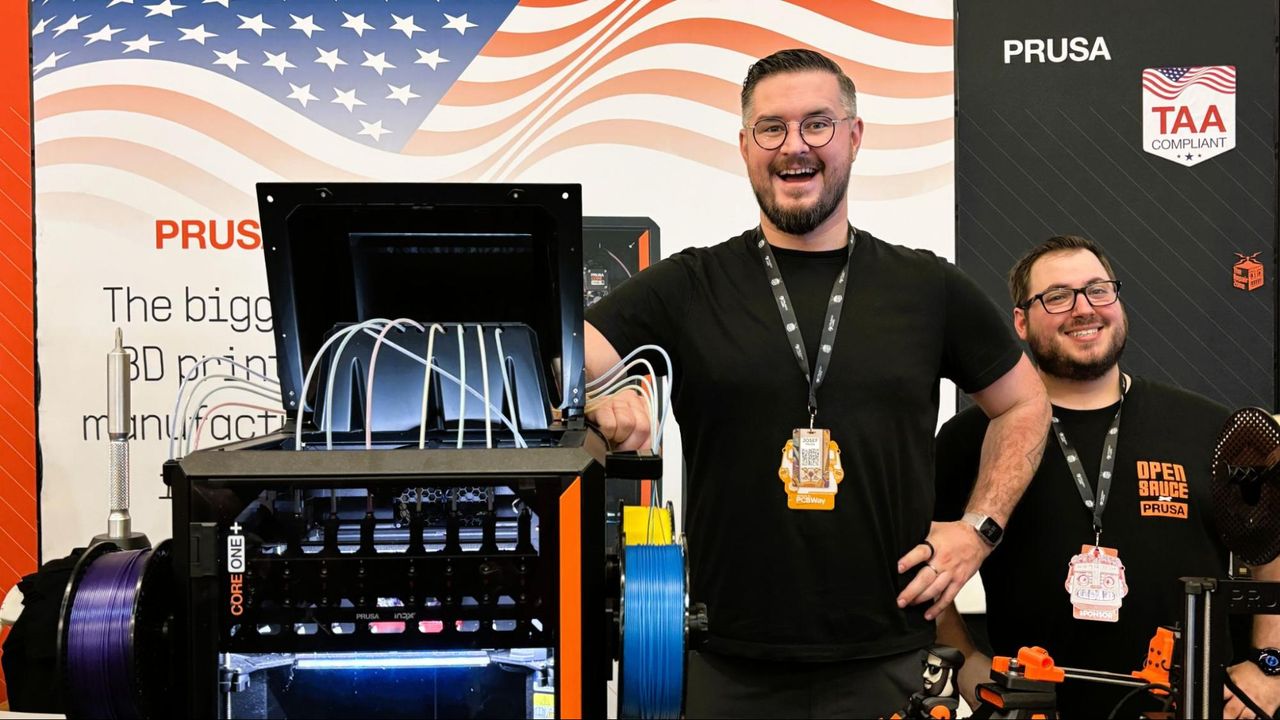
Printed Solid, the Delaware-based filament manufacturer acquired by Czech Prusa Research in 2022, is now known as Prusa USA, Inc. I chatted with Prusa Research team members at Open Sauce, who confirmed the name change was largely window dressing, with nothing changing in the company’s day-to-day operation. Josef Prusa will remain CEO of both companies, with a new Marketing Officer moving up the ranks internally.
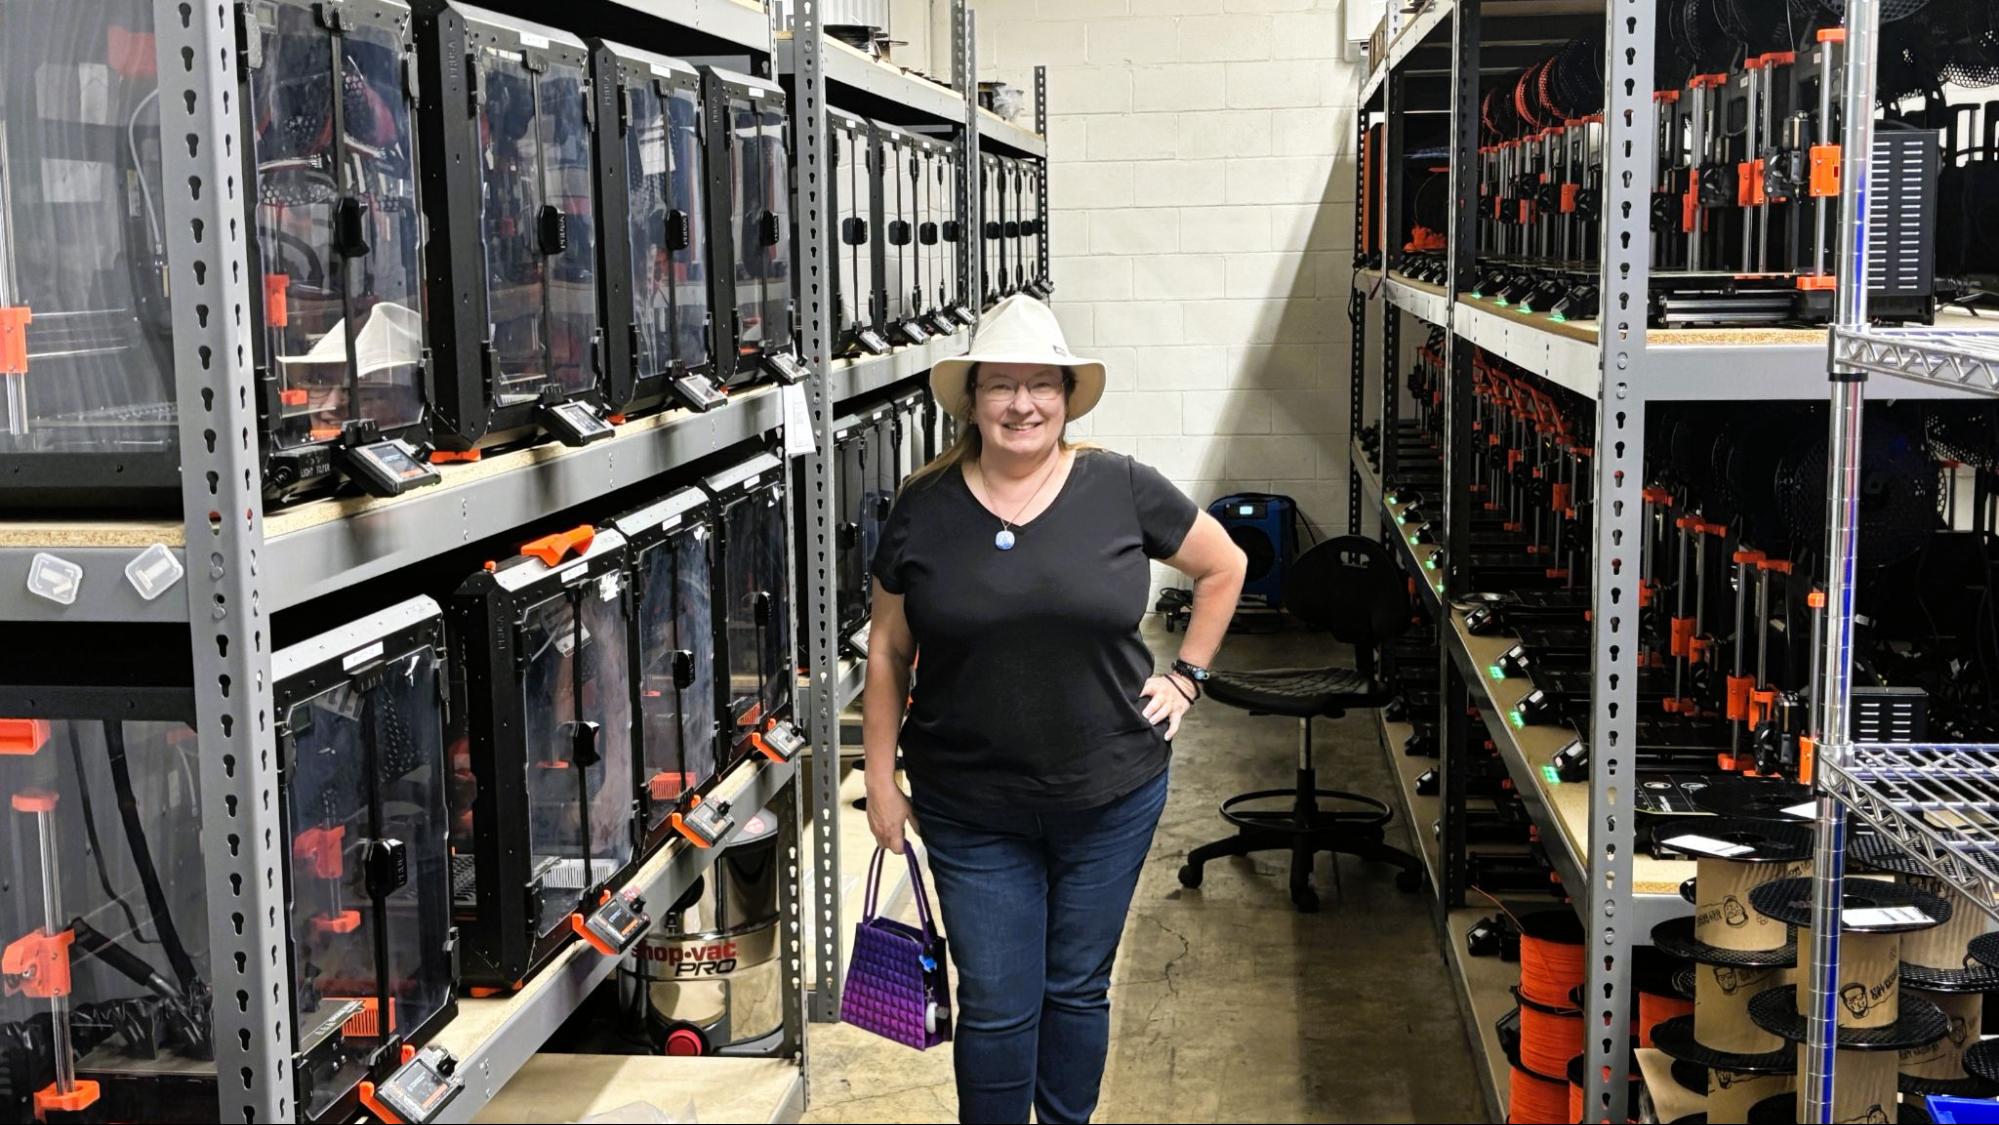
During the changeover, Printed Solid will be known as “Printed Solid, a Prusa Company”. The website now proudly states that Prusa Research is a “European-American” company with U.S. production capabilities. The company has a duplicate print farm at its 100,000-square-foot Delaware factory for the production of 3D printers and filament. The printers are not yet fully “Made in the USA,” as some parts are still needed from the factory in Prague. This helps overcome supply chain issues for American customers.
(Image credit: Prusa)
Josef Prusa states, “We wanted to be closer to our customers. Expanding to America was the natural next step to support the most important market in the world.” His booth at Open Sauce proclaimed Prusa to be the biggest 3D printer manufacturer in the USA. Though Prusa Research ships well over 10,000 printers a month from both Prague and Wilmington, it’s a fraction of what its Chinese competitors produce overseas. 3D printing is simply getting bigger as more businesses and individual makers discover the ease of additive manufacturing.
The change comes at a difficult time for 3D printing enthusiasts, as several anti-3D printing bills are sprouting up around the country. These bills are trying to impose government oversight by installing spyware on new 3D printers to prevent the machines from manufacturing firearms. This is the antithesis of Prusa Research, which stands firmly on the side of Open Source, the right to repair, and proudly produces 3D printers that meet the high security needs of the US military and government agencies. Delaware, Prusa Research’s new home away from home, has just introduced House Bill 399, which would place so-called “blocking technology” on all 3D printers.
It is also the American fulfillment center for Prusa Research’s Amazon sales and the official US Service Center for printer support, which includes repair and maintenance.
We toured the Printed Solid print farm in 2025.(Image credit: Tom's Hardware)
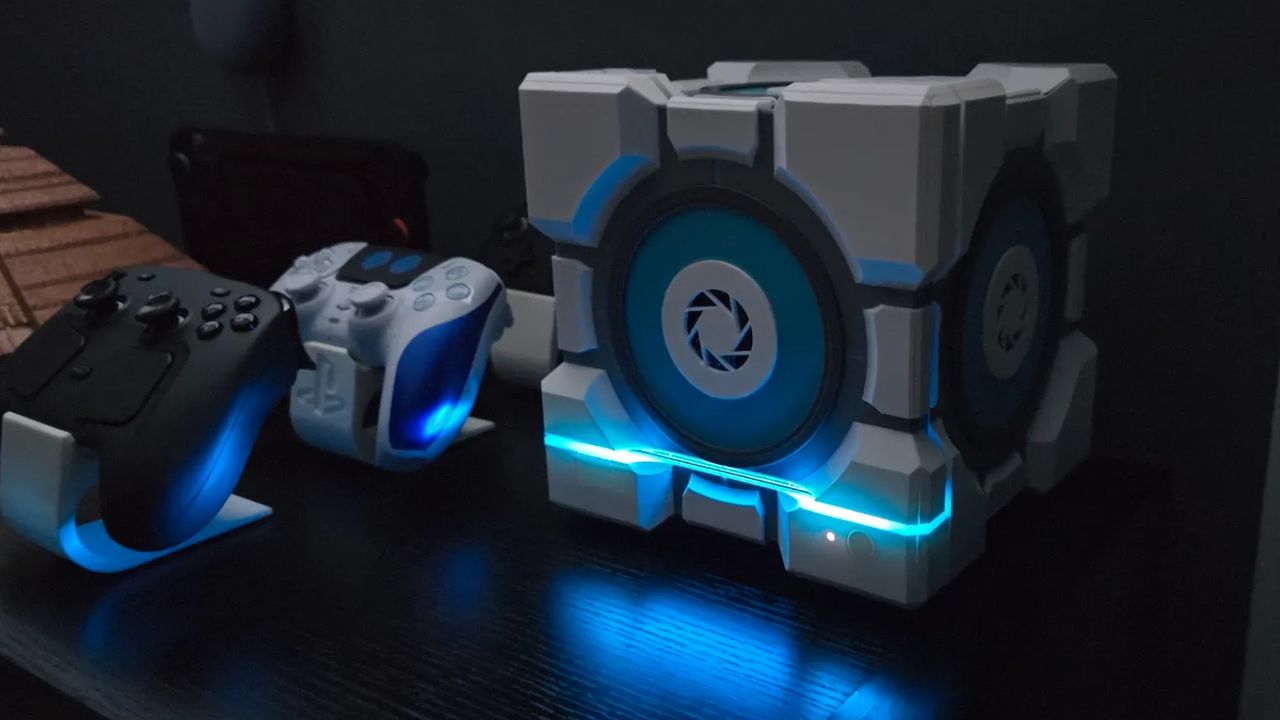
Mere weeks after dbrand announced it would have to shelve its Steam Machine Companion Cube because it didn't get permission to use Valve's intellectual property, a 3D printing enthusiast has created a DIY version that you can make for yourself at home. Printables user Jaron's Steam Machine Companion Cube Caseis "An unofficial Portal Companion cube case for your Steam Machine" that you can create using a single-extruder printer, if you have the right model.
According to a user post on X, the fan-made tribute to the dbrand project was made "from scratch," and is based entirely on images of dbrand's design. Ironically, whether that will incur any copyright wrath from dbrand itself remains to be seen.
Very important to note this is a fan-made print made from-scratch, based entirely on images of dbrand's design.July 19, 2026
As you can see, the project looks exactly like dbrand's companion cube. According to the Printables listing, it can be printed using a single-extruder printer as long as it lets you pause at specific layers to swap filament for other colors. Jaron says a slicer is required to get the multi-color look for the panels, but otherwise provides an extensive parts list of screws, inserts, and magnets you can acquire from Amazon to piece the project together. You will, of course, also need a Steam Machine for the full effect, as well as a soldering iron, tweezers, and a couple of screwdrivers. Helpfully, they even list the specific Sunlu and Overture filaments used to get the look.
At first glance, this is definitely not a beginner 3D printing project, but Jaron has provided extensive assembly instructions as well as multiple YouTube videos to detail the assembly process. As you might expect, popping a 3D-printed shell on your Steam Machine might impact thermals. Jaron says that they have not done any extensive thermal testing of the design, but has ensured that no airflow or vents are blocked. In fact, the additional vent in the faceplate may even aid cooling.
dbrand unveiled its Companion Cube on November 12, the day of the Steam Machine's announcement. Following extensive interest, the company says it poured thousands of hours into industrial design and injection molding, as well as promoting the Companion Cube. Unfortunately, it forgot to ask Valve for permission. "They stated that the Companion Cube is Valve intellectual property, for which dbrand does not have a license," the company admitted in a statement last month. Despite appeals, the company in the end gave up and shelved the project.
Valve's Steam Machine is the company's somewhat beleaguered in-home console alternative, which finally launched last month. The diminutive desktop gaming PC is a lot pricier than Valve had anticipated, owing to the AI pricing squeeze on RAM and SSD parts. As such, at $1,049, it's decidedly more expensive than console alternatives, somewhat limiting its appeal. With a semi-custom AMD Zen 4 six-core chip, RDNA3 graphics, 16GB of DDR5, and up to 2TB SSD capacity, it's pretty good value when compared to equivalent PC hardware.
If you have got your hands on one and would like a version of dbrand's Companion Cube to match, this enthusiast 3D-printed project — which Jaron says is not affiliated with Valve or Steam, nor features any official assets from any game — could be a fun way to spend a weekend.
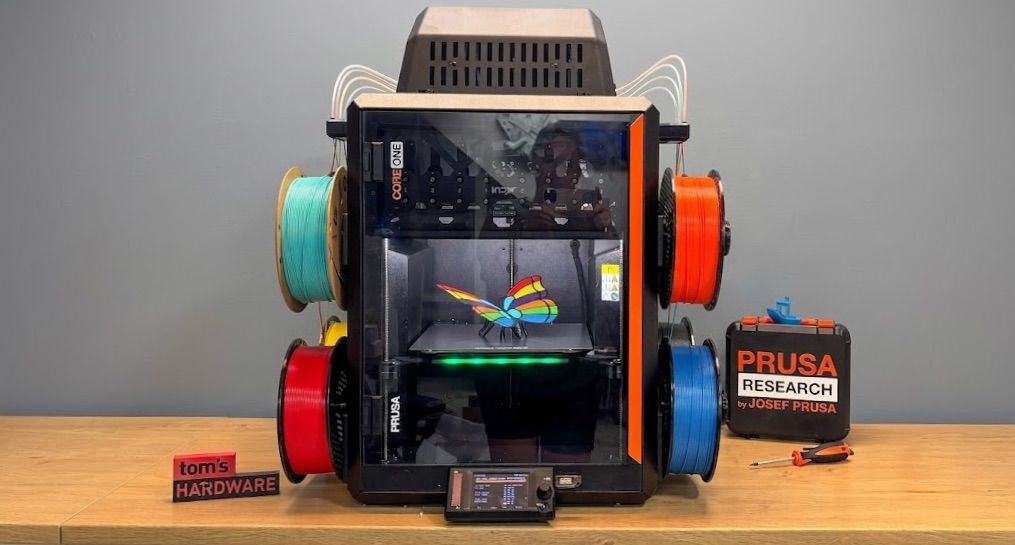
One thousand Prusa CORE One INDX Founder’s Editions have shipped, giving a lucky few first access to Bondtech’s revolutionary toolchanger mod. The Founders Edition is a special limited run, intended for early adopters and Prusa fanatics.
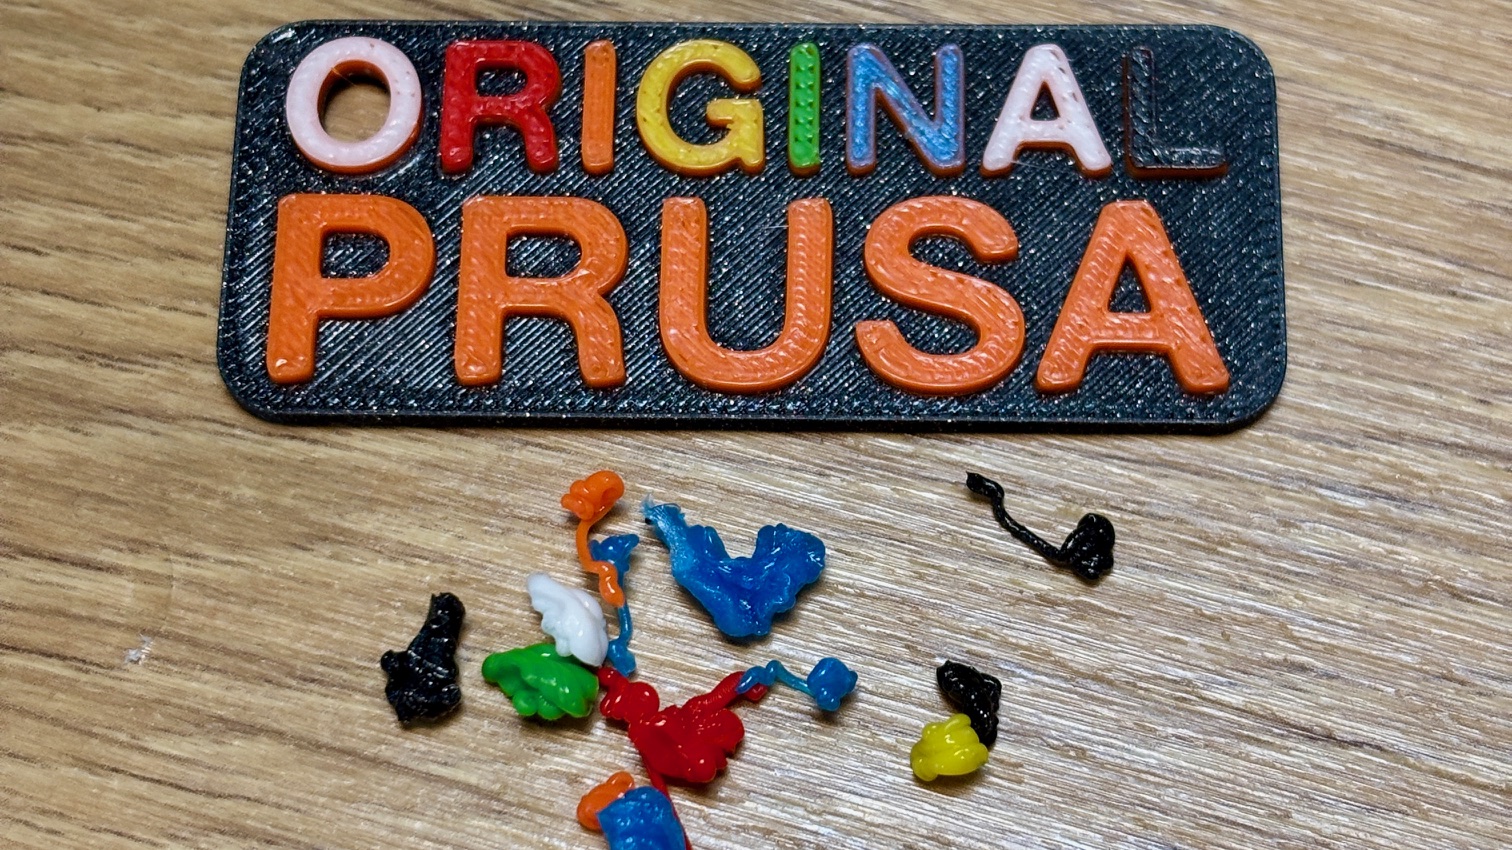
The INDX toolchanger promises multi-material printing without the headache of prime towers and massive purge waste. Since toolchangers have a dedicated nozzle for each filament path, they don’t need to clean out the nozzle between color or material swaps; however, they do need to “prime” the nozzle to make sure the filament is flowing at the right pressure. Before the INDX, this meant printing a smallish, unavoidable prime tower. The INDX has been precisely tuned to purge only tiny crumbs of waste into an internal tray, then wipe the nozzle on a silicone pad.
(Image credit: Tom's Hardware)
The INDX, invented and patented by Bondtech, uses an induction heater to rapidly bring each nozzle to temperature in a few seconds. This allows the Prusa Core One with INDX to have some of the fastest color swap times we’ve seen.
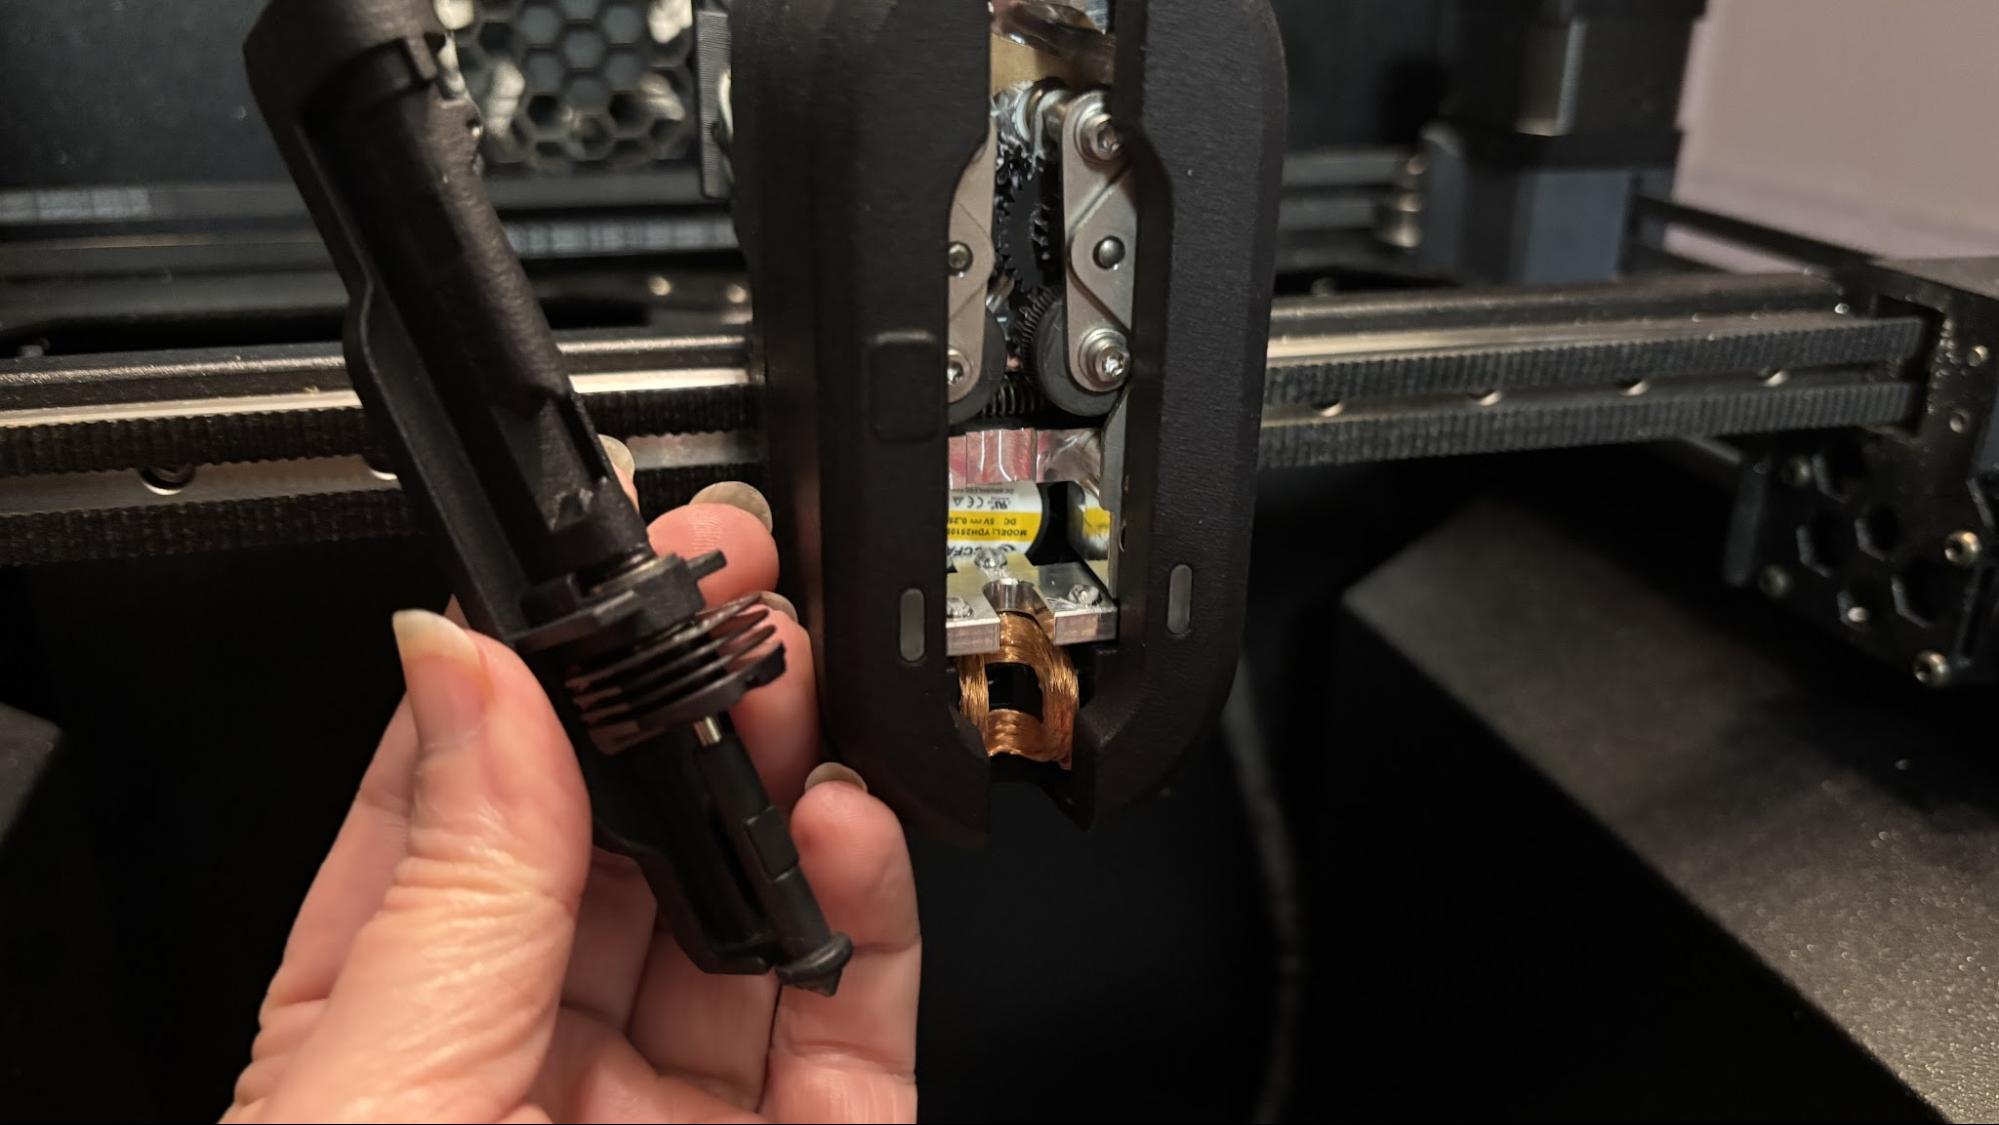
Tom’s Hardware was sent an eight-tool kit so we could share our first-hand experience with the INDX. It took the better part of a weekend to strip down our existing CORE One and modify it. This involved completely removing the Nextruder, replacing it with the INDX carriage, then mounting a rack to hold the eight tool heads. Eight spool holders were mounted on the sides, using preexisting screw holes. A calibration sensor was mounted to the front corner of the build platform, and an internal waste catcher was installed.
(Image credit: Tom's Hardware)
Prusa requested that we not conduct a full review of the Founder’s Edition, as it is merely a taste of what’s to come. The final retail INDX will be a more refined version, with a few tweaks (like better visibility through the front grill) and firmware upgrades. Prusa Research is taking feedback from Founders to improve the retail launch.
Prusa Research is expected to launch the retail version of the INDX for Prusa CORE One + by the end of July. A 4 tool kit will cost $749, while an 8 tool kit will run $999. Bondtech is offering a Development Kit that can be installed on Vorons, Sovols, or whatever you can hack, with a starting price of $487.50 for one toolhead.
So why is the Founders Edition considered unfinished? Bondtech’s original INDX concept was designed as a generic add-on to any compatible 3D printer, not as a bespoke Prusa mod. We first saw a Bondtech demo of the INDX at Rapid/TCT in April of 2025, mounted on a Voron 0. The partnership with Prusa Research was announced seven months later at Formnext, with a functional CORE One sporting eight tool heads.
The CORE One was not built with the INDX in mind, and it’s a testament to Prusa’s ingenuity and Open Source moddability that such a collaboration can work at scale. Prusa Research has always maintained a close connection with its user base and encourages owners to creatively tinker and customize the machines they own.
Unlike previous purpose-built toolchangers we’ve reviewed, the INDX is an upgrade kit. This is not a beginner-friendly piece of hardware to install, and Prusa Research is looking into issues that Founders are having with assembly to improve the retail experience. They may need to offer a fully assembled “Prusa INDX” to properly compete in this era of dumbed-down “just push play” 3D printers.
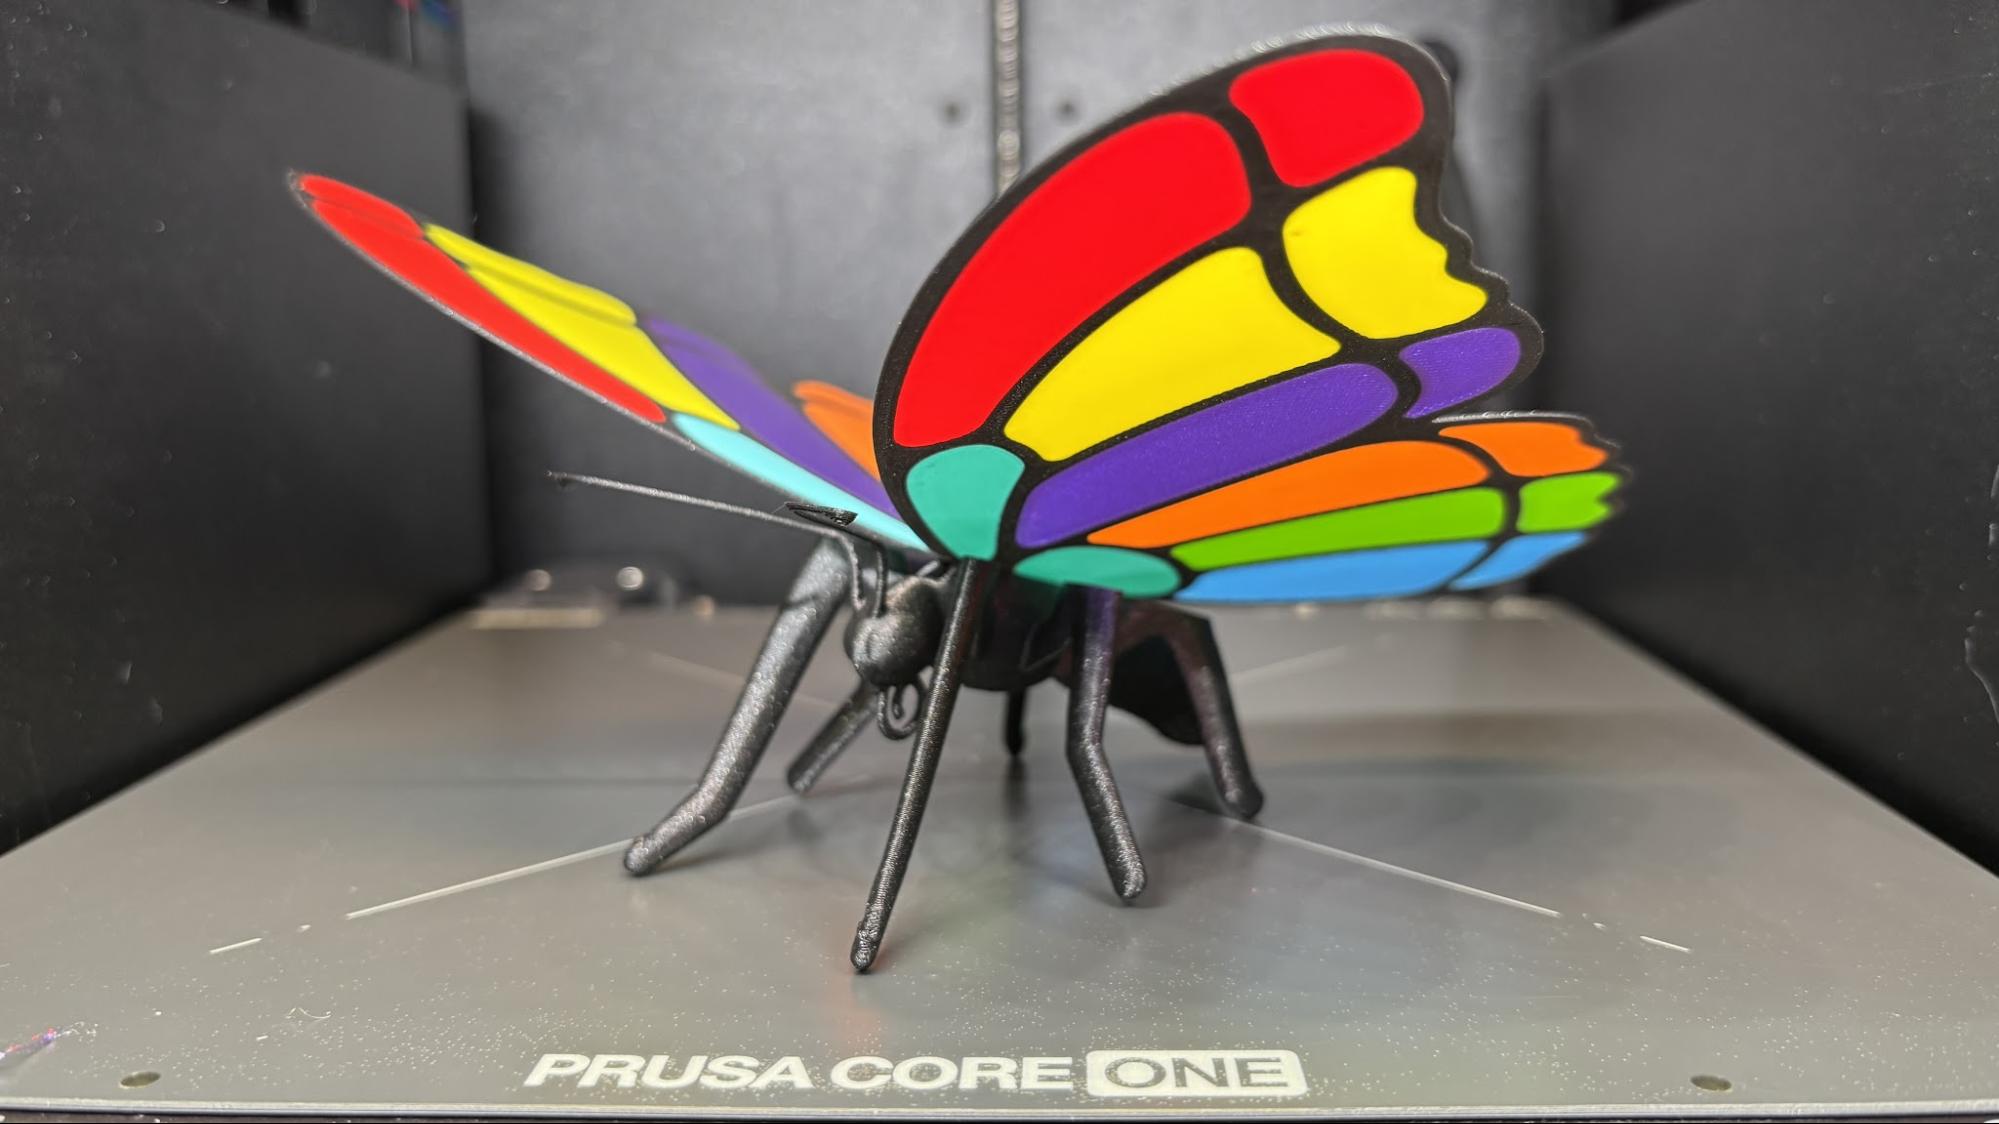
Though our “definitely-not-a-review-unit” had a few hiccups, most issues were solved by a firmware update and a second run through the calibration program. We’ve not had any issues with print quality, and our first calibration print turned out flawless.
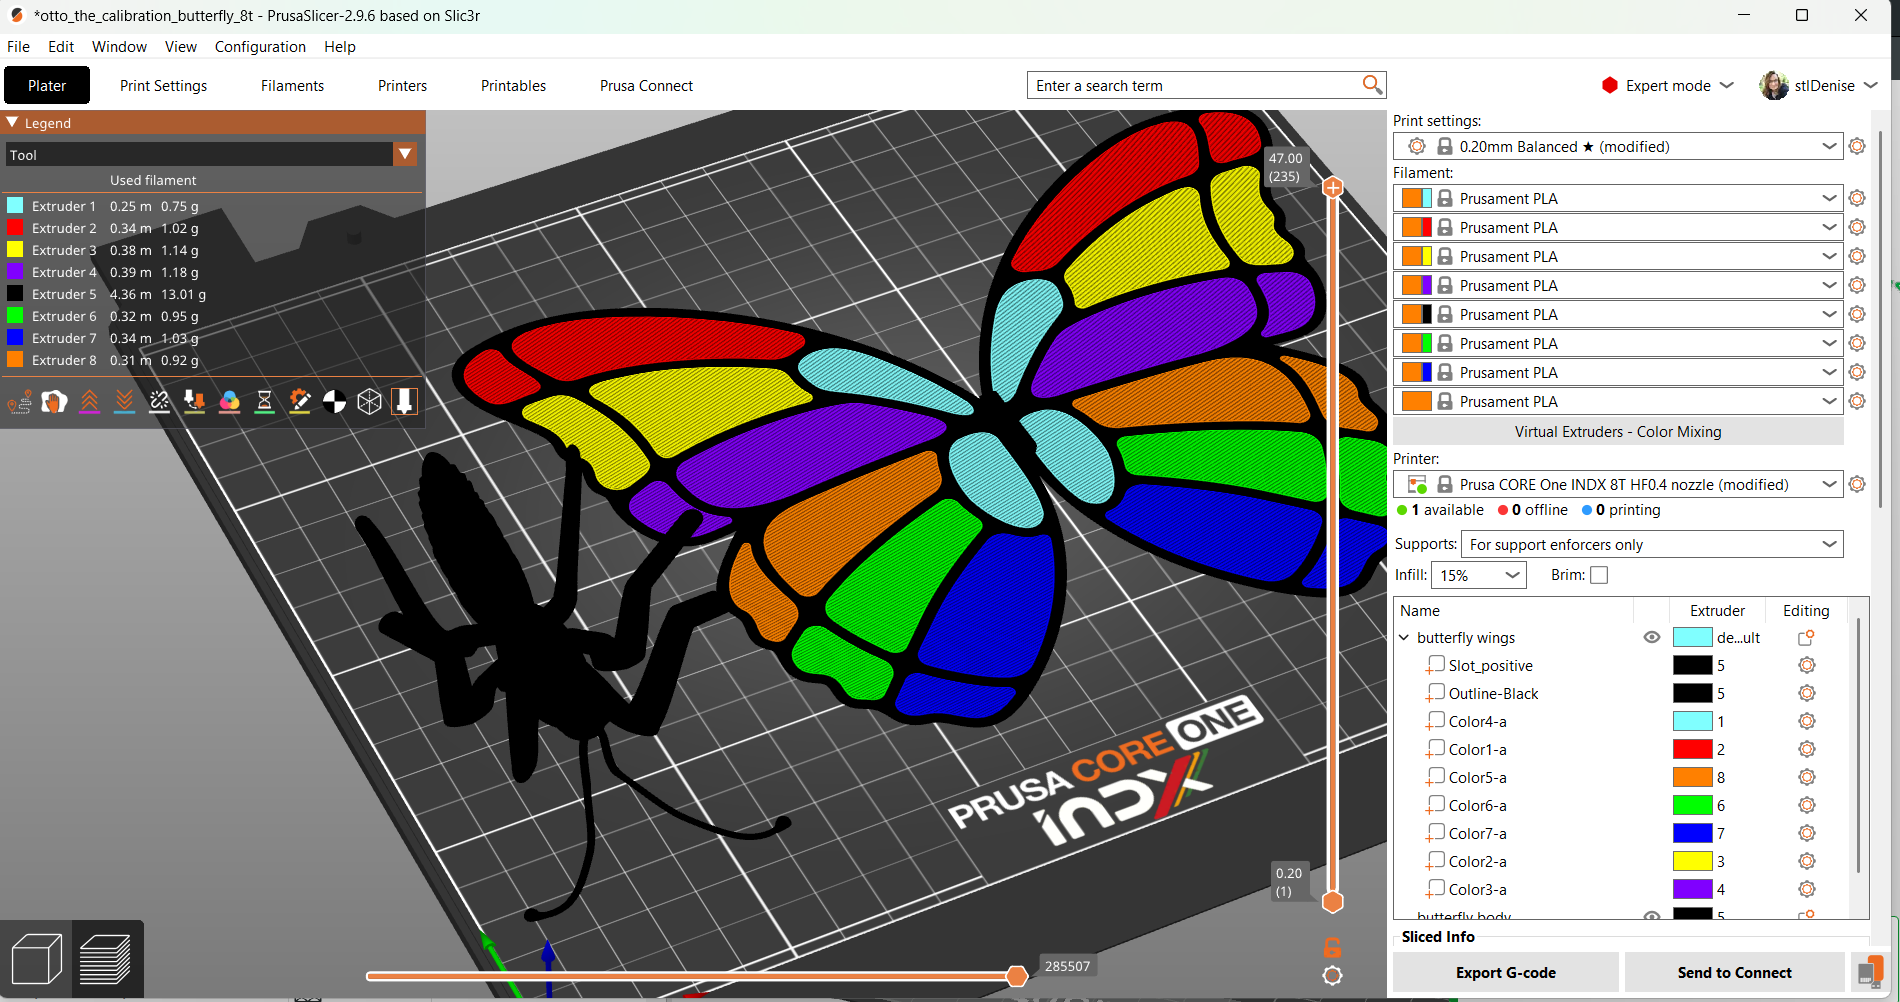
Prusa published a new calibration print just for the INDX. This eight-color sample test print took 1 hour and 14 minutes. The wings are a first-layer test and are only two layers thick. A tab on the wing slots into the body to prove that tolerances and extrusion flow are correct. The multi-colored wing segments act as a visual test for first-layer quality, belt tension, and toolhead alignment, as any tiny offset in color boundaries or axis motion will show up instantly.
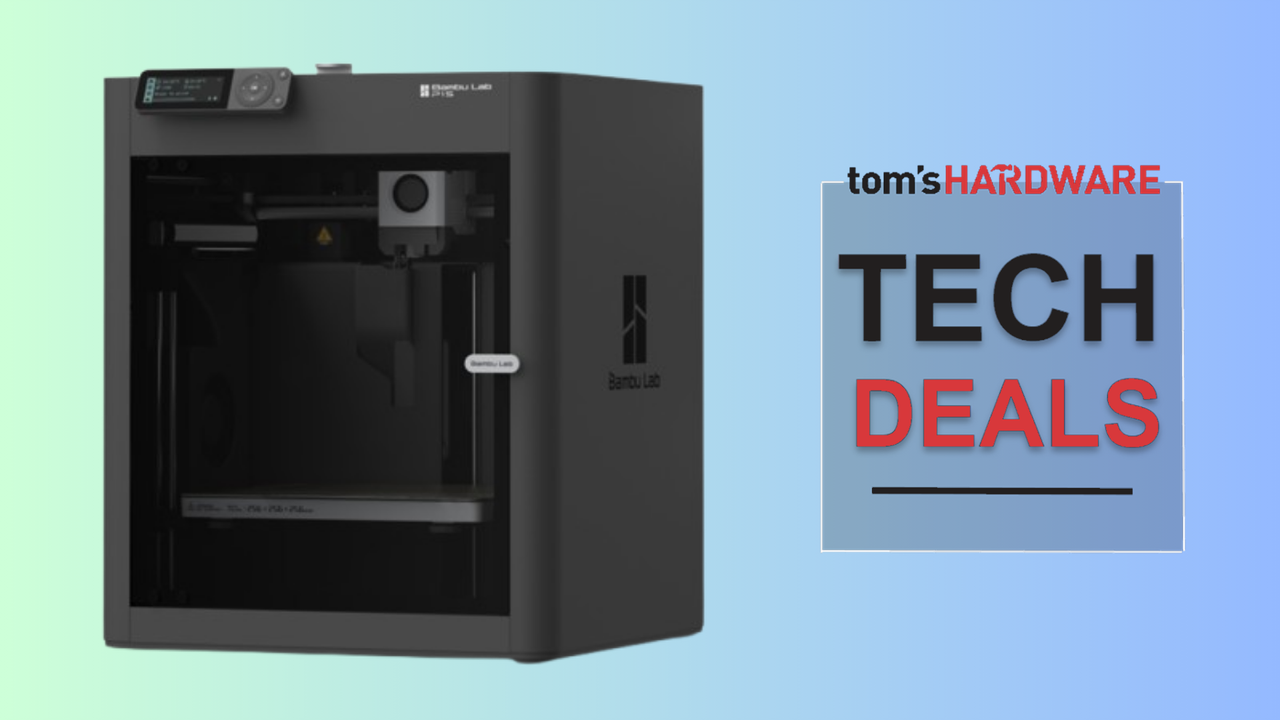
An awesome 3D printer could be yours for a brilliant price. One of our favorite 3D printers, the Bambu Lab P1S, is on sale for $399.99 right now. That price means you'll save $300 compared to its MSRP, scoring you a printer with a seriously decent spec sheet.
This is a good price for the P1S, but we'd be remiss if we didn't make it clear that it isn't a new development. We've seen Bambu Lab slash the cost of the P1S several times in recent months, so it isn't a price we're unfamiliar with. $399 is (so far) the floor for the P1S' price, and while we can't see it jumping back up to $699 any time soon, it doesn't negate what a great printer you're getting here.
If you're new to the 3D printing world, the Bambu Lab P1S should be on your radar. Compared to some of its more complex rivals, the P1S is easy to set up. This is a great all-rounder for beginners and pros, as our Bambu Lab P1S review explains, arriving semi-assembled and requiring only 15 minutes to get set up and running. It has a whole host of features designed to make it easy to use, too, including automatic bed leveling and easy-to-use presets that you can apply to your printing process in the slicer software, making it a more approachable option for novices.
You can start your printing and maker journey in just 15 minutes with the Bambu Lab P1S 3D printer. The P1S is an enclosed printer, making it ideal for high-temperature filament printing, and arrives semi-assembled. Its 20000 mm/s² acceleration limit makes it fast, too, and you can even remotely monitor your prints via the built-in timelapse camera.
You're getting a fully enclosed printing environment with the P1S, so it's a good option for prints that require high temperatures in the right climate. The build volume is 256 x 256 x 256 mm, a large bed size for a budget-focused printer, though you can find larger ones. The bed is made from a textured PEI spring steel sheet which, in our experience, makes it easier to remove your models once the print process is complete.
You're using one of Bambu Lab's proprietary 0.4mm nozzles as standard with this printer, which is attached to a direct drive extruder. An extruder like this one gives better pressure control while you're printing, which improves accuracy and avoids filament waste. You can print pretty quickly with the Bambu Lab P1S, too, as it's able to achieve a 20,000 mm/s² acceleration limit here.
Wireless connectivity comes as standard, with Wi-Fi and Bluetooth connections offered. However, if you'd rather stick close to the printer, you can load models to print directly using the P1S' microSD card slot. The built-in LCD screen and control panel let you choose your desired print options and settings. You've also got a time-lapse camera that can help you watch (or rewatch) the whole print process from start to finish.
The P1S might have been replaced by its successor, the P2S, in our best 3D printer guide, but the OG is still a firm favorite, and its near-perfect review score still holds. The $399 sale price here makes it a serious option for someone looking to begin printing on a budget, especially as stock levels have fluctuated during sales events.
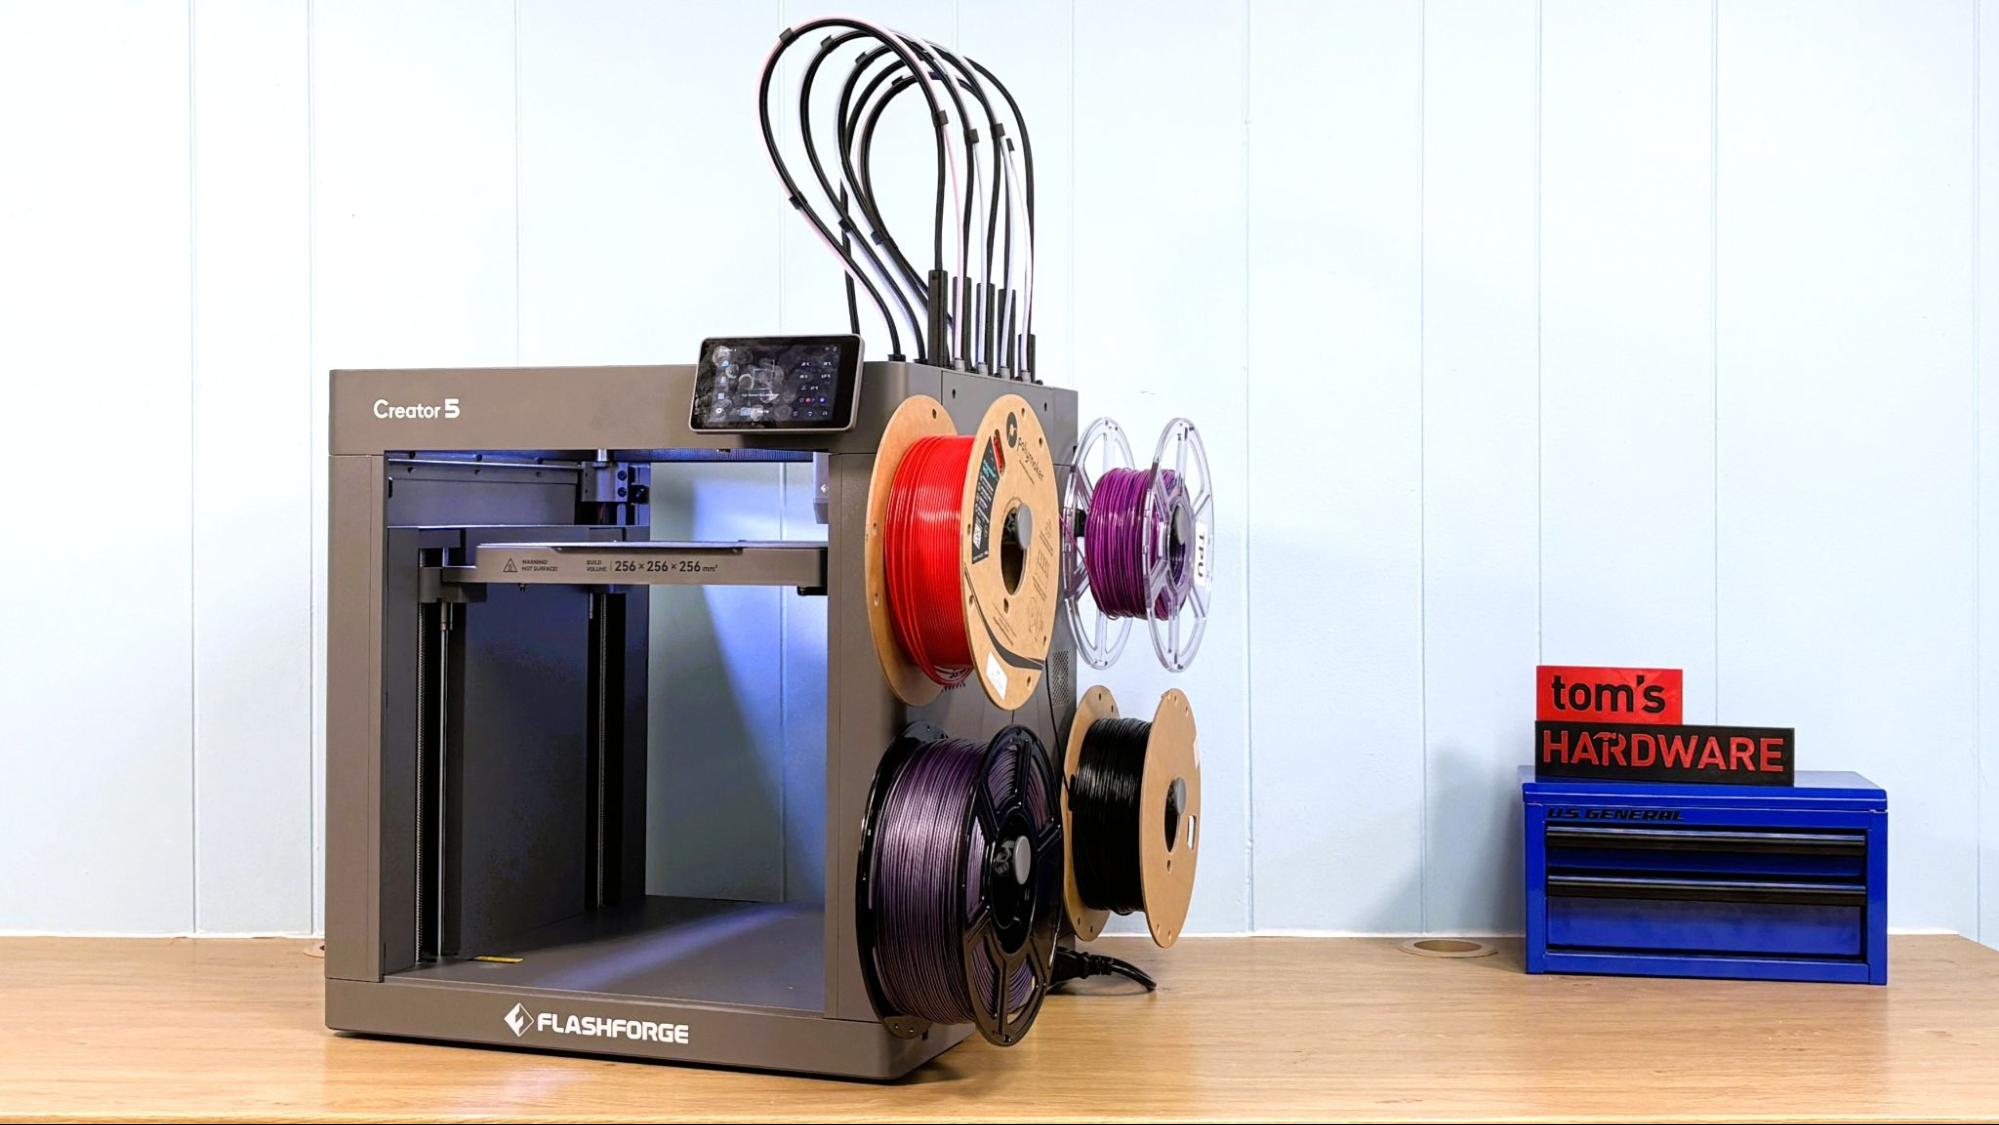
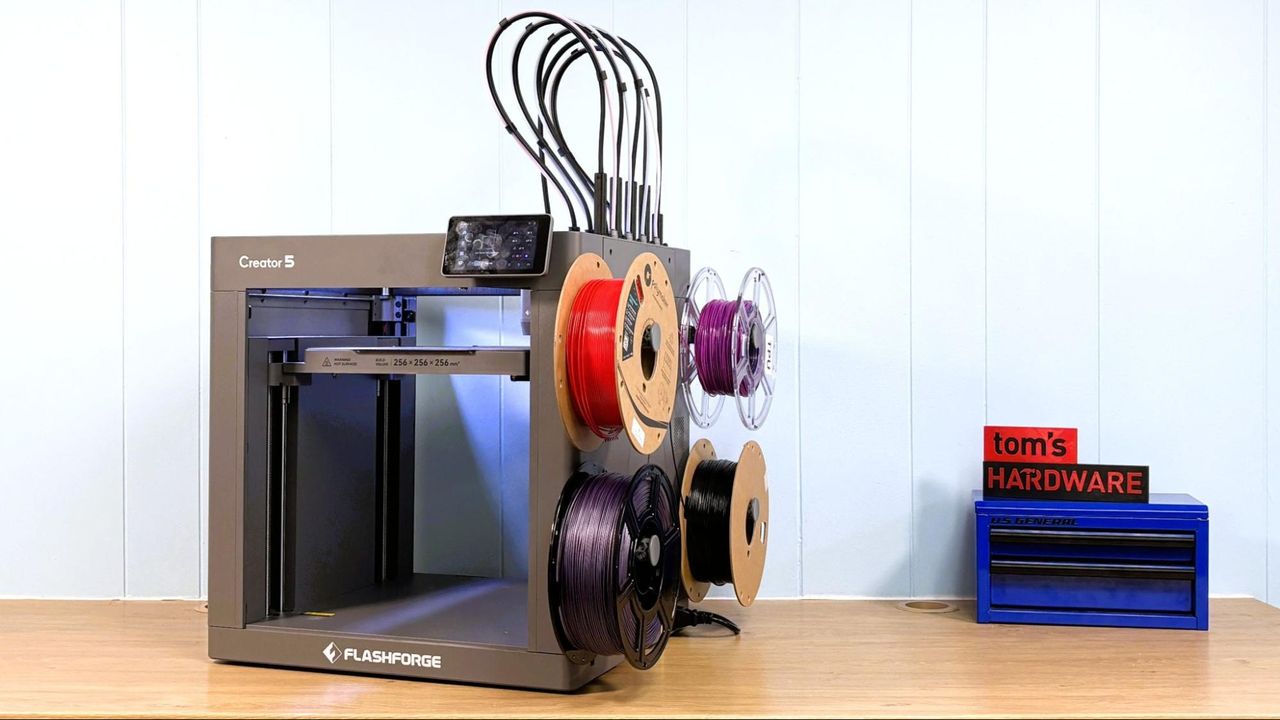
The Flashforge Creator 5 is the best budget tool changer currently on the market. Of course, there are only two other true toolchangers out there right now, three if you include the Bambu Lab H2C nozzle swapper. At the time of this review, the Creator 5 is on sale for $699, after a $100 discount. For that, you get a solid, open-frame Core XY machine with a 256 mm cubed build volume and four speedy toolheads that won’t waste your filament budget.
The Creator 5 is not perfect. It purges an insane amount of material when it loads, and the required prime block is surprisingly large. If you don’t use the Flashforge filament profiles, you’ll be in for a shock at the heft of the prime tower. Why? They only adjusted the filament profile for their own material. Everything purges at single-nozzle AMS levels. This setting is buried pretty deep in the slicer, and it took some time for me to find and correct it.
The printer handle high temperature materials well, which is more relevant if you opt for the enclosed Creator 5 Pro. It's still useful on the open frame machine because it loads and unloads at a higher temp to avoid clogging.
Being an open-frame printer, the Flashforge Creator 5 is limited in the materials it can print. We used the basics, PLA, PETG, and TPU for most of our prints. Since the hot end temperature can go all the way to 320°C and bed can get to 120°C we did try some higher temp filaments like PET-GF which printed fine at 310°C.
There’s no upgrade path to take the Creator 5 to an enclosed Pro, something that other companies might offer. Even though it looks like Flashforge uses the same case for both machines, there’s no fan behind the exterior grill for extra cooling, and no way to install one. However, if your plan is to print in multicolor PLA, PETG, and TPU, this is a good, no-frills machine for your workshop. It's one of the best 3D printers we’ve seen this year, and I highly recommend checking it out for your next multicolor machine.
Specifications: Flashforge Creator 5
Build Volume
256 x 256 x 256 mm (10.07 x 10.07 x 10.07 inches)
Material
PLA/PETG/TPU (up to 320 degrees)
Extruder Type
Direct Drive Tool Changer
Nozzle
.4mm stainless steel proprietary
Build Platform
Double-sided textured PEI steel flex plate
Bed Leveling
Automatic + Z height
Filament Runout Sensor
Yes
Connectivity
USB, LAN, Wi-Fi
Interface
4-inch Color Touch Screen
Machine Footprint
520 x 443 x 710 mm (20.47 x 17.44 x 27.95 inches)
Machine Weight
14 KG (30.86 lbs)
MSRP
$799
Release Date for Pre-Orders
June 2026
Flashforge Creator 5: Included in the box
(Image credit: Tom's Hardware)
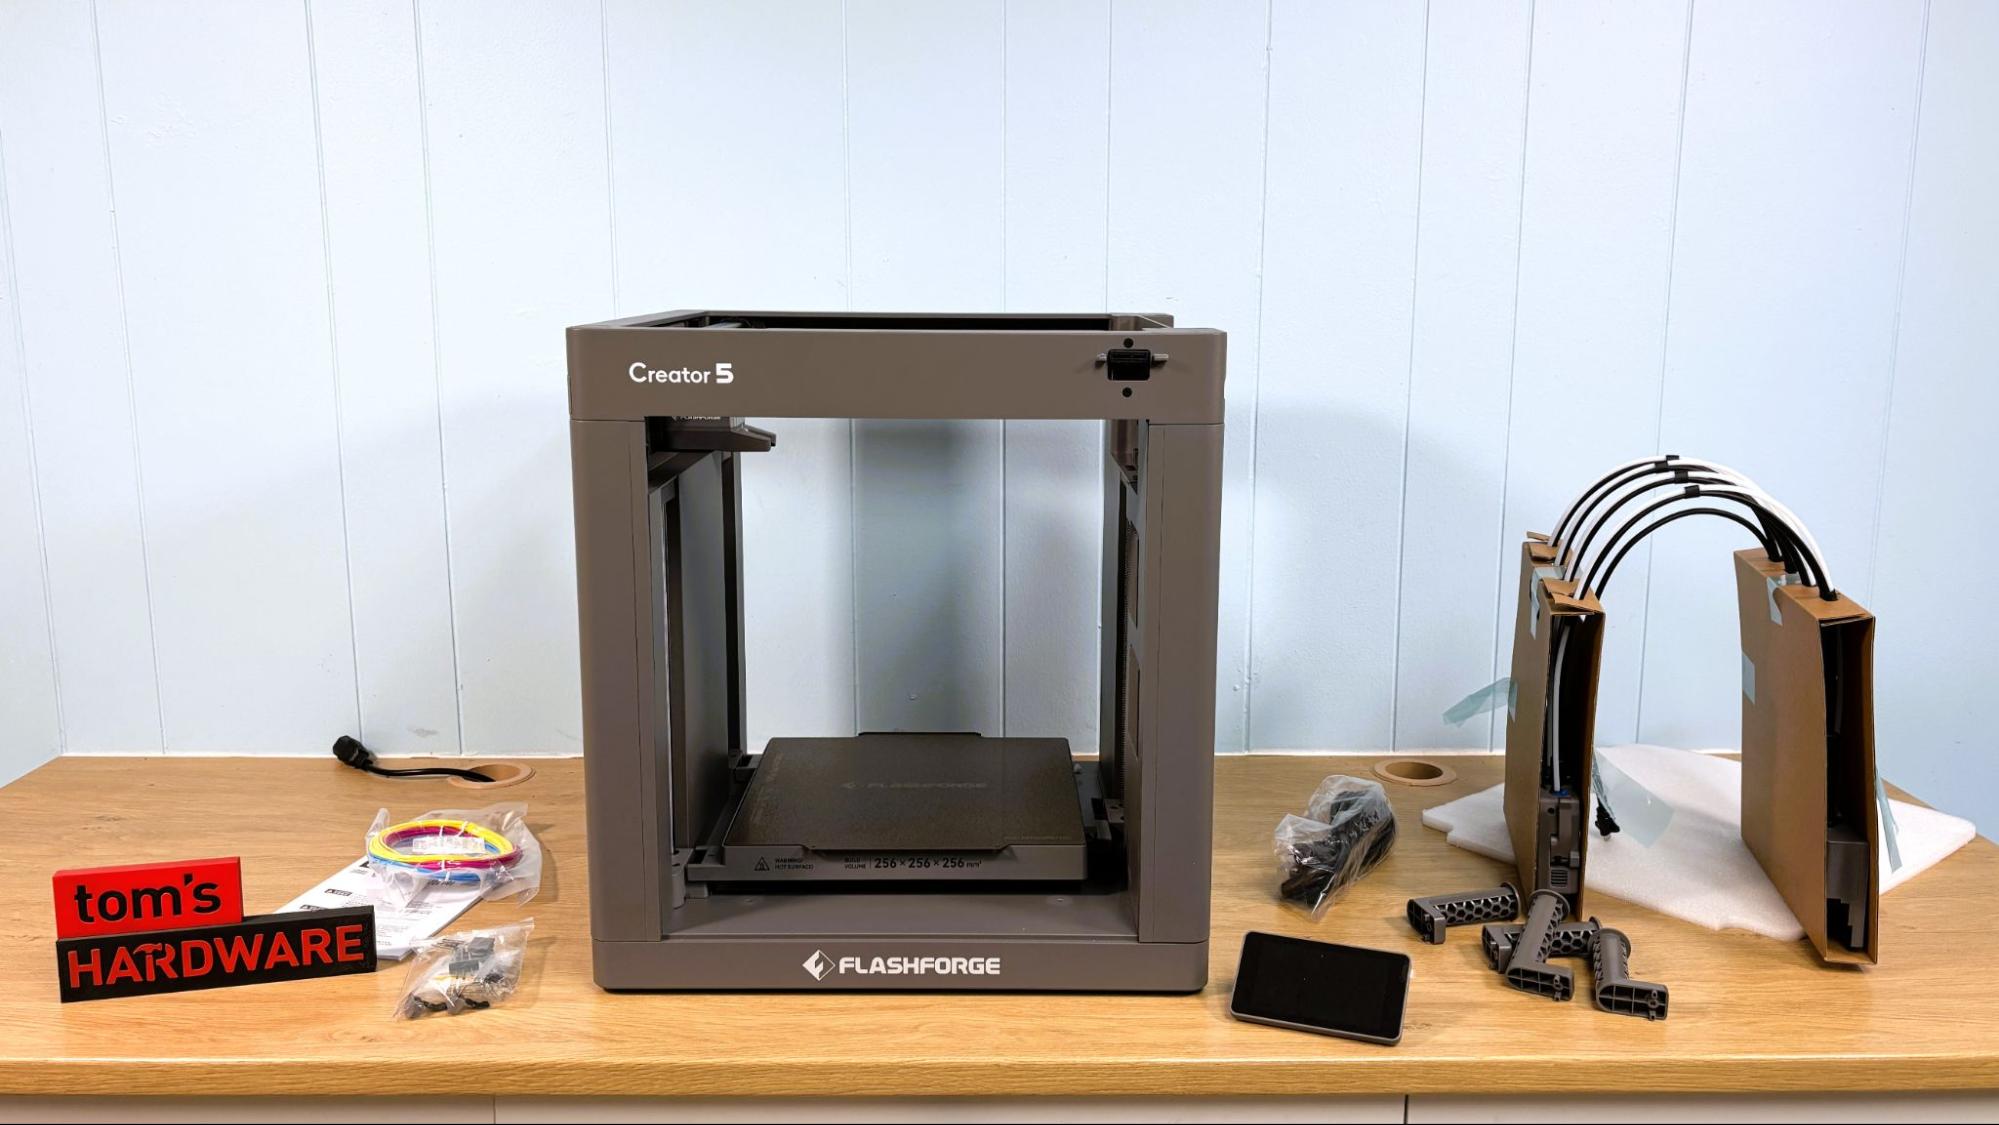
The Flashforge Creator 5 arrives mostly assembled. The tool heads are pre-assembled with a mounting plate. The spoolholders, touch screen, toolkit, filament coils, and quick start guide are included.
Design of the Flashforge Creator 5
(Image credit: Tom's Hardware)
The Flashforge Creator 5 is a fast Core XY open-frame printer with a simple grey case that prioritizes mechanical simplicity to keep the price down. We mainly see this in how filament is manually loaded to each tool head and requires picking up each head to physically hold down a lever while you push the material through to the nozzle.
The build volume is 256 mm³, which is a fairly standard size when compared to most 3D printers. The removable flex plate is two-sided and coated with a common PEI textured surface, which gave us no problem.
As I mentioned previously, the open frame case is not meant to be upgraded with a door or top lid. It appears to be the same one used on the Pro version of this machine, which is a great cost-saving method for Flashforge, but disappointing to the buyer when you notice there are no fans behind the vents in the body.
The X and Y axes run on beefy 8mm belts with a linear rail for the X axis and linear rods for the Y. The Z runs on three linear rods, driven by three lead screws belted to a single stepper motor.
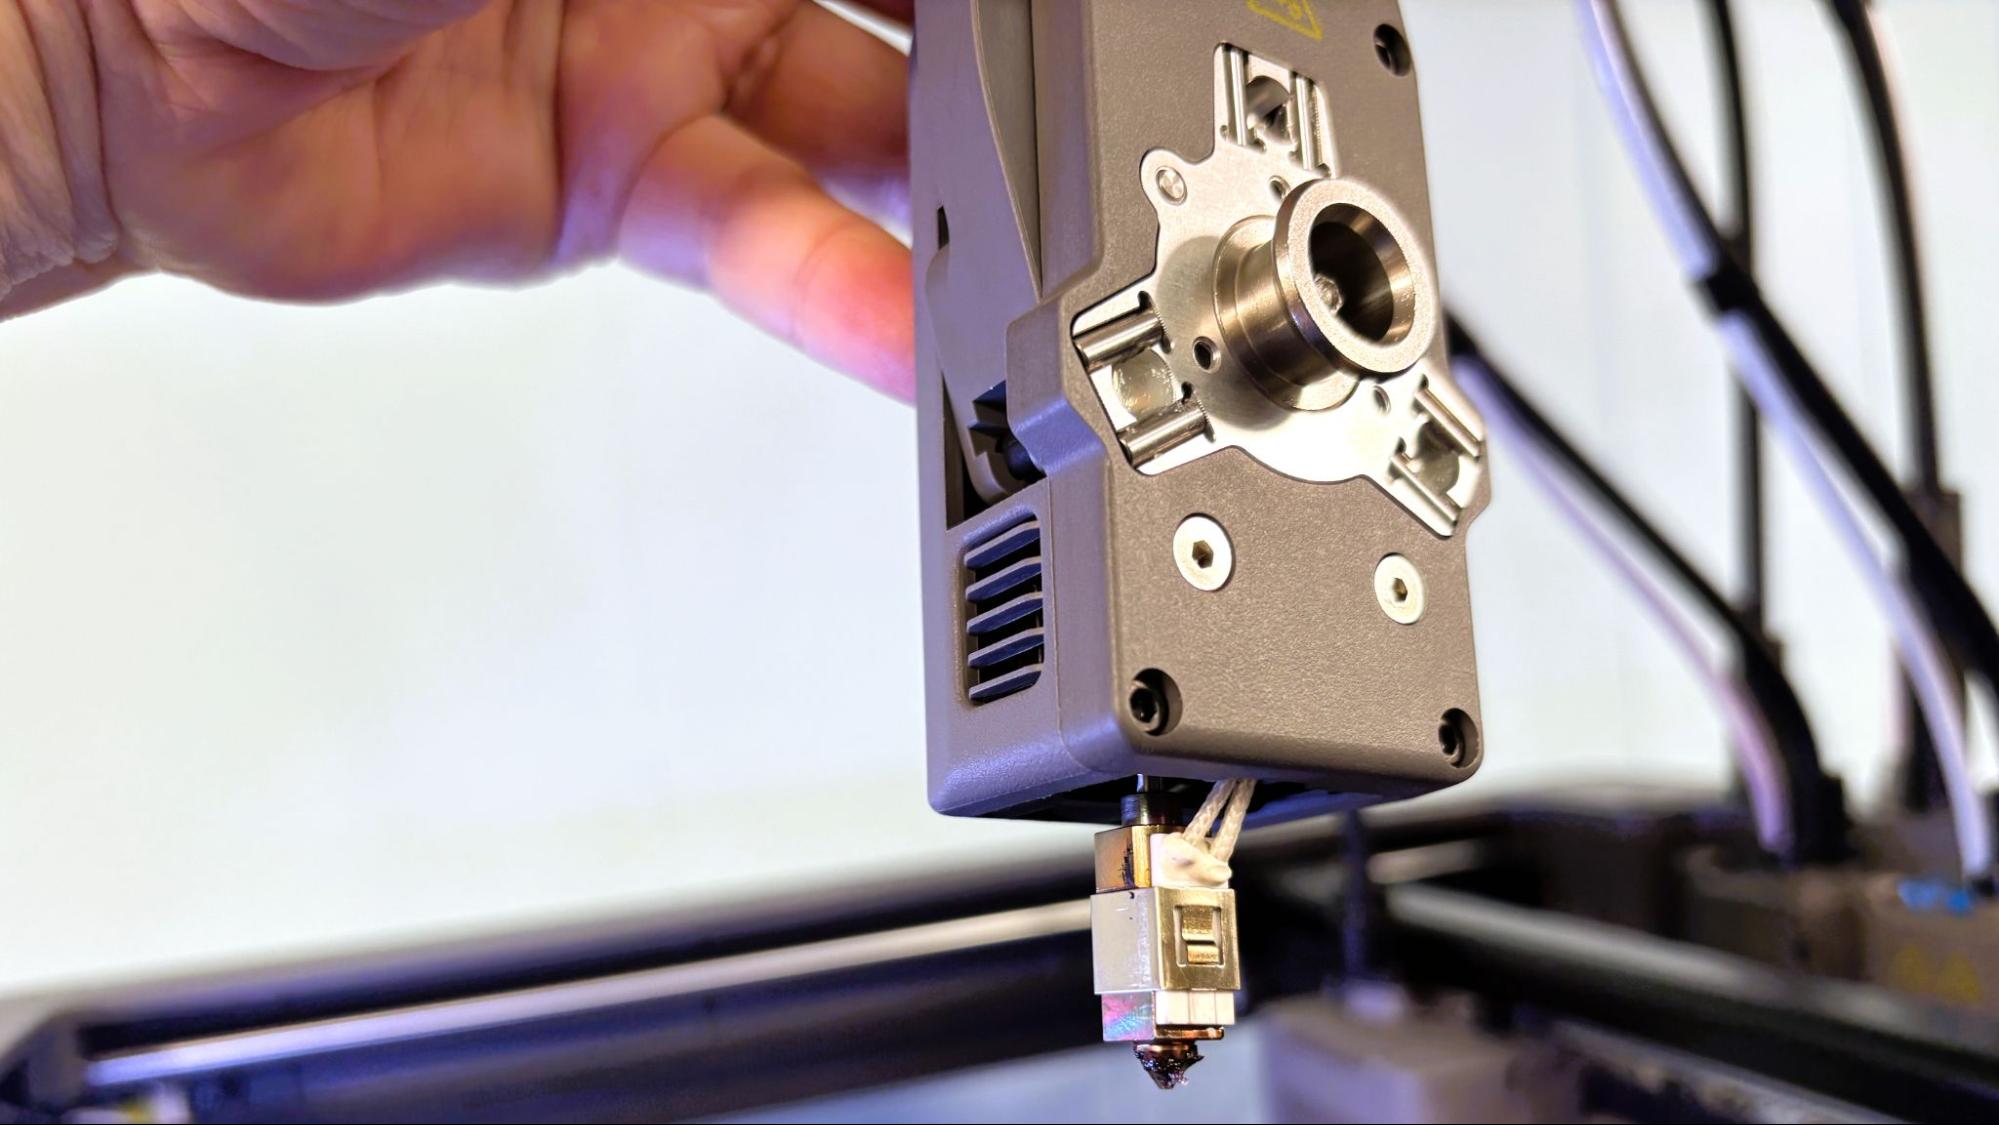
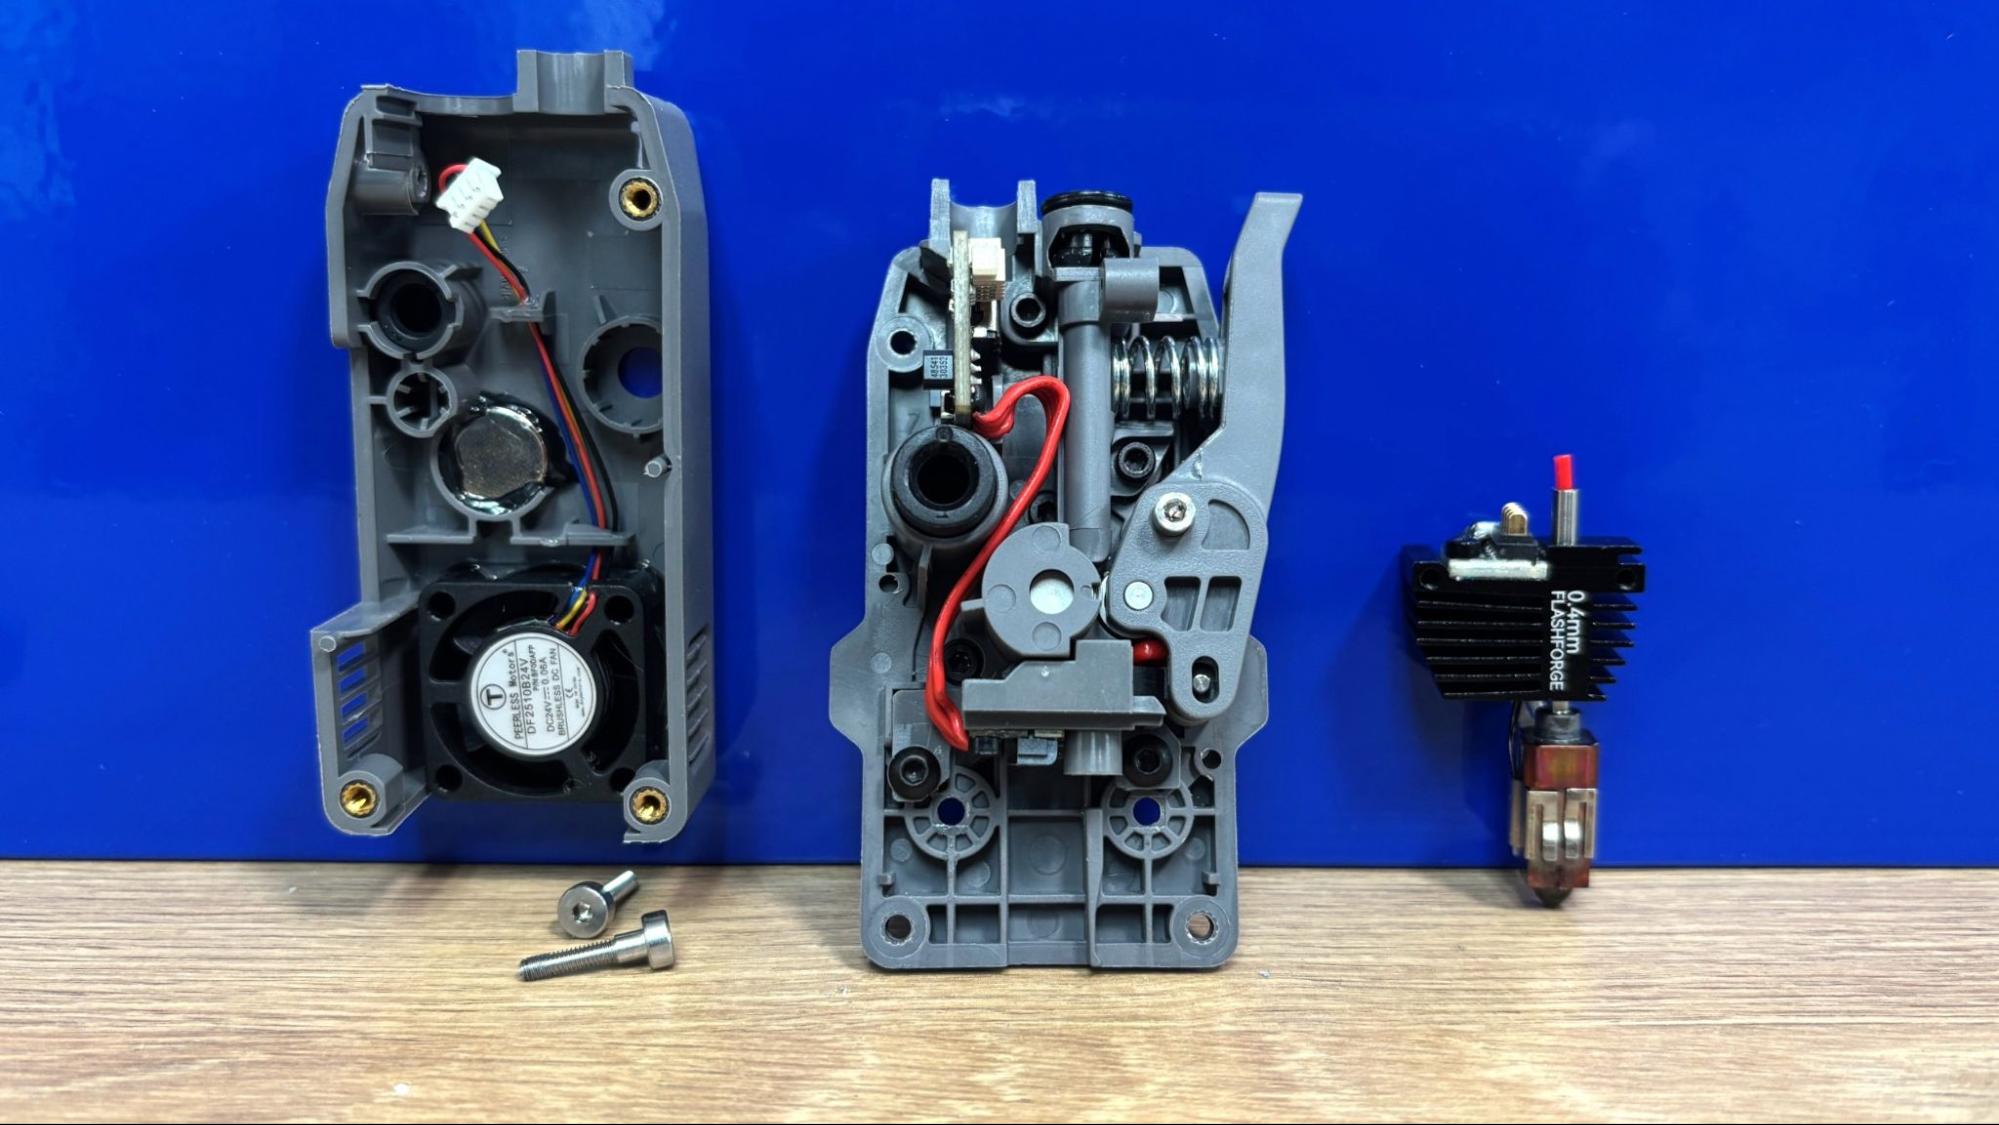
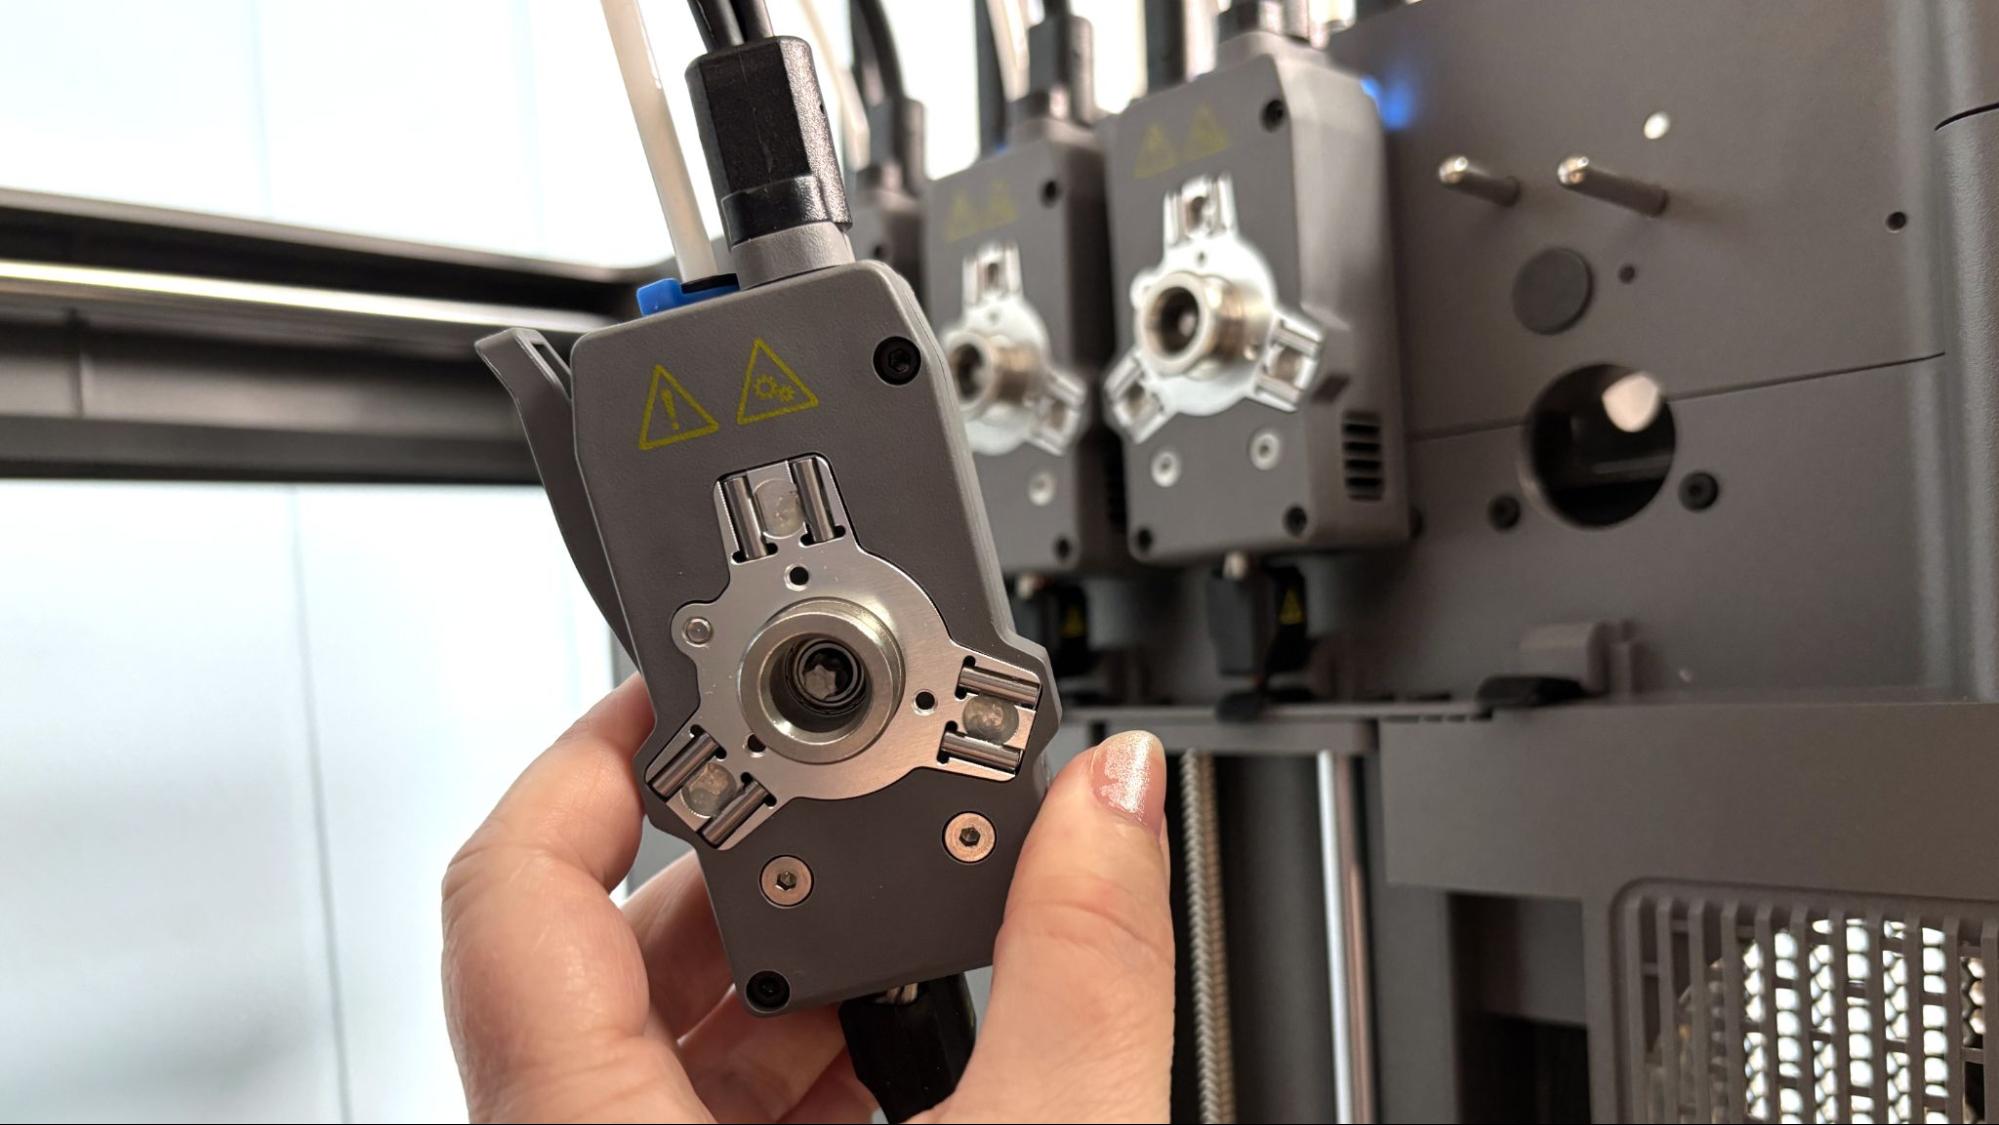
The tool head carriage includes the extruder motor and parts cooling fan, which are shared by four very lightweight tool heads. Each tool head has a manual cutter, hot end, and cooling fan. The tool heads attach to their base with magnets and are picked up by the tool carriage mechanically by gripping the circular protrusion on the back of the tool head, and aligned by mating with three pins on the tool head carriage. This is less complex than motorized latching pins that other machines use, but during our testing, it proved to be a very reliable system.
(Image credit: Tom's Hardware)
The hot end includes the thermistor and heater, and is replaced as a unit. This is not a quick-release system, and you will need tools and a bit of patience to change out the nozzles.
The Flashforge Creator 5 has basic, static, spool holders which allow for the use of a wide variety of spool types from sample spools and coils to oversized spools and spools with dinged up rims. Since the Creator 5 does not automatically unload filament, these work just fine.
Assembling the Flashforge Creator 5
(Image credit: Tom's Hardware)
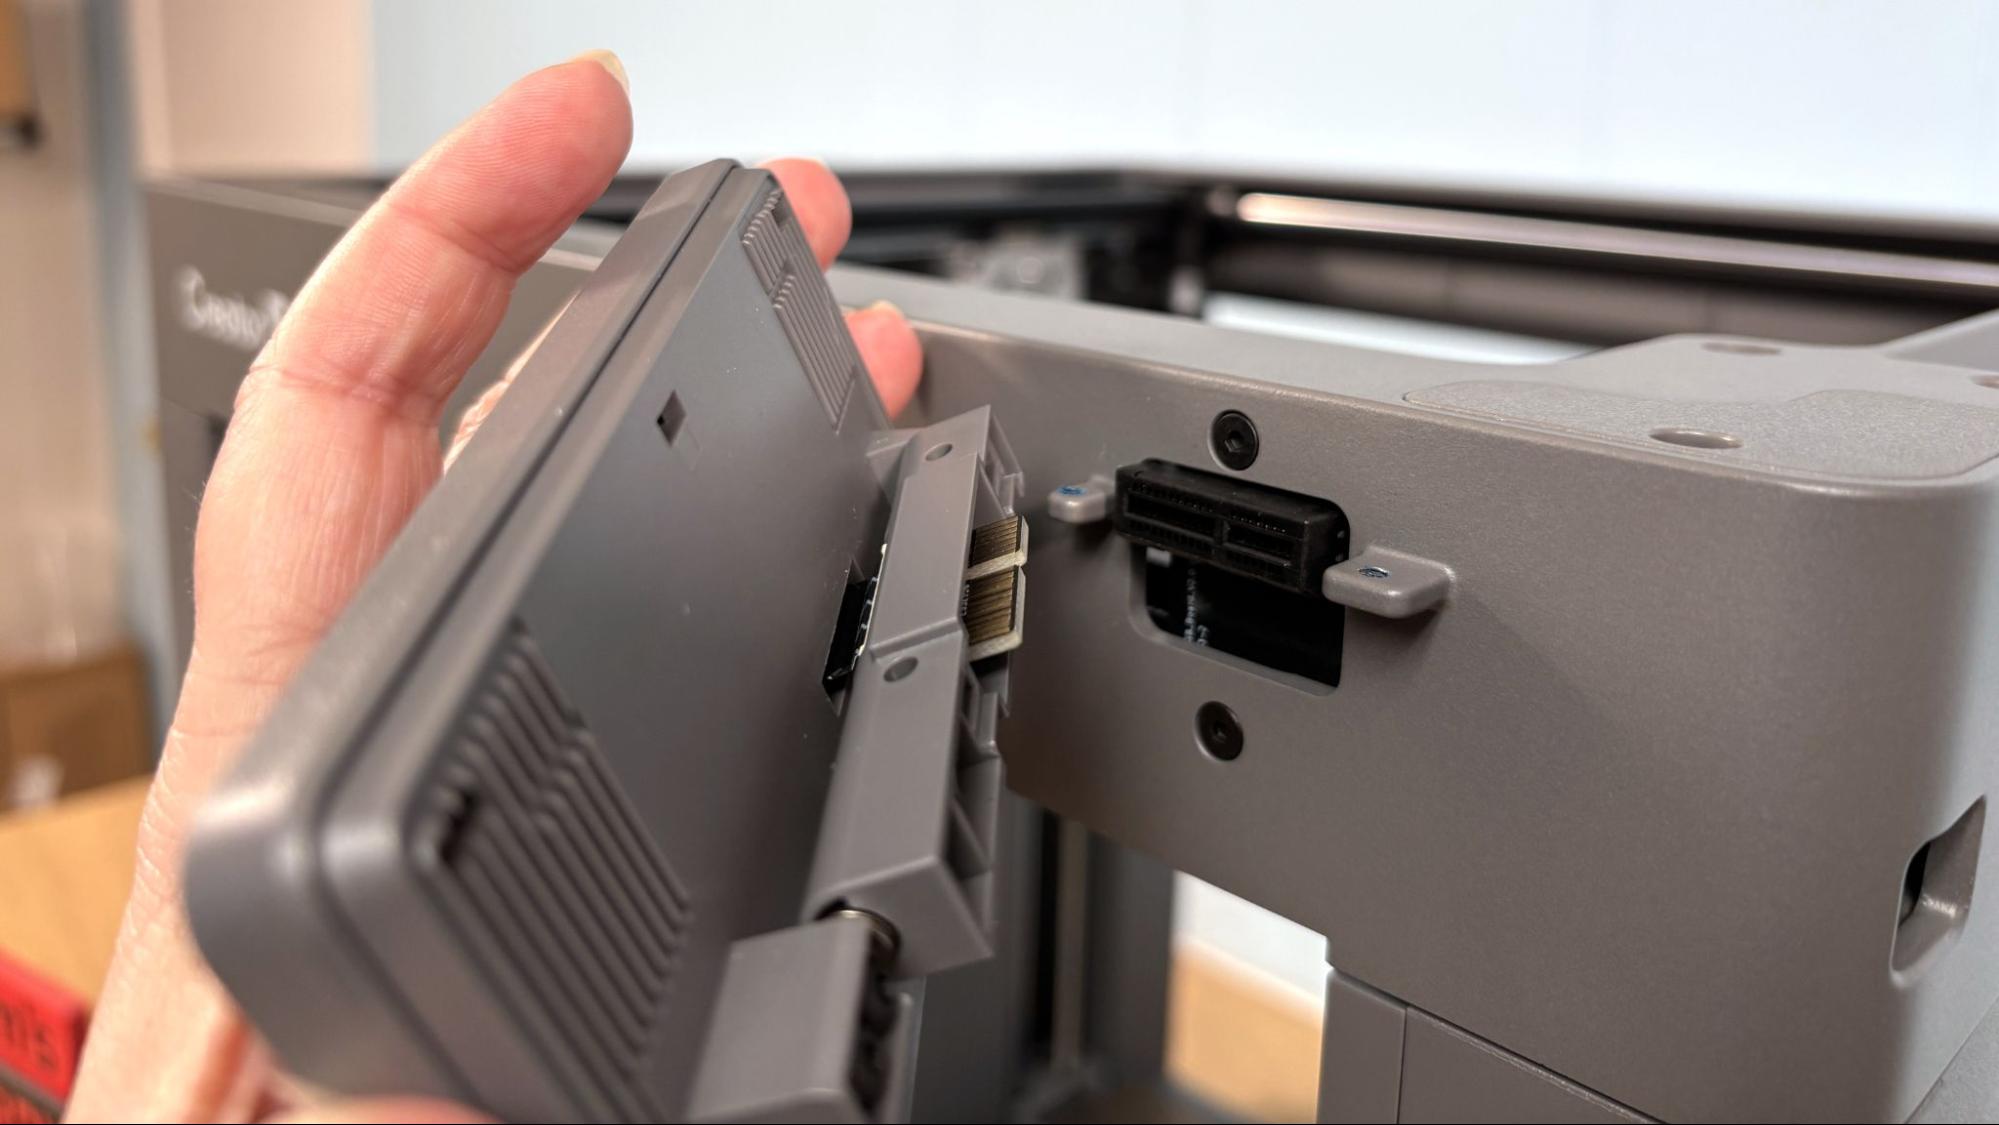
For a complex machine, the Flashforge Creator 5 is very simple to assemble. The 4-inch touchscreen plugs into a socket on the printer, with no ribbon cable to fuss with, and attaches with two screws.
(Image credit: Tom's Hardware)
The tool heads are prewired and attached to a plate, which is screwed into the right side of the printer, and the tool heads dock magnetically, also on the right side of the printer.
The spool holders are attached to the right side of the printer with a single screw each. Four nozzle blockers slot into the right side of the printer to prevent oozing. There is one cable to plug into the toolhead carriage, and it attaches with two screws.
(Image credit: Tom's Hardware)
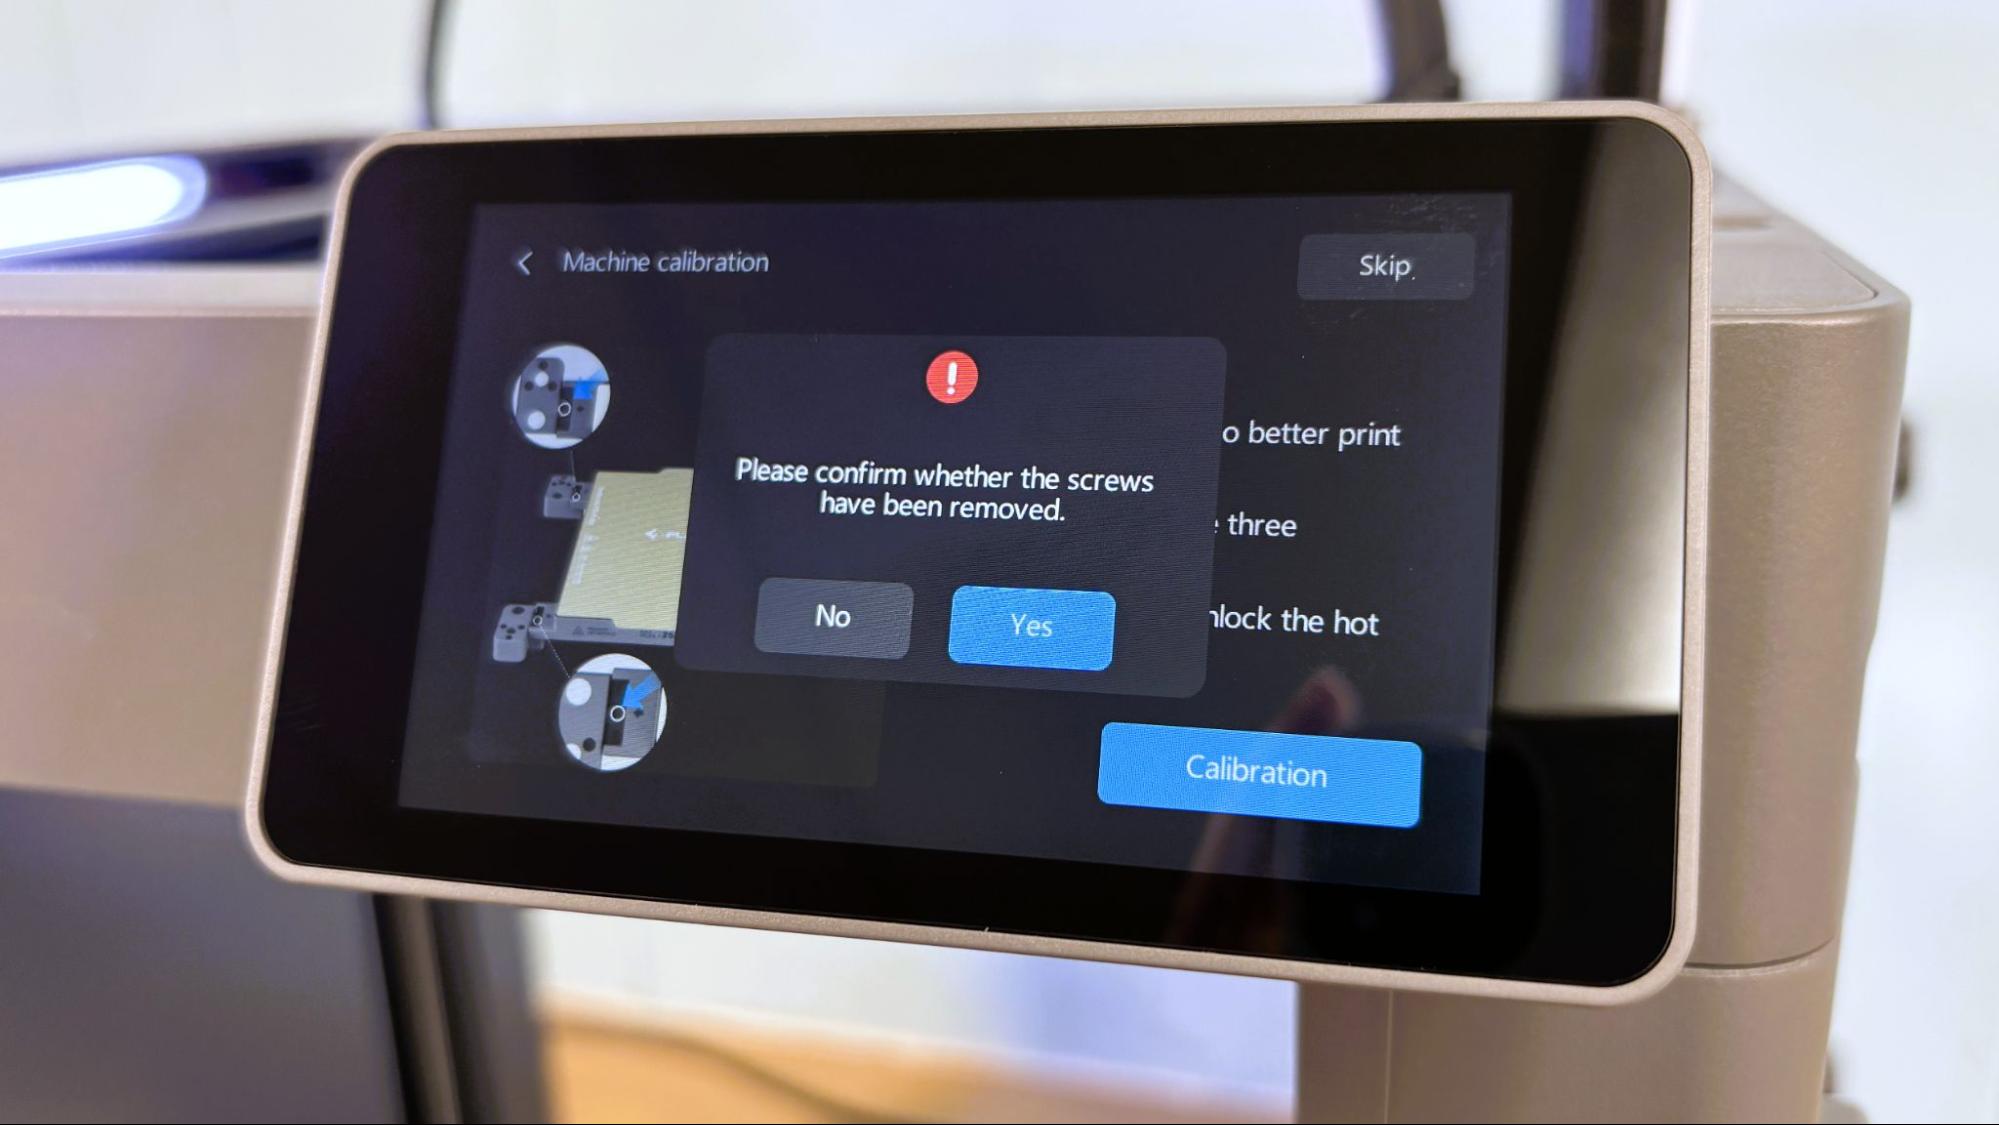
Before calibration, there is a nice reminder to make sure you’ve removed the three screws holding the bad in place for shipping.
Preparing Files / Software for Flashforge Creator 5
(Image credit: Tom's Hardware)
The Flashforge Creator 5 requires a download of Flash Studio, which is based on Orca Slicer, which traces its lineage to Bambu Studio and Prusa Slicer. Flash Studio is stable and works fine for connecting to the Creator 5 in either cloud or LAN mode. The filaments input from the printer itself show up on the device page, but have to be manually chosen in the slicer as they do not sync up automatically.
Flashforge does not give access to the printer directly from a browser using the IP address, but does offer LAN mode if you want to avoid the cloud. Files can also be transferred manually via a USB drive.
(Image credit: Tom's Hardware)
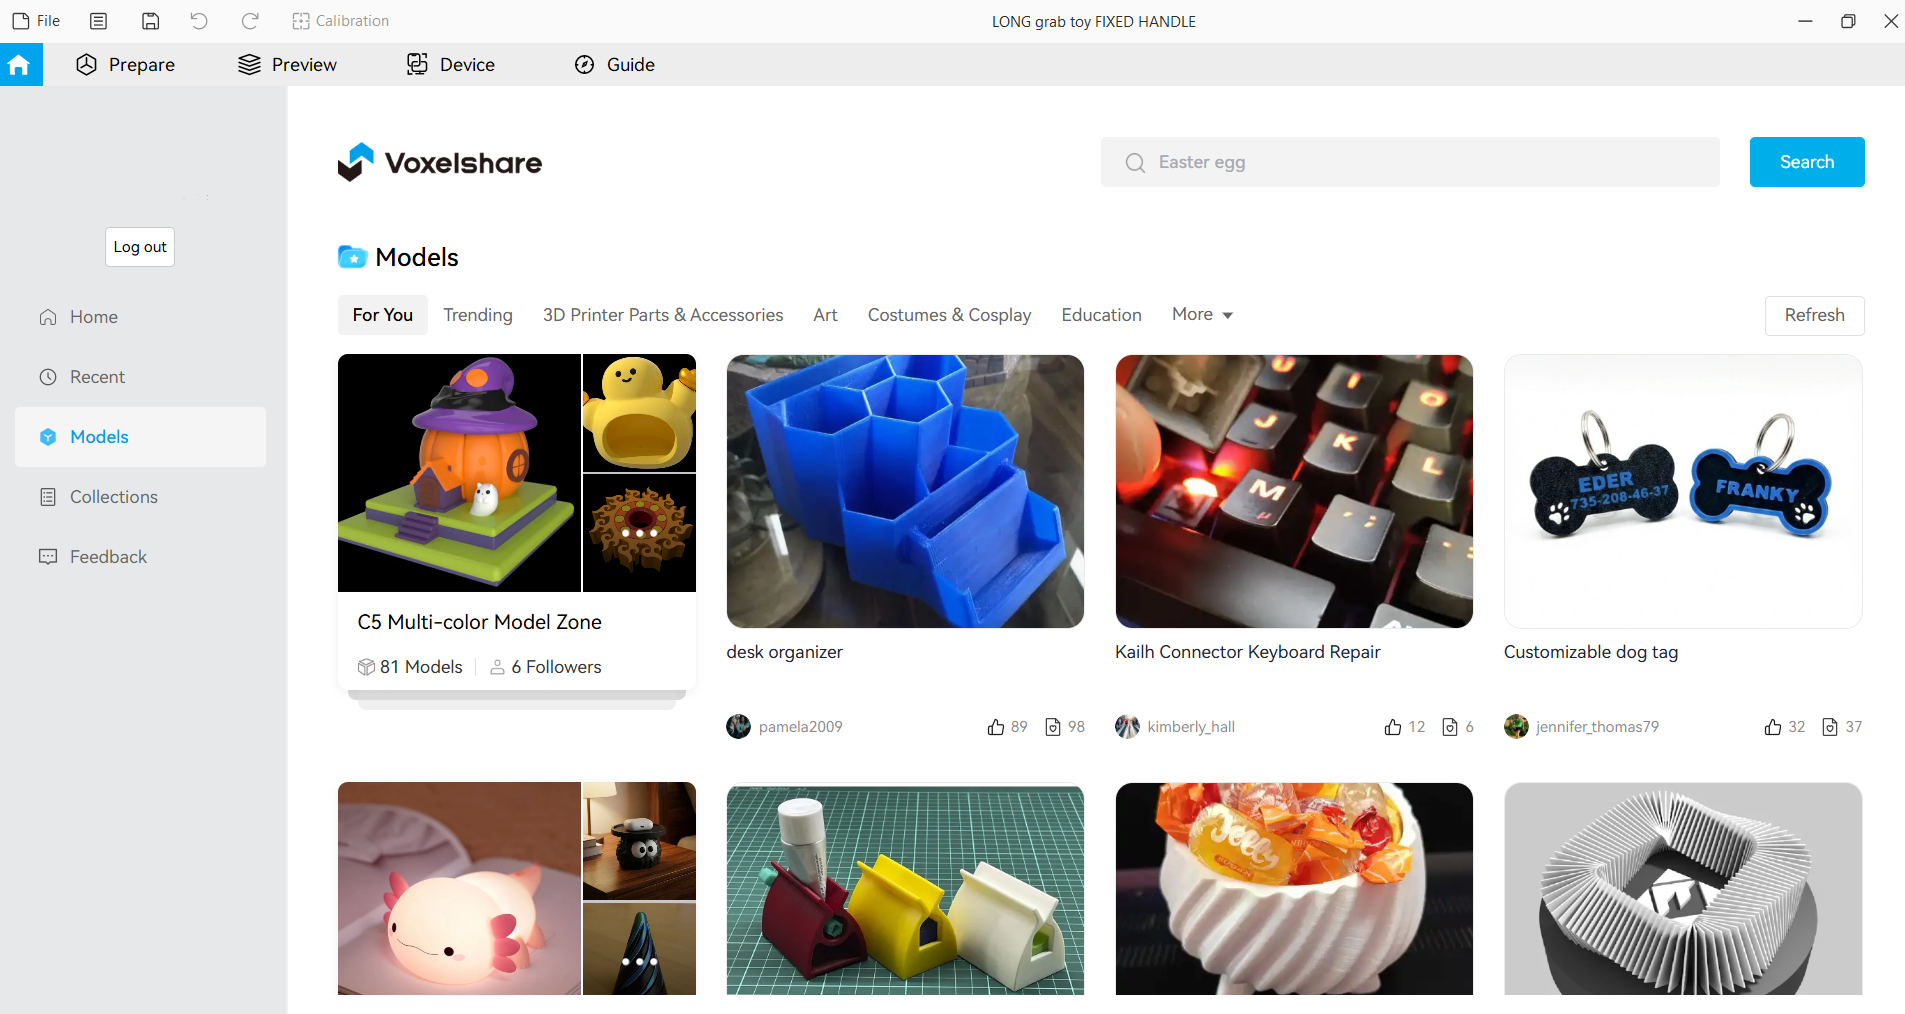
You can access Voxelshare, Flashforge’s file sharing site from the home page of the slicer. While not as deep as some of the other file sharing services out there, it is a good place to start looking for something to print.
(Image credit: Tom's Hardware)
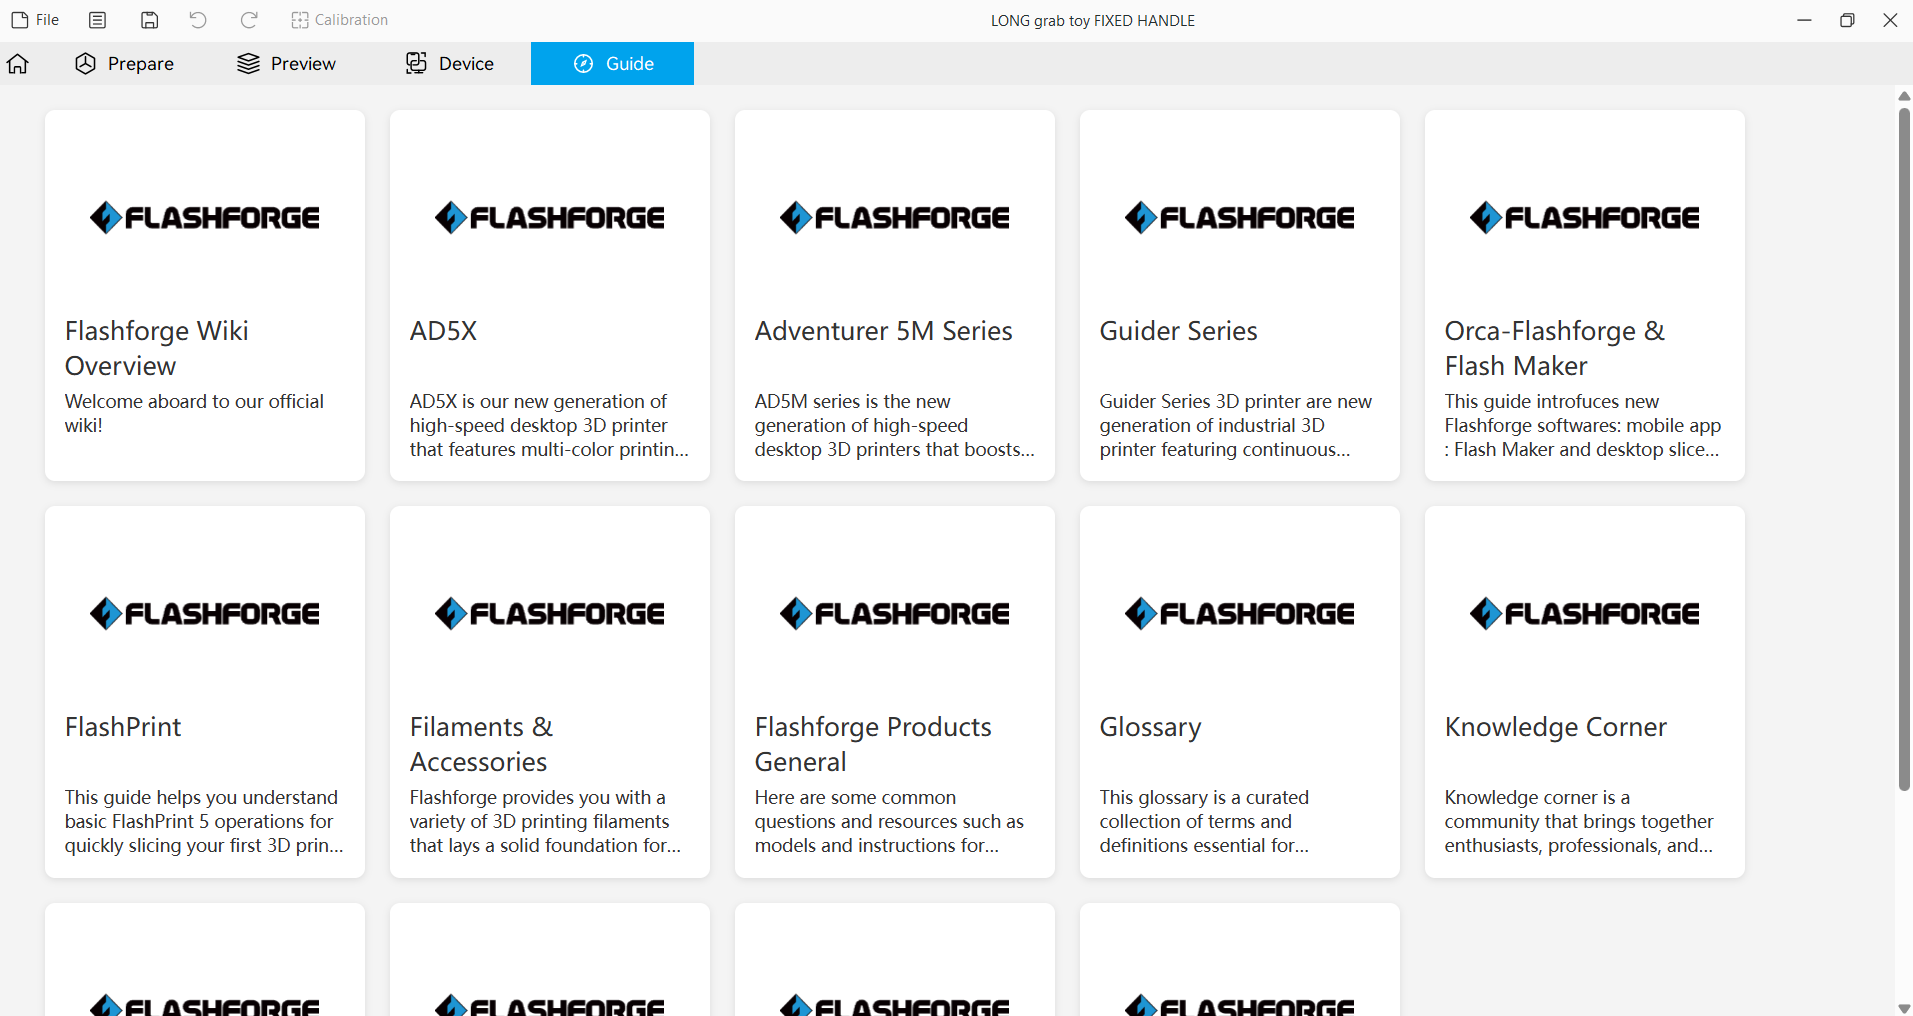
Flashforge does have a nice series of guides that can be accessed directly from the slicer. Information is a little light on the Creator 5 largely because it is still in pre-order status.
Leveling the Flashforge Creator 5
(Image credit: Tom's Hardware)
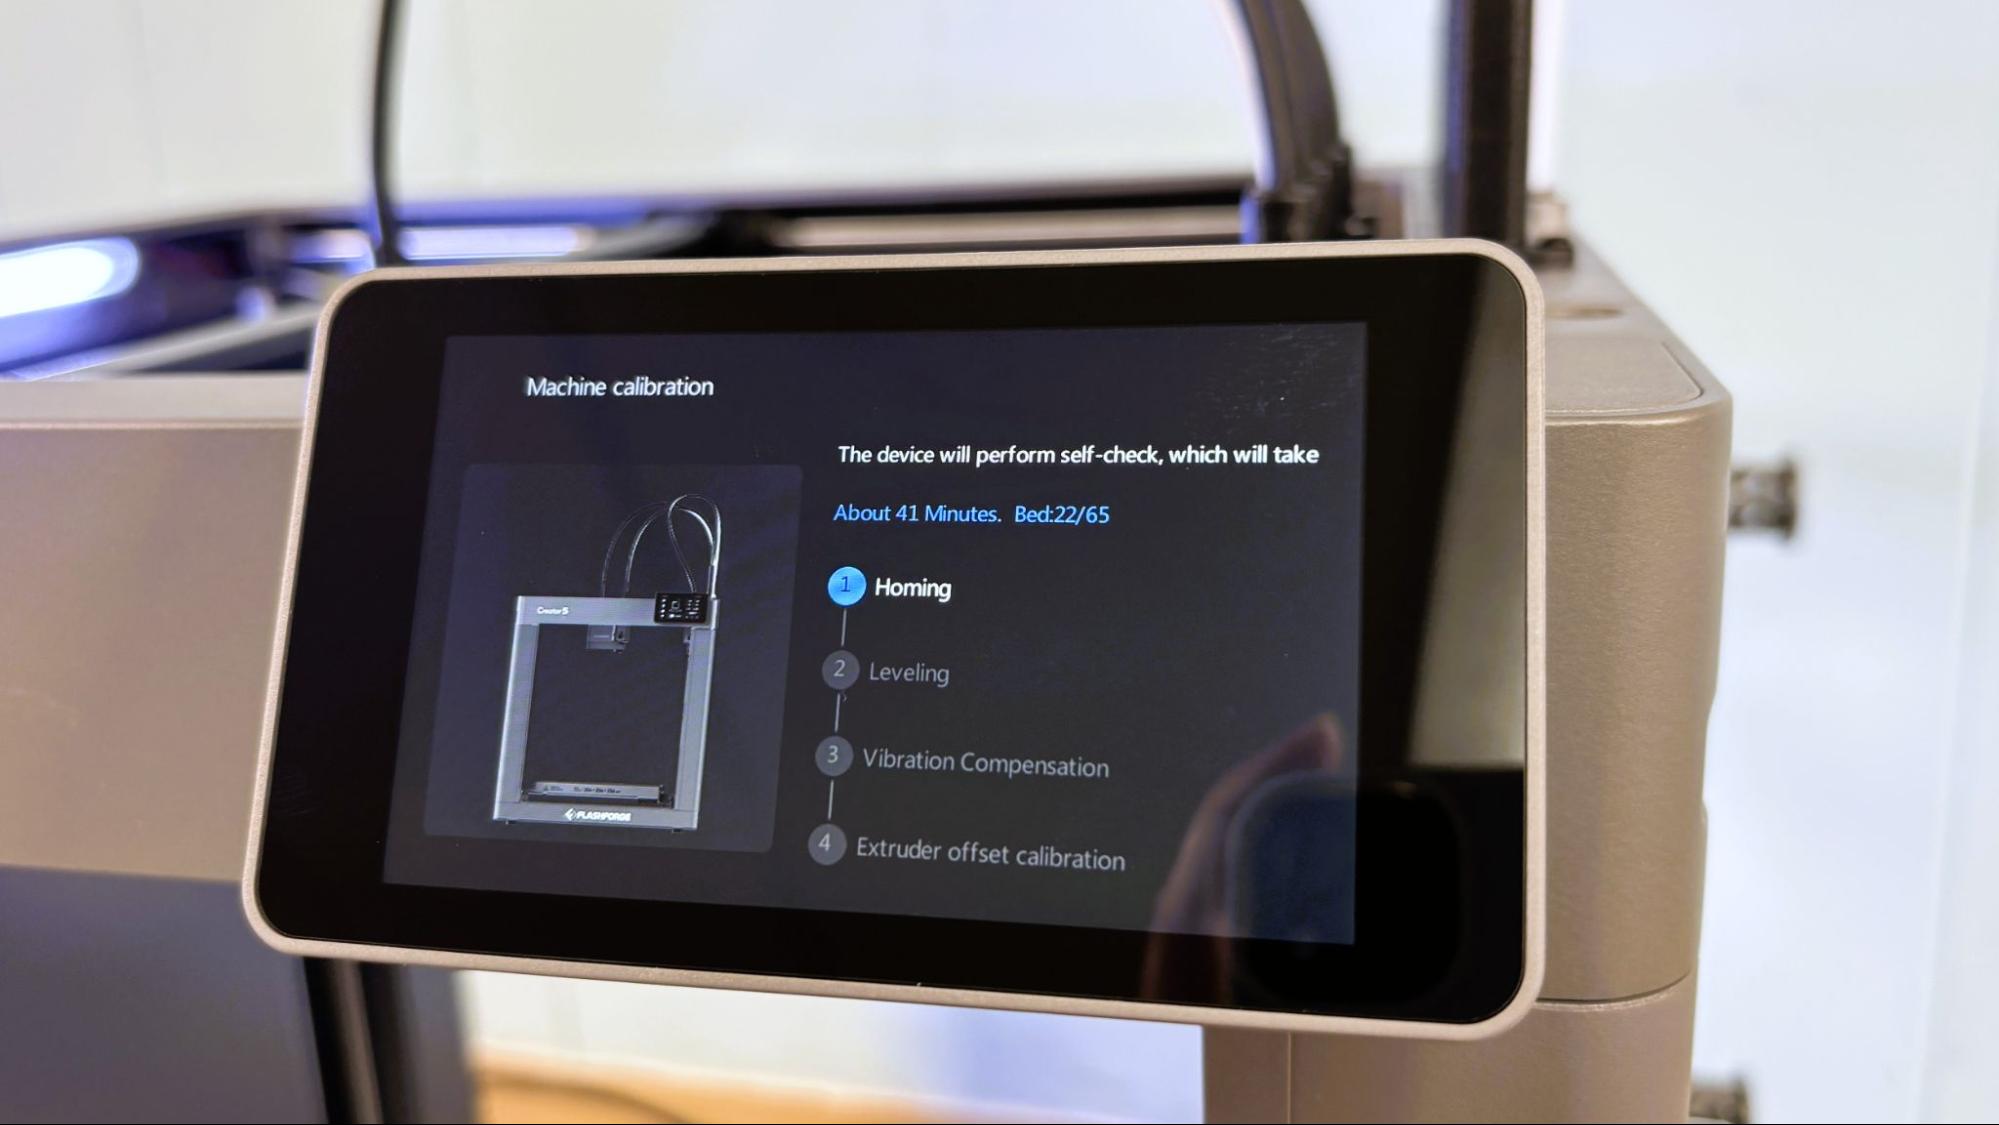
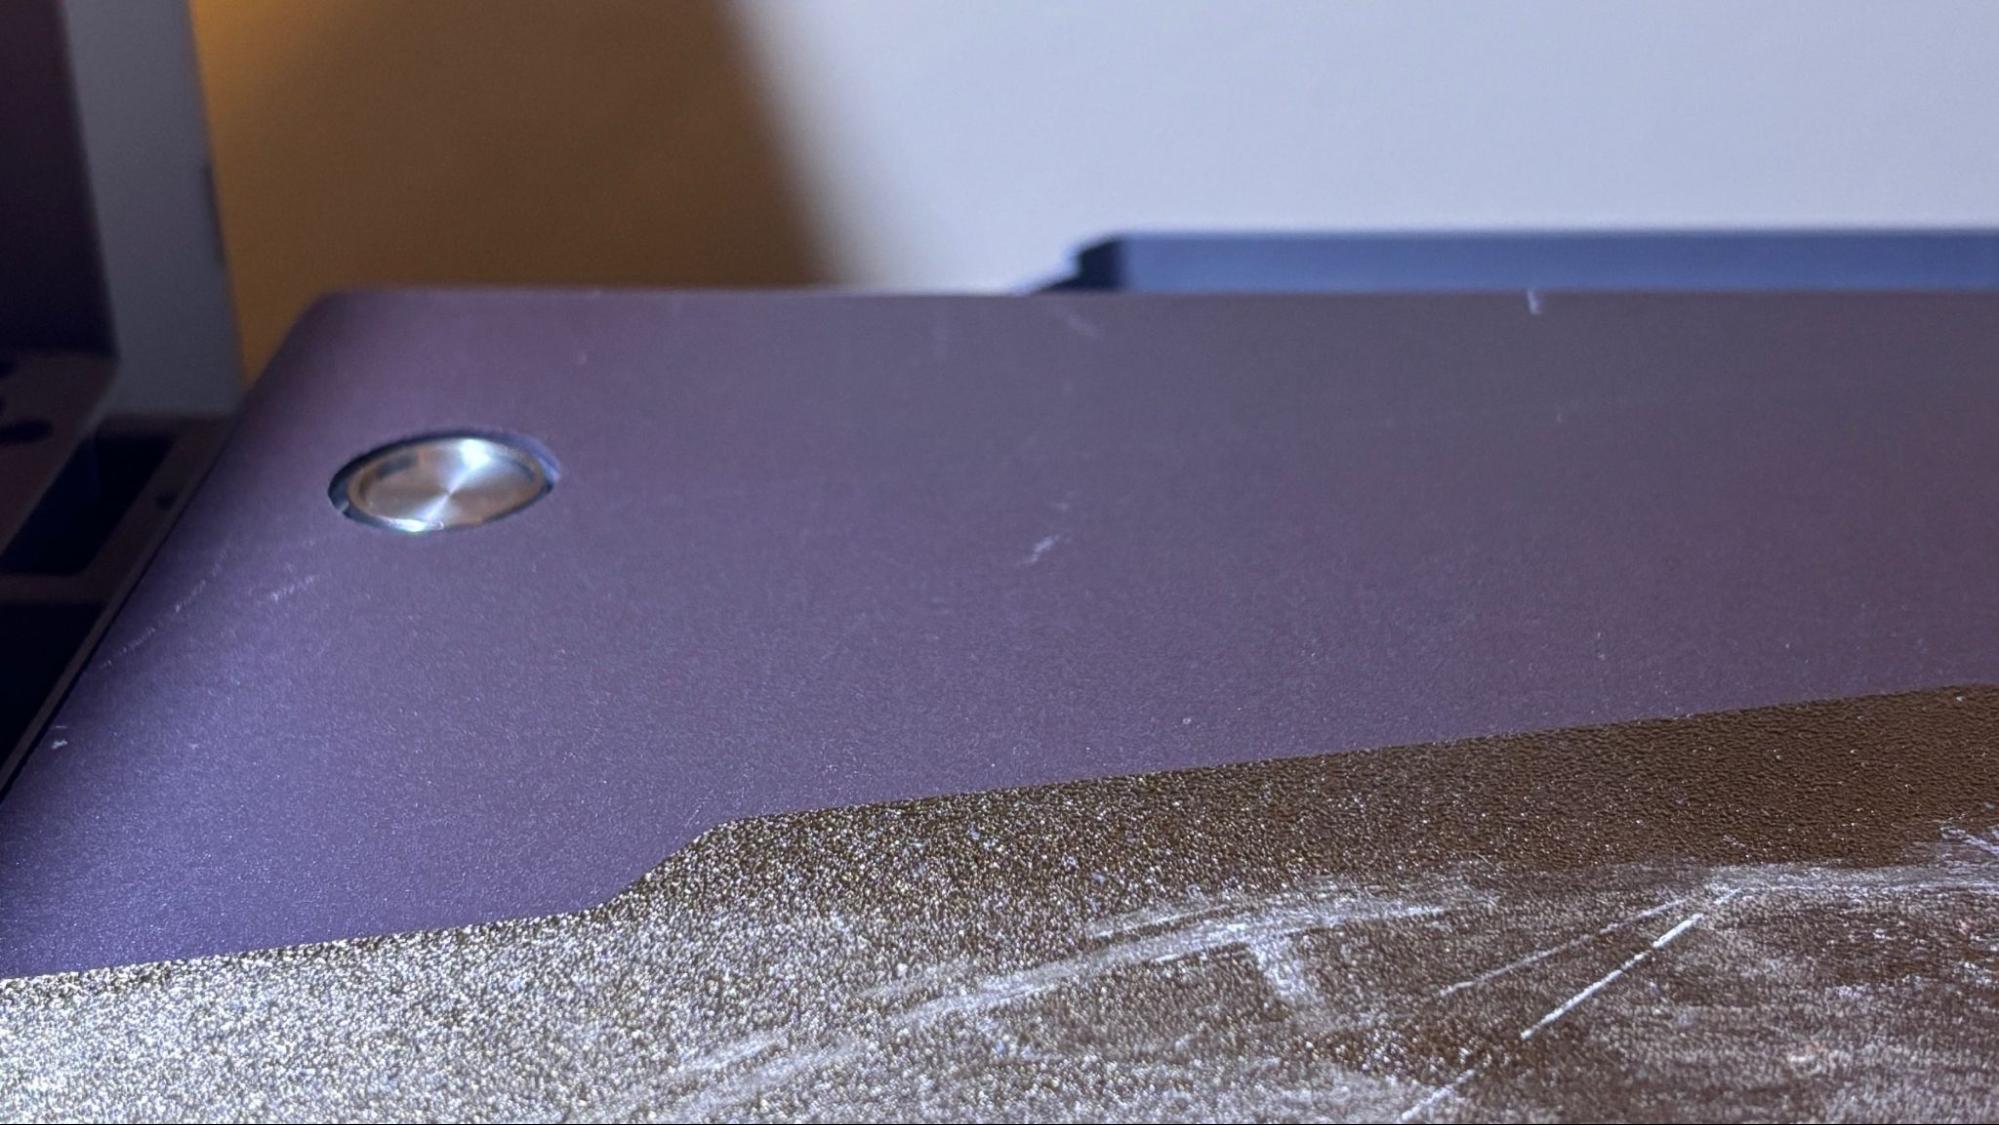
The Flashforge Creator 5 sets Z offset and levels the bed as part of its initial calibration, along with vibration compensation and extruder offset calibration. It calibrates the four tool heads by tapping a calibration disk hidden underneath the build plate. This takes about 40 minutes, but only needs to be done when the machine is first set up.
(Image credit: Tom's Hardware)
The printer offers to recheck the level at the start of each print. Since the printer sets the level using the tool head carriage, without the need to level each individual tool, it’s quick enough to just let it level each time.
Loading Filament on the Flashforge Creator 5
(Image credit: Tom's Hardware)
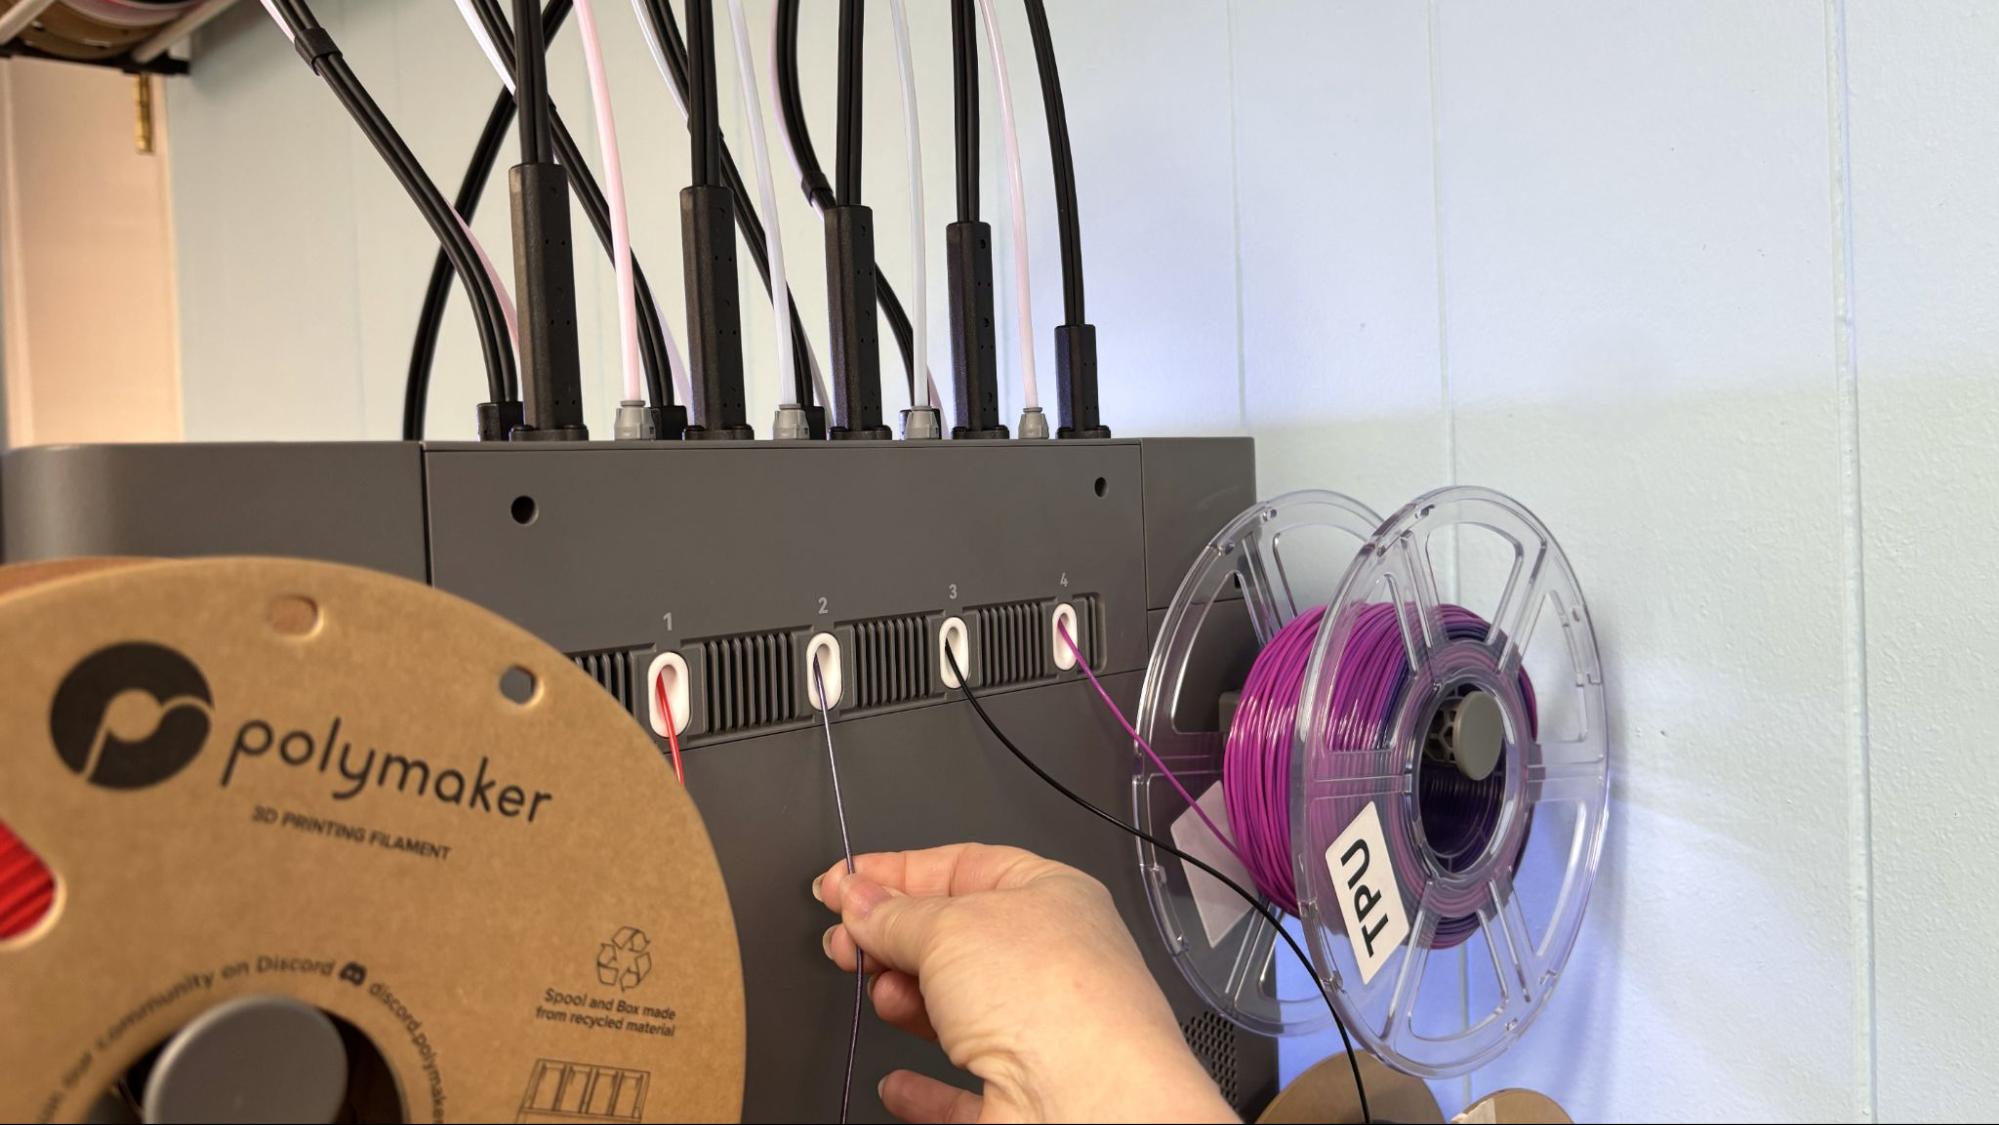
Loading filament in the Flashforge Creator 5 is a very simple, though oddly manual, process. Each tool head has a manual cutter, triggered by a lever, which also releases the extruder. To load filament, place the spool on the holder, push the end of the material into the appropriately numbered port, and hand-feed the material to the tool head. You then remove the toolhead from its dock, press the lever to release the extruder tension, and feed the material until it stops. To unload, you reverse the process.
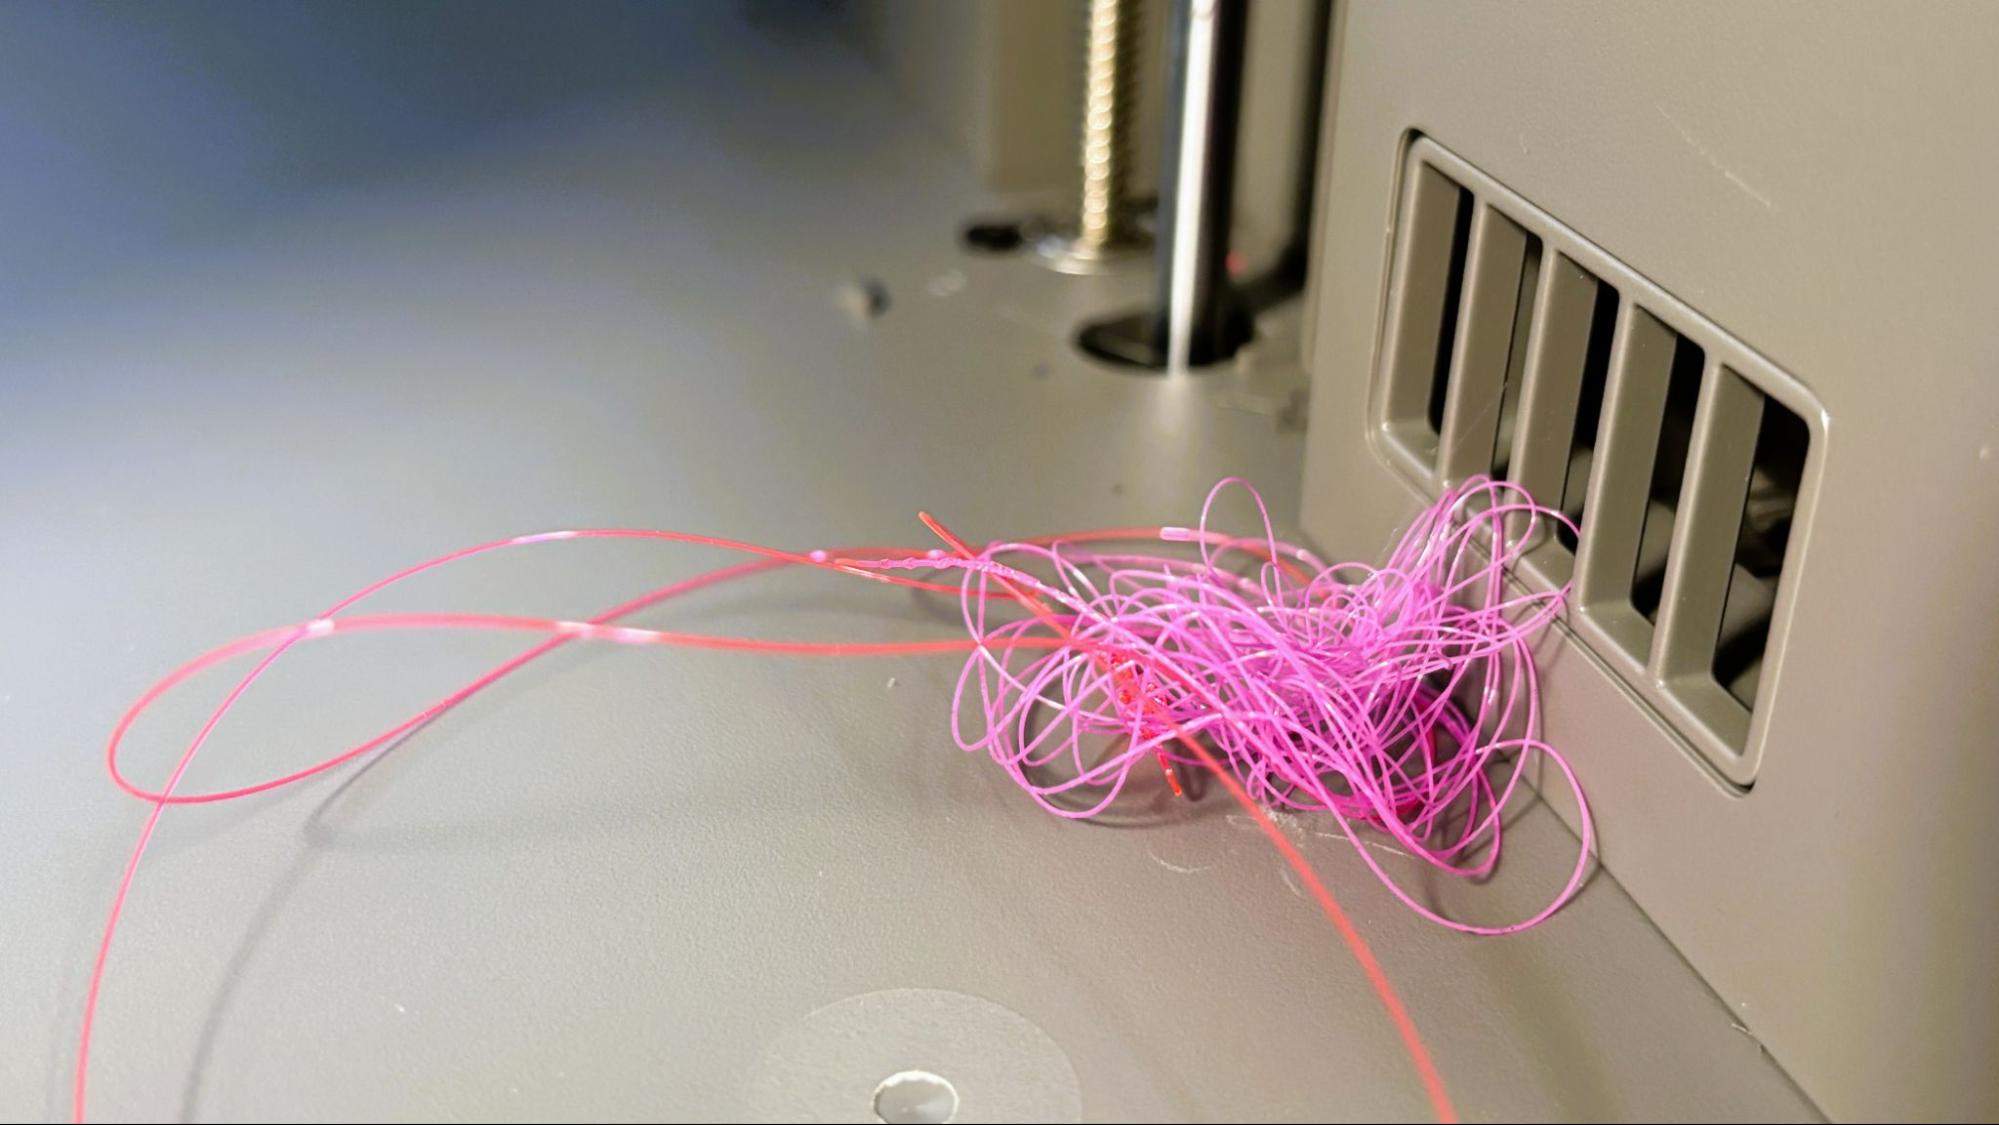
The loading routine on the printer nicely sets the hot end temperature to match the last filament loaded, 250 °C for PLA and TPU, and 270 °C for PETG. It will then purge a rather large amount of material onto the floor of the printer.
(Image credit: Tom's Hardware)
Printing on the Flashforge Creator 5
The Flashforge Creator 5 comes with four small sample coils of basic colored PLA, which are too small to be of any real use. You should check out our guide to the best filaments for 3D printing to stock up on filament before using the Creator 5.
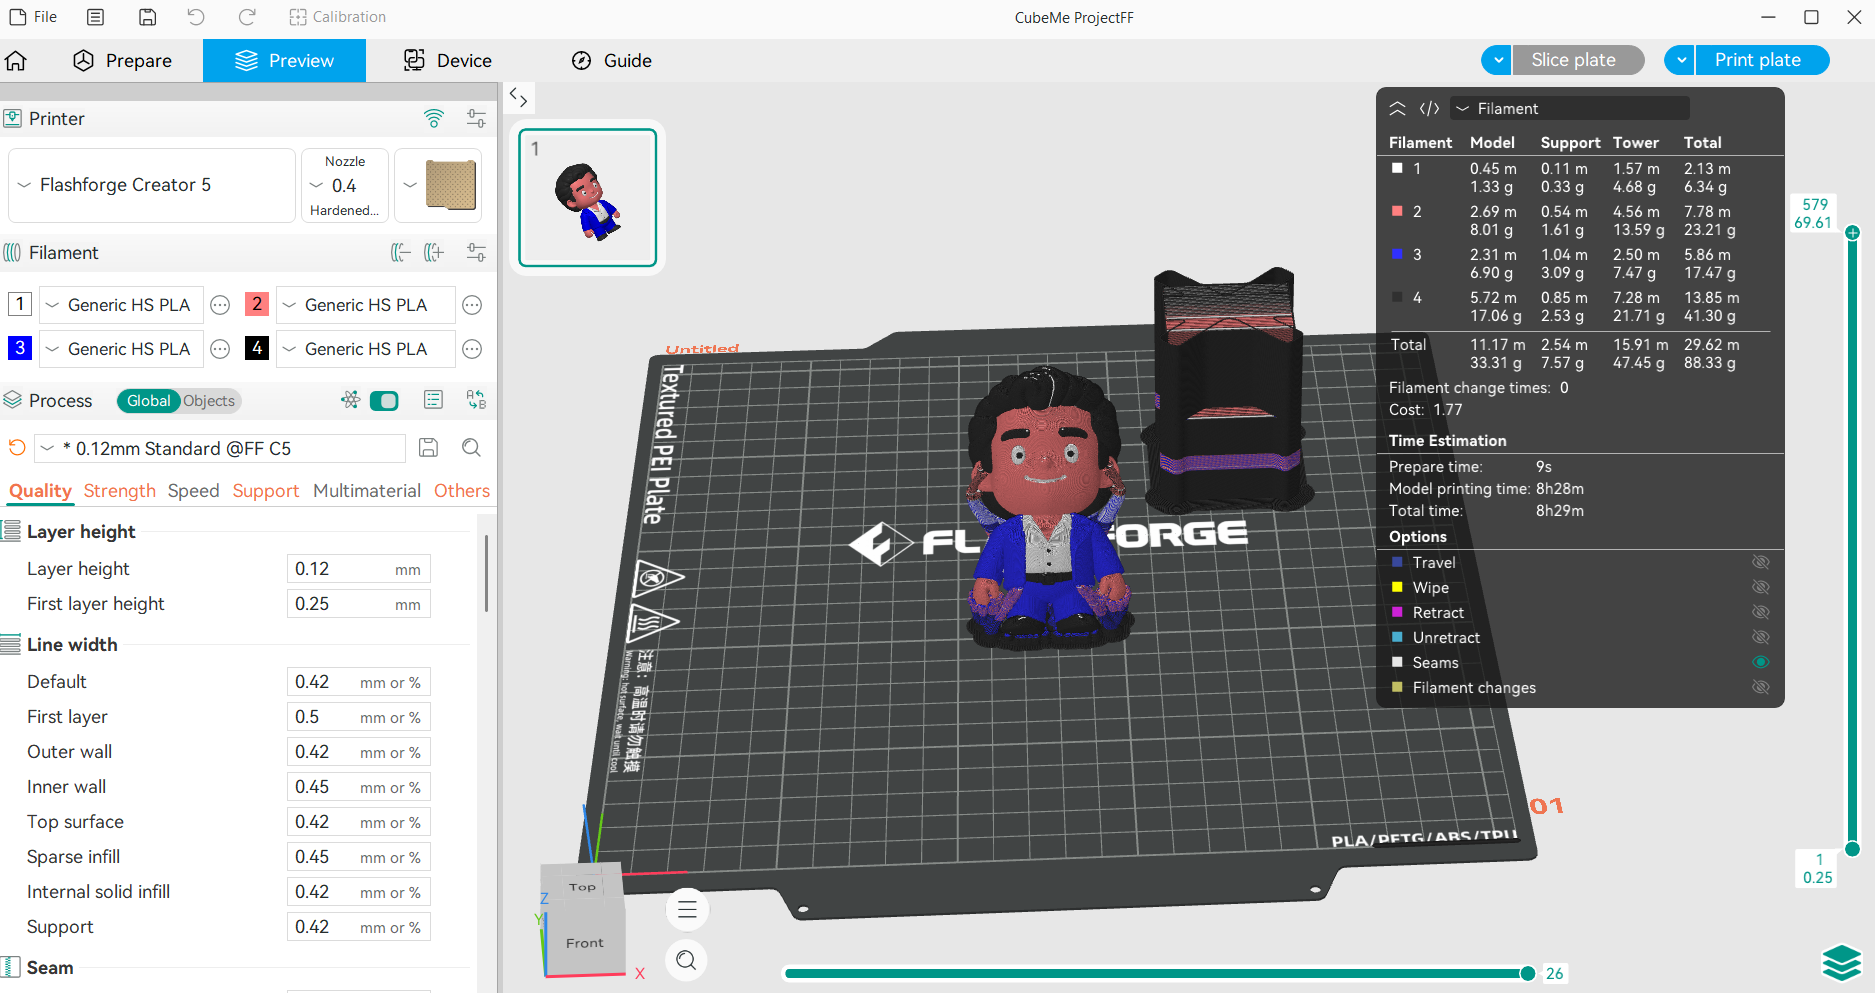
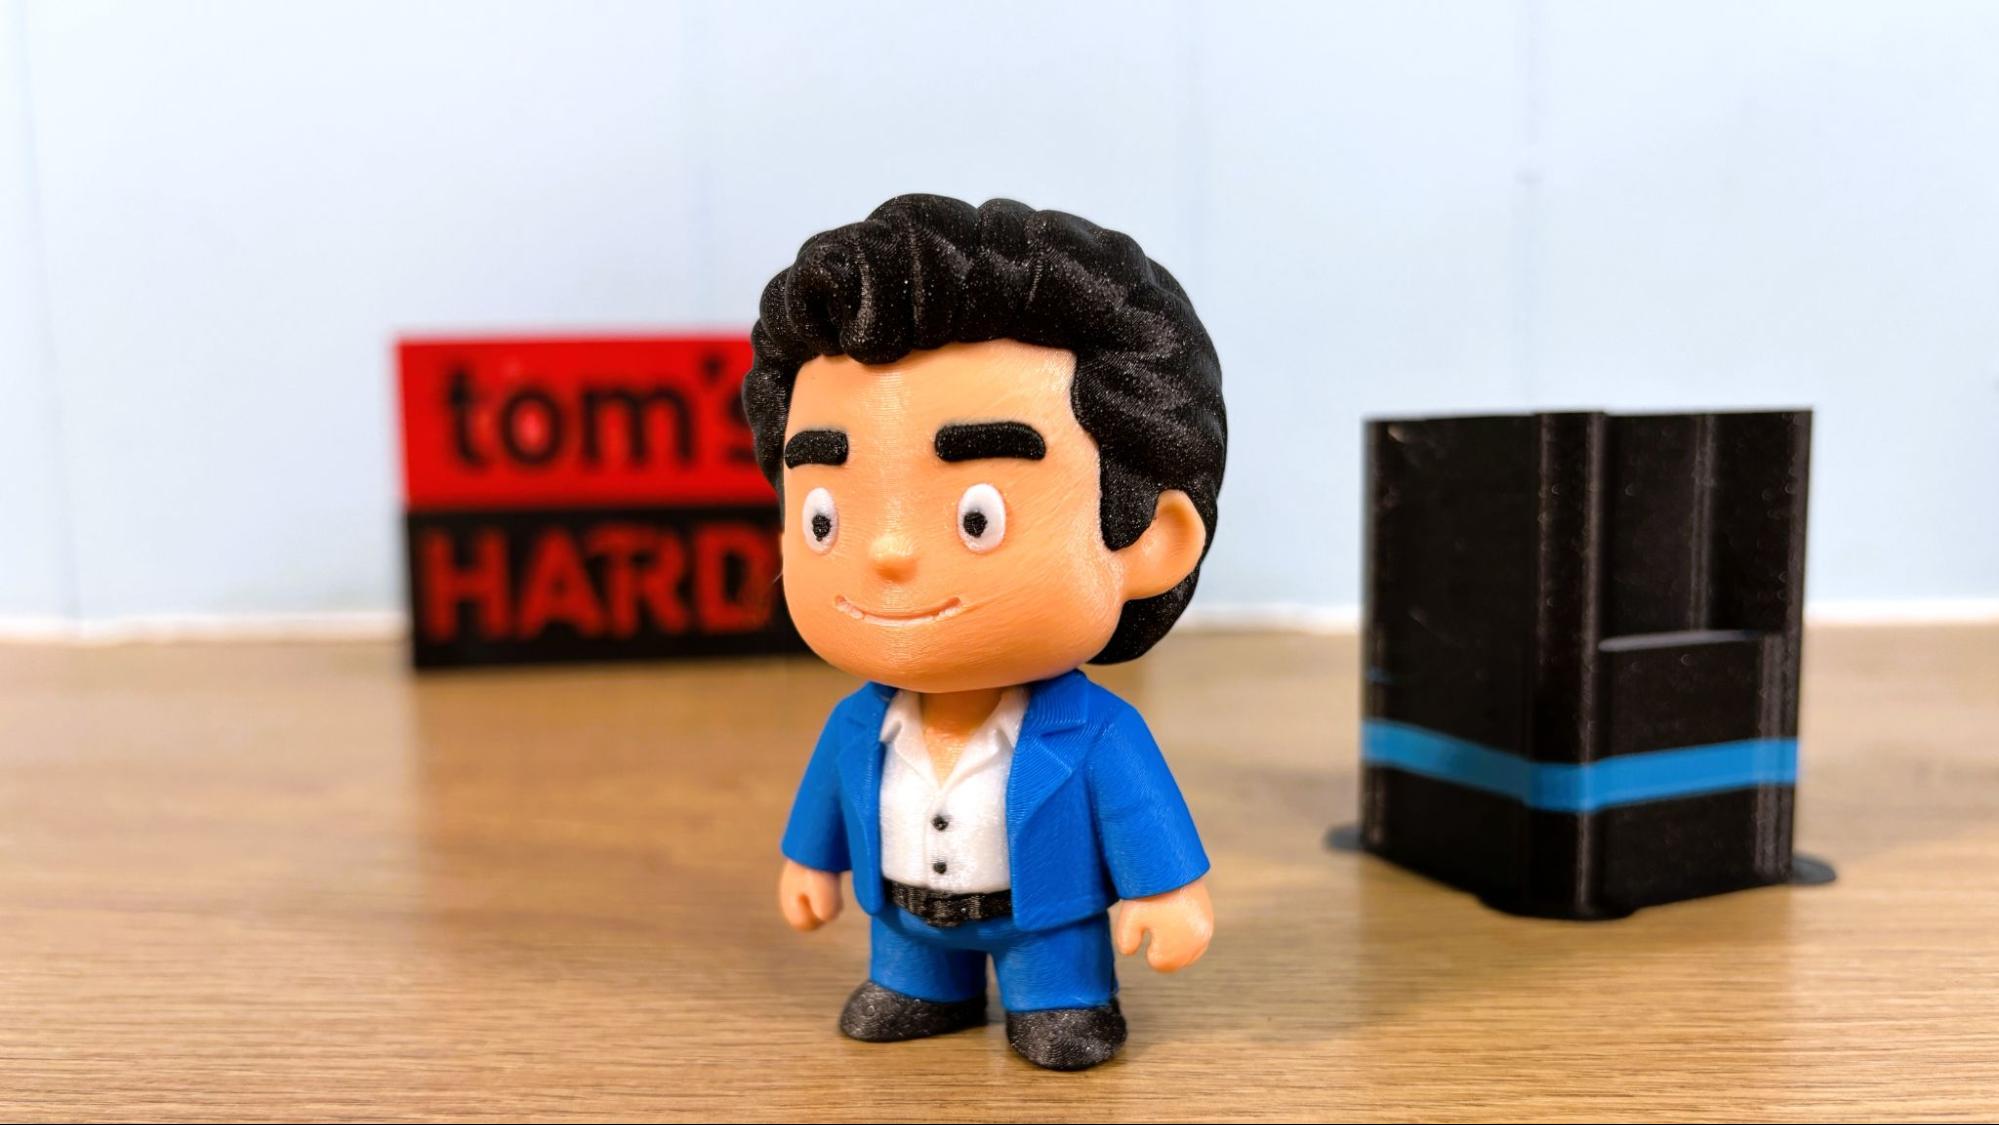
For my first print, I decided to jump into the deep end of the pool. I used Creality’s Cube Me tool to make a model from a photo of Dave Hasselhoff from his Knight Rider days. I used the .12 mm layer height default profile, which set an average print speed of 160 mm/s. I tilted the model 90 degrees backward to avoid supports on Hoff’s face and stuck with the default values for tree supports. The supports were very stout, but were removed with very little trouble.
The print took 8 hours 28 minutes to complete and looks fantastic. The purge block generated by the defaults was massive on this model, weighing in at 44 grams, more than the model’s 33 grams. This purge value can be adjusted in the slicer and should be refined in future software releases as well.
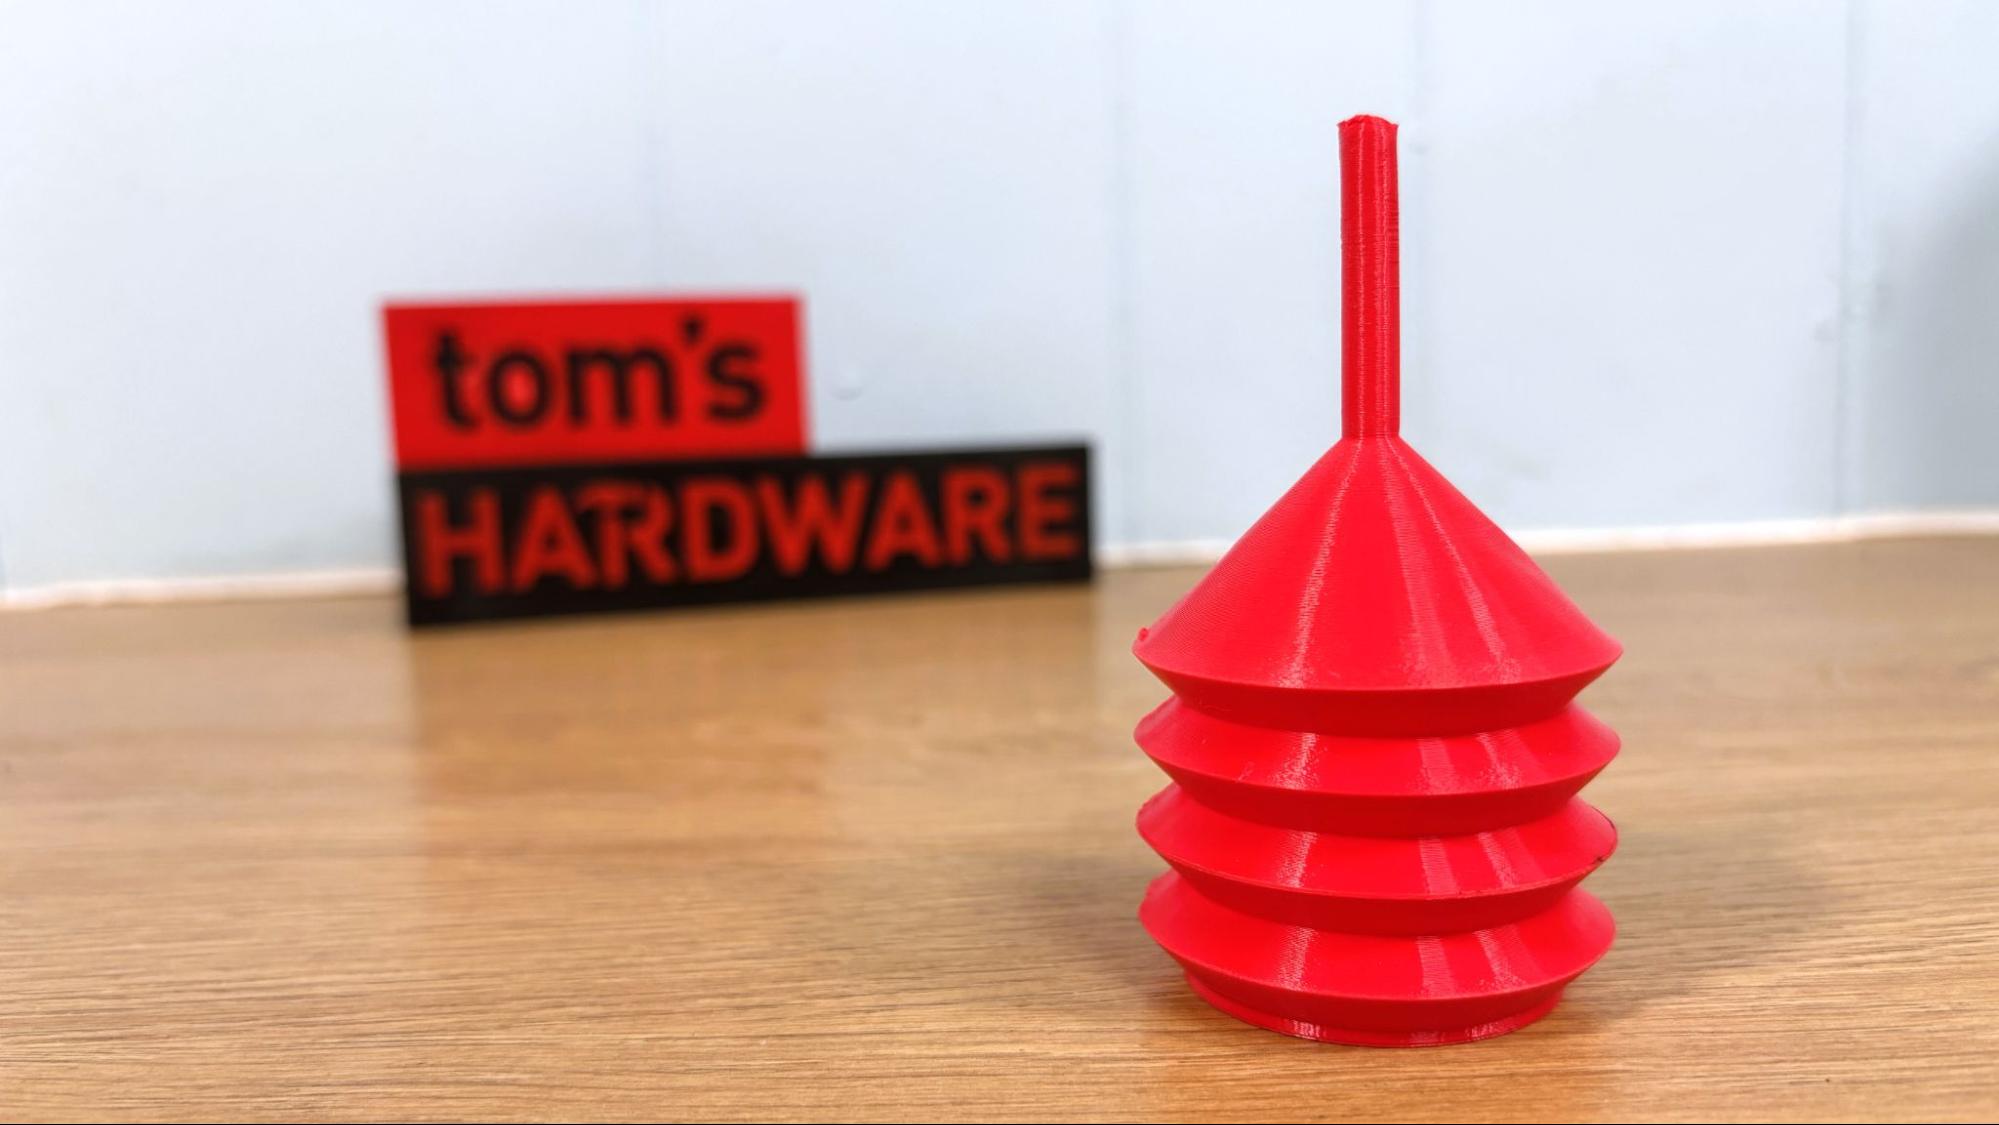
I wanted to test the ability of the Creator 5 to push TPU, so I loaded up some FiberFlex 40D from Fiberology. 40D is a little bit softer than standard 95A TPU, and many of the printers I test have a hard time handling it. To make it more interesting, I gave it a difficult model, the TPU air duster from Dan the 3D Printing Dad on Printables. This file will fail at the first hint of underextrusion. Using a .12mm layer height and an average print speed of 50 mm/s, the print completed in 2 hours and 9 minutes.
The duster printed great, with no leaks in the bellows, but did fail ¾ of the way up the straw. That soft TPU was way too wiggly at the top, where the model was very small.
Sadly, the extruder clogged, which required disassembling the tool head to clear.
Tinkercad (Image credit: Tom's Hardware)
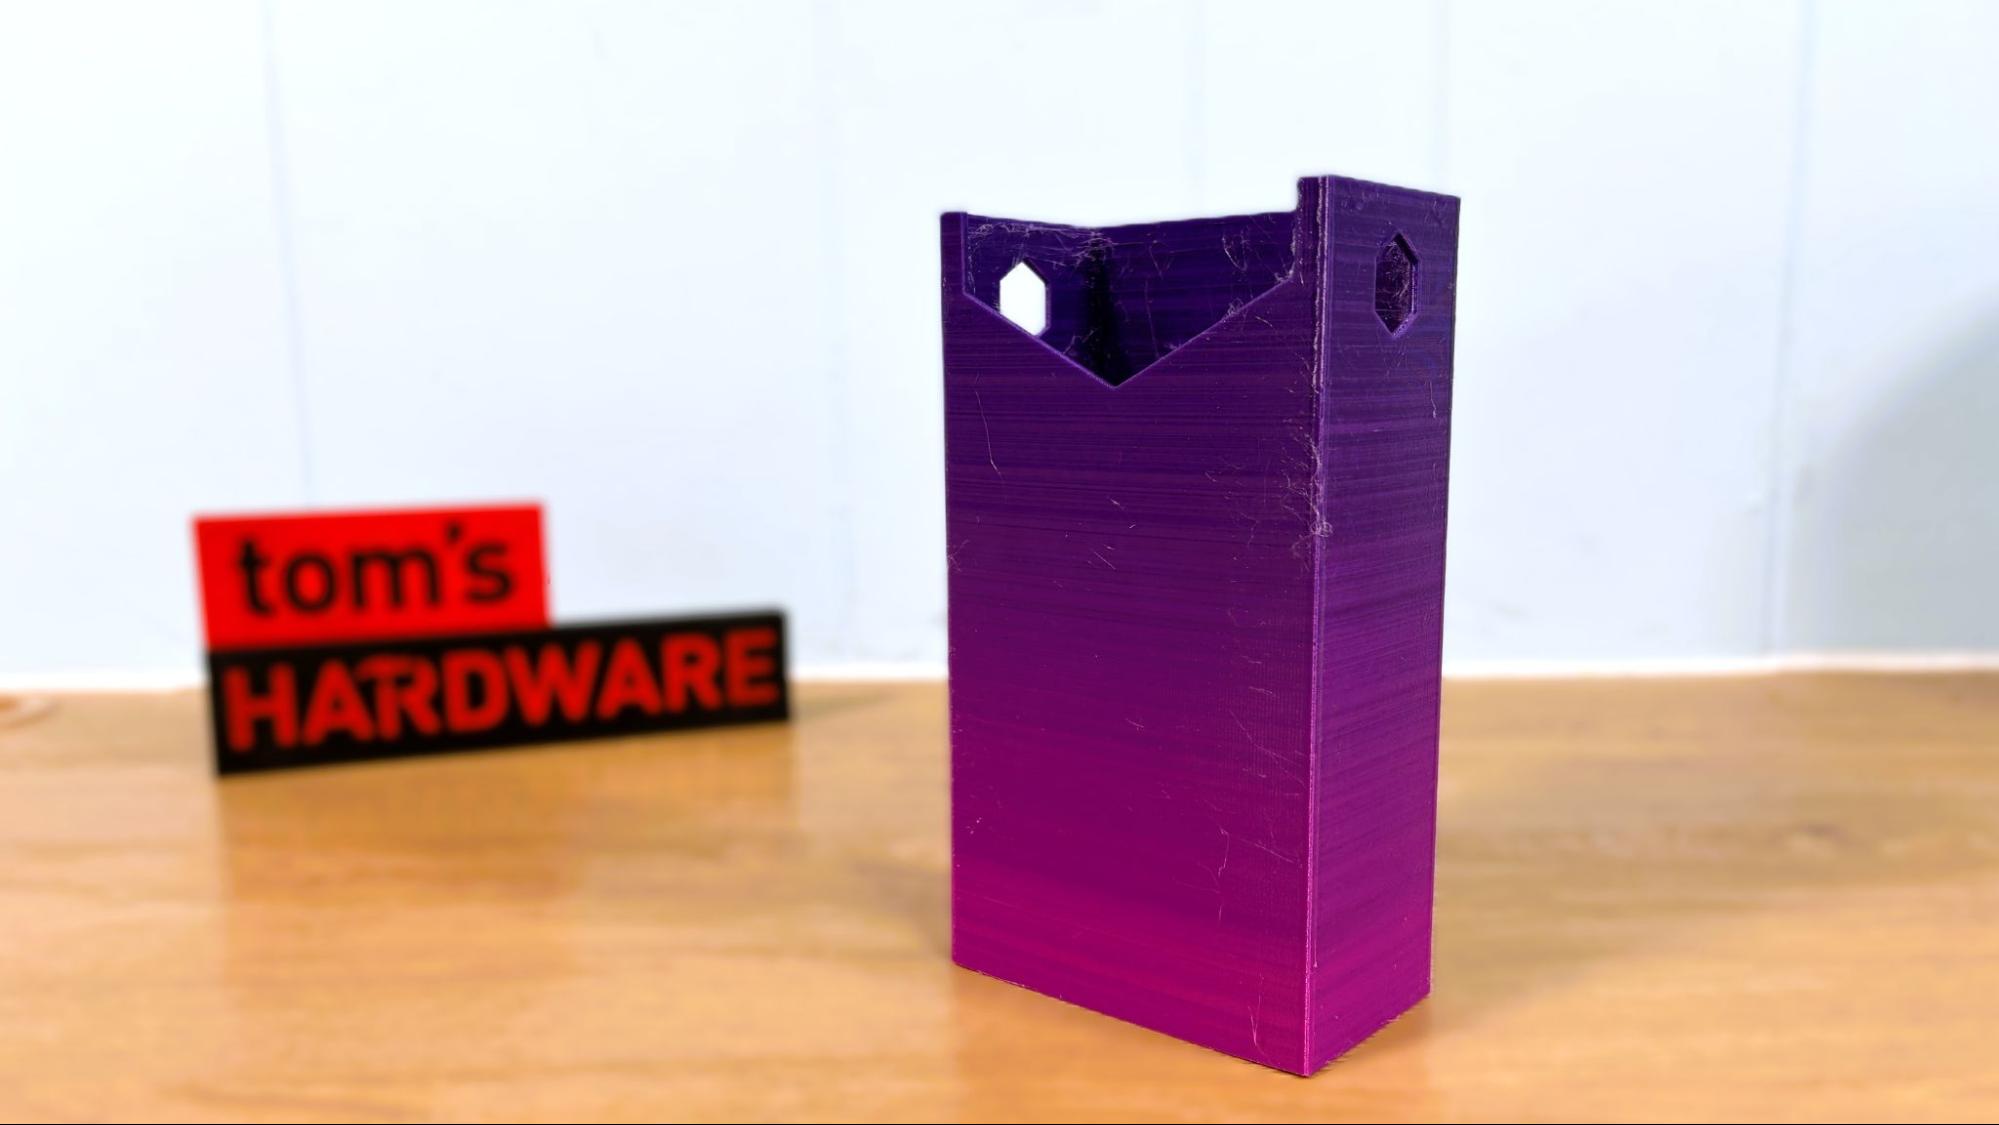
I wanted to give the machine another shot, so I loaded up some CookieCad Sunset TPU, which has a shore hardness of 95A. This time, I was prototyping a phone bag I made in Tinkercad.
This printed at a .2mm layer height, with an average speed of 50 mm/s. The print took a little over 10 hours to print. The quality is very nice with just a little bit of stringing on the interior of the bag, which just means I should have dried the TPU before printing with it.
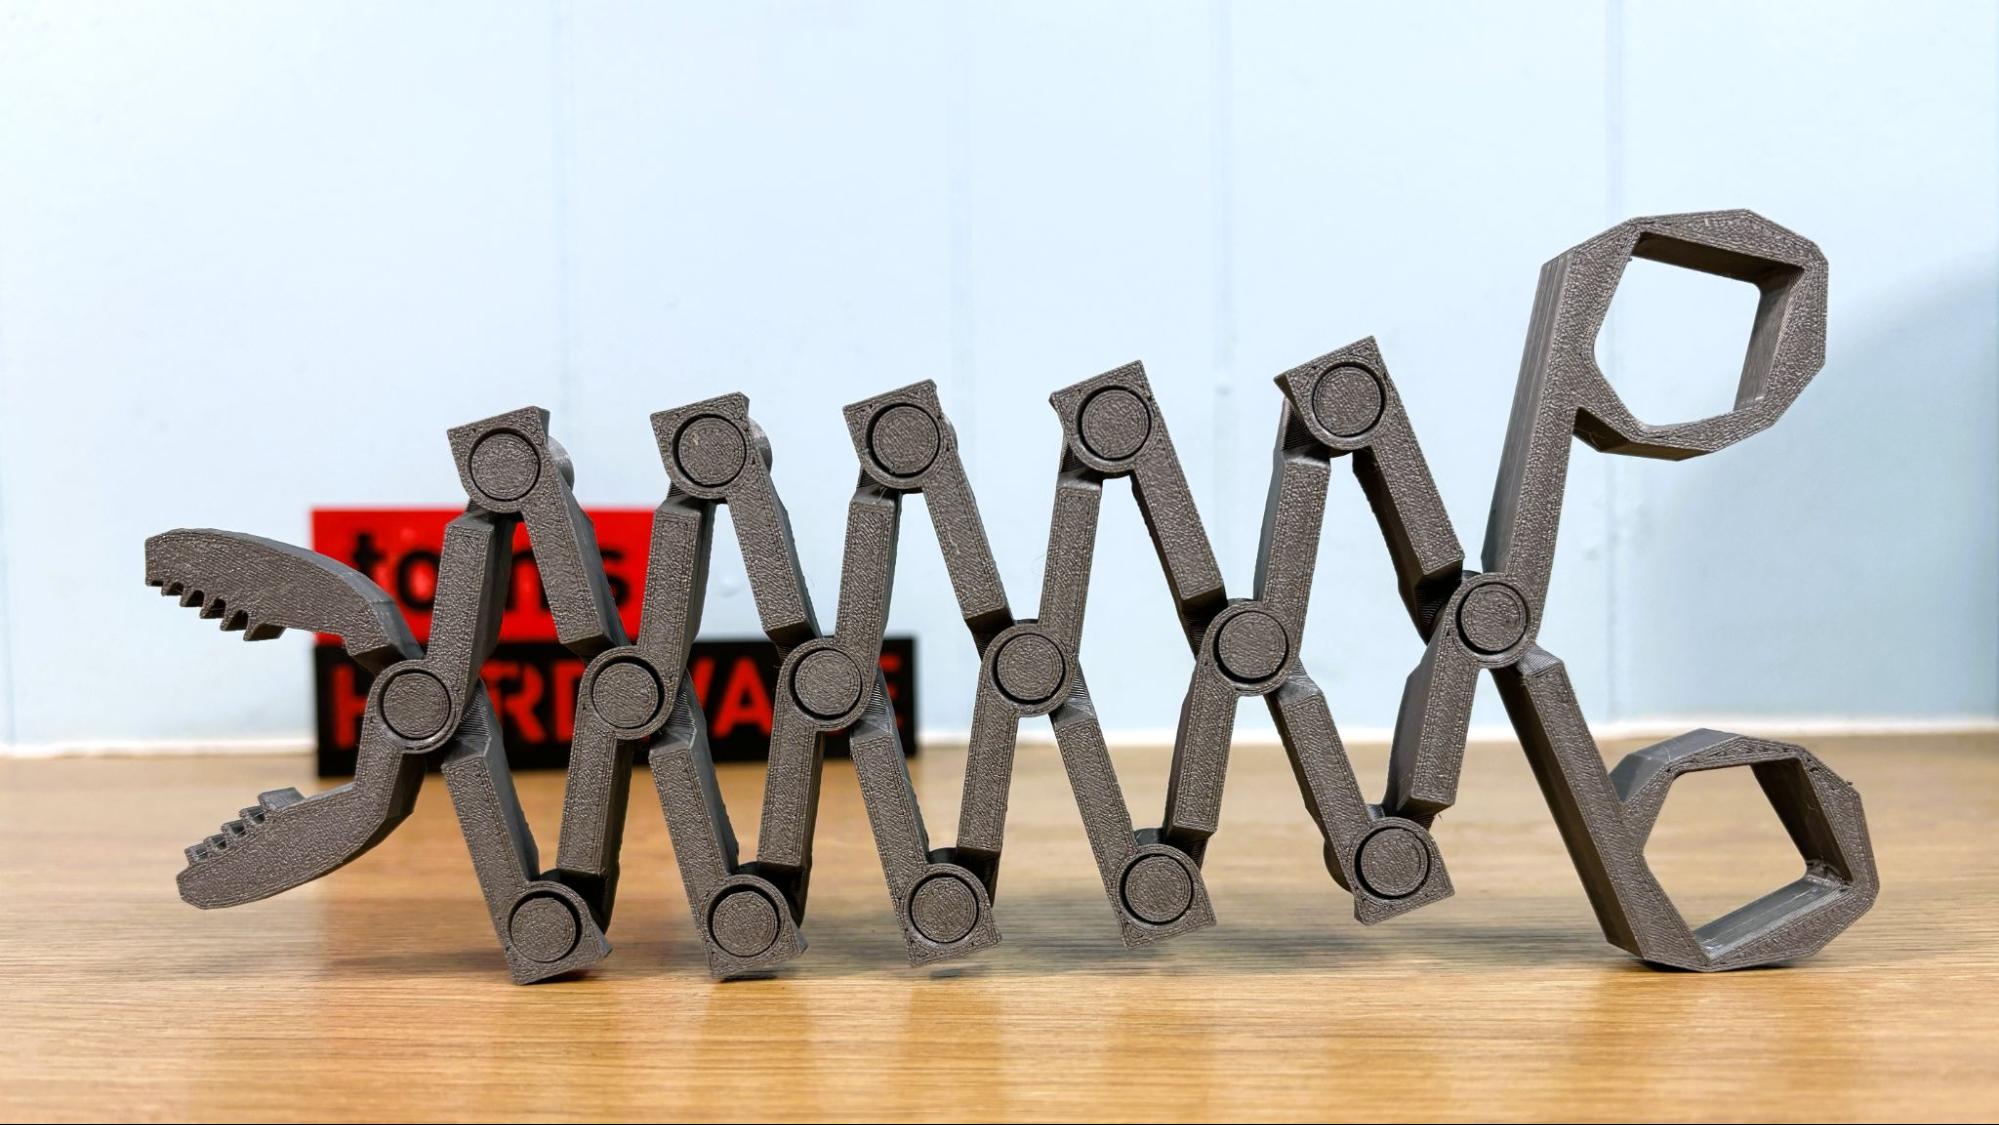
For PETG, I printed a Fidget Grabber I found while browsing MakerWorld. Using a .2mm layer height and an average print speed of 120 mm/s, the print completed in 2 hours 57 minutes. The print looks really good in Polymaker Silver PETG, and all of the print-in-place joints came out super clean. It’s not the most functional print, but it’s certainly fun.
Bottom Line
(Image credit: Tom's Hardware)
The Flashforge Creator 5 printed everything we threw at it (except softer than soft TPU) and did an excellent job. It will be even better if Flashforge can tone down the purge waste when loading and on the prime block. The slicer could be a little less clunky and sync filaments directly, but again, this is a small issue.
$699 isn’t exactly the cheapest price for a 3D printer, but it is currently the best deal you’ll get on a tool changer. If you want to print in four colors, but hate wasting your filament, the Creator 5 is worth a look.
Right now, our options for tool changers are limited. The Snapmaker U1 has a bit more polish and can be upgraded to be fully enclosed by slapping an IKEA tub on top of it. It is currently $899. The prosumer Prusa Research XL, which has a larger print volume and five heads, is $3,899.
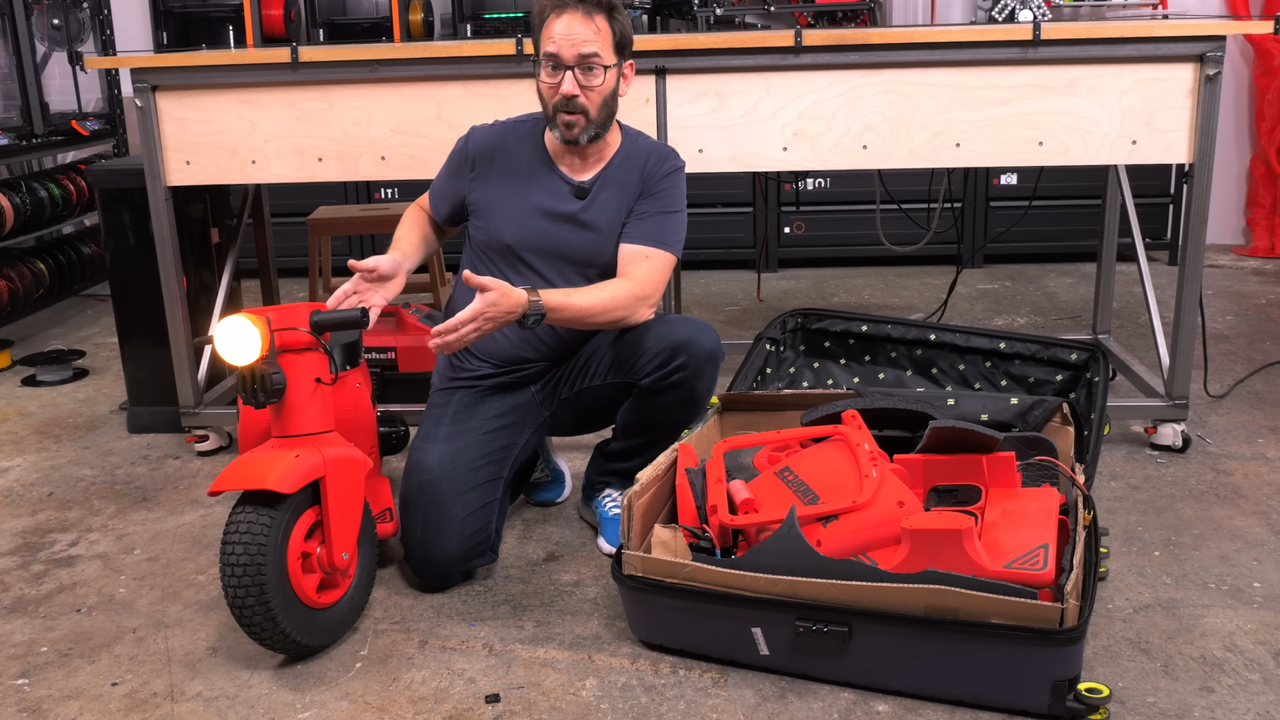
Ivan Miranda has released the design files for the Mirandetta, a 3D-printed electric motorbike that breaks down to fit inside a suitcase. He has re-engineered the vehicle so that every part prints on a single 300mm x 300mm bed. The files cost $40 through his website, ivanmiranda.com, and the redesign targets makers who want to build their own rather than admire the one-off he rode at Prague Maker Faire.
Miranda built the original in roughly 10 days as a "travel hack" — the smallest motorbike an adult could ride that still packed into checked luggage. To achieve this, he relied on aluminum wheel axles and an all-metal steering column assembly, and now the released design replaces both with printed parts.
Miranda also standardized the lighting on off-the-shelf T10 automotive sockets and bulbs instead of the salvaged components in the original, cut the number of distinct screws, and constrained every part to a 300mm x 300mm build volume. He says the redesign took more work than building the first bike from scratch. The reference printer is the Prusa CORE One L, a 300mm x 300mm x 330mm machine that we've reviewed previously. Anything smaller, including the standard 250mm-class CORE One, can't fit the largest parts in one piece.
The wheels use lawnmower tires, which are normally too flat-profiled to lean on, and Miranda printed the rims narrower than standard so the tire's internal bead rings sit closer together; once inflated, the sidewalls can't splay outward and the tread rounds into a profile usable for cornering.
Braking uses floating motorcycle discs rather than the bicycle discs because the floating discs can be deriveted to open up a wider center bore that a printed axle passes through without shearing. Meanwhile, a belt drives the rear wheel, and the throttle is a 10K linear potentiometer mapped through an Arduino to the motor's electronic speed controller.
Power comes from two 36V cordless tool battery packs, making them hot-swappable and simpler to carry through airport security, while a DC-DC converter steps the 36V down to 12V for the horn and lights. Without the batteries fitted, the finished bike weighs a little over 14kg.
Users won't be folding up the assembled scooter and packing it away, though; that's only possible when the bike is fully assembled. Regardless, Miranda won the suitcase-build contest at Prague Maker Faire with the machine and plans to show it at Open Sauce. Miranda is selling the files as-is with no support, and the bike isn't intended as a production design; Miranda describes it as a "complicated hobby build."
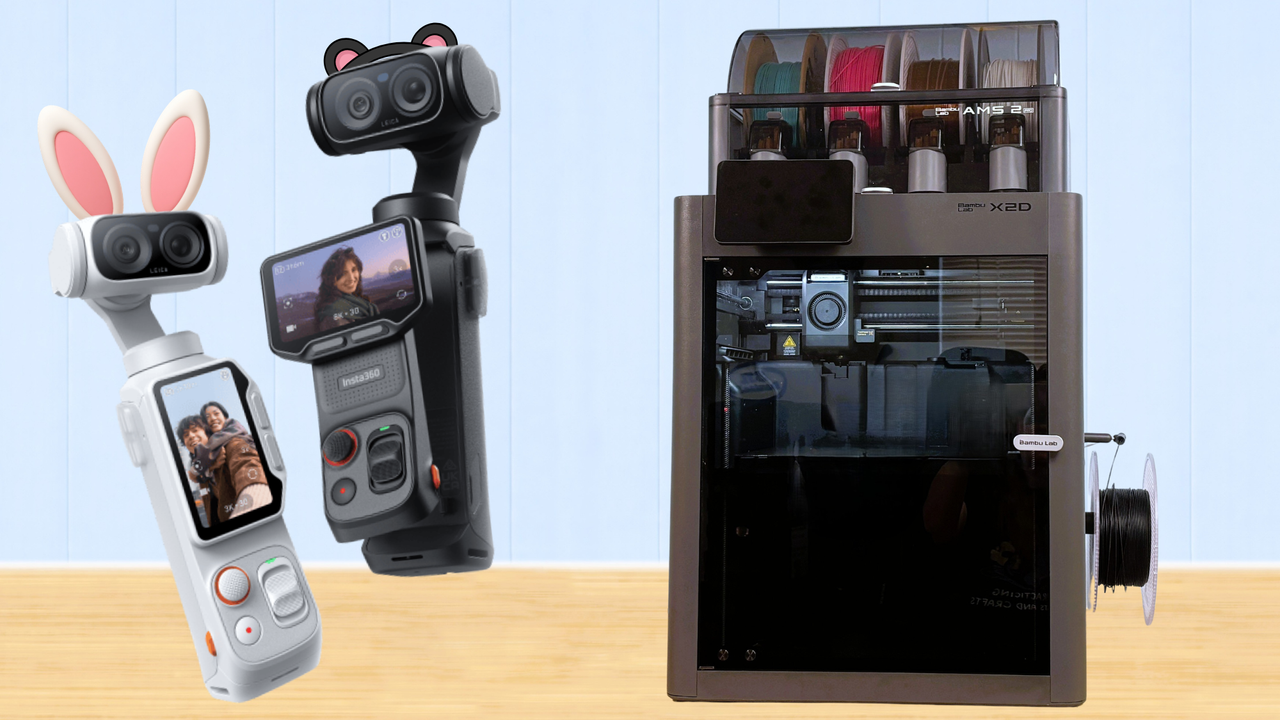
Bambu Lab announced a major collaboration with the camera brand Insta360, featuring a “Let’s Make It” Luna Ultra Design Challenge on MakerWorld. The two companies invite fans to design and 3D print custom hardware to fit the new Luna Ultra, a dual-lens 8K gimbal camera built for vlogging. This is the first camera brand to establish an official presence on MakerWorld, the home of Bambu Lab’s file library and maker community.
Up for grabs are $11,160 in prizes, including Luna Ultra cameras, 3D printers, and gift cards. The most intriguing part of the contest is a “Mystery Grand Prize” that will go to the most inspiring concept and could be selected for development as an official Insta360 product.
Though the Luna Ultra uses AI-powered software, AI-generated designs are not welcome in the contest. Each model entry must be a new, unique, human-created design that is printable on an FDM 3D printer. Designers can download a mockup of the Luna Ultra to precisely fit their creations to the camera without needing to own one first.
MakerWorld – and other 3D printing file sites – are already full of useful camera mods for all sorts of cameras. Tripods, clips, grips, boom arms, dollies, stands, cases, and storage systems abound for every kind of camera. Type “Insta360” into MakerWorld, and over a thousand files pop up for the company's older camera models. Most files are born of necessity, then shared for free by the photographers who designed them.
Insta360’s decision to embrace the 3D printing community and encourage fan-made mods is a refreshing change from standard corporate behavior. We’ve seen many cases of brands being overprotective of their IP and shutting down the "unauthorized" use of their name and image. Rather than presenting Bambu Lab users with a cease-and-desist letter, Insta360 is leaning into the fandom. By providing official 3D-printable mockups of the Luna Ultra only a few weeks after the camera’s launch, they are asking users to become active participants in the hype train.
“We see a shift where creativity doesn’t stop at capturing images—it extends into building and shaping the tools themselves. This collaboration between Insta360 and Bambu Lab brings together imaging and the maker community for the first time in this way, bringing creators the freedom to push the boundaries of what's possible,” said Max Richter, Co-founder & Vice President of Marketing at Insta360.
The two companies hope the contest encourages users to “move past the limits of off-the-shelf parts” and build custom gear uniquely designed for each photographer’s shooting environment.
You don’t need to have an Insta360 camera or even a 3D printer to enter the contest. The contest consists of two tracks: one for 3D printed models posted to MakerWorld and a second for creative ideas posted to social media.
For the model design challenge, contestants need to upload an original creation that fits the Luna Ultra and mark it with the hashtag #PrintForLuna.
Track 1: The Model Design Challenge
For the core model track, contestants need to upload an original creation that fits the Luna Ultra to MakerWorld and tag it with #PrintForLuna.
Three grand prizes will be awarded for physical designs:
Most Original: Wins an Insta360 Luna Ultra Creator Bundle and a Bambu Lab X2D Combo.
Best Functional: Wins an Insta360 Luna Ultra Standard Bundle and a Bambu Lab A2L Combo.
Best Aesthetic: Wins an Insta360 Luna Ultra Standard Bundle and a Bambu Lab A2L Combo.
Models must fit the Luna Ultra, and be printable on an FDM printer. Each participant can submit up to five entries per contest, and each entry must be a new, unique design. AI generated models and remixes are not eligible. Models will be judged by a committee based on relevance, printability, uniqueness, visual appeal and functionality.
Track 2: The Social Media Campaign
The social media contest is for creators who may be new to 3D printing and lack design skills to actually design and print their ideas. Entries can be based on idea concepts, sketches or written descriptions shared on Instagram, TikTok, YouTube, Facebook, or Reddit (r/Insta360) with the hashtags #PrintForLuna #BambuLab #Insta360LunaUltra.
Two grand prizes will be awarded for social media posts:
Most Creative Idea: Wins an Insta360 Luna Ultra Standard Bundle and a Bambu Lab X2D Combo.
Most Practical Idea: Wins an Insta360 Luna Ultra Standard Bundle and a Bambu Lab X2D Combo.
Submissions will be open from July 10 to August 9, with winners announced on August 20, 2026
F/A-18 Super Hornets and other jets that require advanced composite parts can sometimes remain grounded for a protracted period due to the lack of available parts. The U.S. Navy now wants to solve this issue by giving maintenance sites around the world the ability to 3D print these parts on site, instead of waiting for deliveries coming from thousands of miles away through an extended logistics chain. According to the Department of Defense’s information distribution service, this 3D-printing repair method will allow the U.S. Navy to repair and replace advanced composite parts at forward operating bases, cutting repair time by around 50%.
"Our goal is to put capability directly into the hands of the Fleet," Naval Air Warfare Center Aircraft Division (NAWCAD) Commander Rear Adm. Todd Evans said. "By simplifying a complex repair so it can be done forward, our engineers would get aircraft back in the fight faster — it's a smart solution that makes our squadrons more self-sufficient and directly improves operational readiness."
Composite parts are more difficult to repair than traditional aluminum parts and require specialized experience. This new technique allows troops to 3D-print composite patches and apply them directly on the aircraft, instead of having to order and wait for complete replacements of damaged panels. Laboratory and ground tests have already proved the viability of these 3D printed repairs, so the next step is to see how these repairs will perform in the field under the stresses of real-world operations.
Other military branches and divisions are also experimenting with 3D printing to streamline operations and logistics. One Hawaiian startup submitted a 3D-printed rigid-hull inflatable boat (RHIB) for the Pentagon, which used radar-absorbent material (RAM) to reduce its radar cross-section (RCS) and make it harder to detect. The U.S. Army also introduced a three-week course called the Unmanned Advanced Lethality Course (UALC), which trained soldiers how to operate and 3D print drones in the field, as well as 3D printer maintenance and other necessary skills related to 3D printing. The U.S. Marine Corps also developed its own modular 3D-printed drone that had no China-sourced parts capable of achieving various missions, from reconnaissance to one-way attack duties.
3D printing is quickly becoming a crucial manufacturing technique for these military branches, especially as the U.S. faces a threat across the Pacific. If ever a conflict arises in this area, it would face a near-peer adversary at the tail end of a logistics chain thousands of miles long. By giving forward bases the ability to 3D print their own parts and supplies, it will reduce their dependence on a vulnerable supply chain while also allowing them to speed up maintenance and repairs.
Ampera, a nuclear tech startup, just revealed its first full-scale, 3D-printed nuclear reactor module that it says could be used to power AI data centers. According to the company’s press release, this module is the “world’s first subcritical, solid-state, factory-built thorium nuclear reactor.” It’s also the nuclear part of the company’s Integrated Energy Architecture, which comes with a Waste Heat Recovery module that could also be paired with either this 3D-printed nuclear reactor module or a Conventional-Fueled Power Generation module.
"This next-generation nuclear core and pressure vessel sets the foundation for factory-built, mass-produced nuclear energy," said Ampera CEO and founder Brian Matthews. "The advanced technology and additive manufacturing used demonstrate a clear commercial path for new nuclear technology coming to market in an accelerated manner."
The company’s description for its groundbreaking product is quite a mouthful, but it shows how advanced this nuclear reactor is. Subcritical means that its fuel does not reach criticality on its own, requiring an external source to jump-start the fission process. This is inherently safer because it reduces the chance of a runaway reaction that could lead to a meltdown. It also features a “solid-state” core, meaning it does not have any moving parts, making maintenance and operation simpler.
Factory-built suggests that the nuclear module could be manufactured relatively quickly in a production line. This would make it easier to scale for mass production and transport via shipping containers, thus cutting production costs to make it more affordable. Lastly, it uses thorium as its primary fuel source. Thorium is more abundant than uranium, so it’s easier and cheaper to acquire. It’s also not inherently fissile, requiring an external neutron source to produce protactinium-233, which then decays into U-233. While it could still be used for nuclear weapons, it’s relatively harder to do so, which is why the World Nuclear Association says that it “is sometimes promoted as having excellent non-proliferation credentials.”
While the startup unveiled the finished nuclear module, it didn’t mention turning it on and producing electricity with the system yet. This is in contrast to Valar Atomics, which turned on its Ward 250 nuclear microreactor recently and produced electricity to power an Nvidia RTX Spark desktop. Its CEO, Isiah Taylor, also announced that it’s partnering with Nvidia to power a 30MW data center using its technology.
Ampera is also targeting a 30MWe output with its complete system using a proprietary closed-loop, supercritical CO2 Brayton-cycle turbine to produce energy. One advantage of its modular approach to developing its power solution is that customers can purchase them as necessary. It can match the turbine module with its Waste Heat Recovery module to supplement power production in data centers, or it could attach a Conventional-Fueled Power Generation unit to the entire unit as a site’s primary power source. Once the nuclear module becomes available, operators could then easily swap that out to reduce their carbon footprint.
The company did not give a timeline for when it expects to start producing power with their solution, but it seems that they’re confident that they could deploy it soon in various applications. "Our reactors are built for the markets that need power the most: AI data centers, defense, industrial and maritime," Matthews said. "We expect to be the first company to industrialize factory-built nuclear power with near-term deployment timelines."
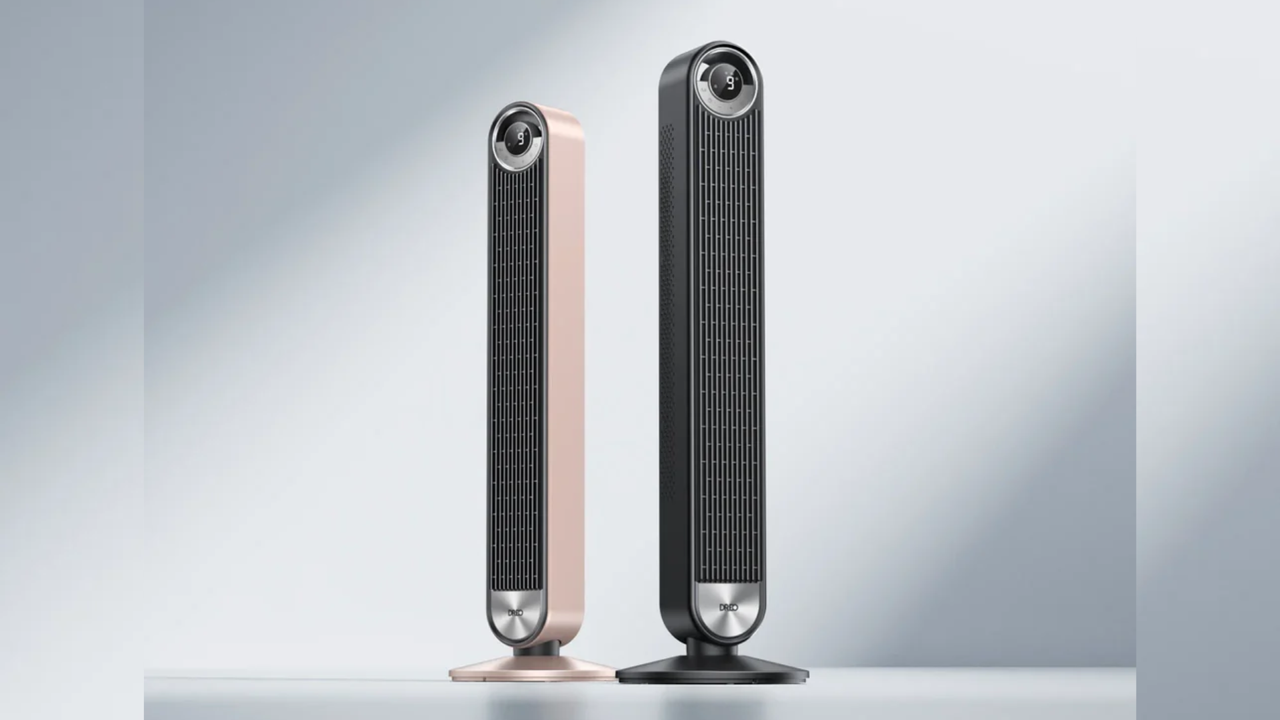
Creator Zac Builds wanted to hide a desktop PC in plain sight in their living room setup. But instead of just placing a discrete mini-PC behind their TV, they decided to build a custom case that allows them to mount it on their living room fan. They shared the project on their Facebook page, where they started with a Dreo 519S Tower Fan as the base of the unit. Aside from serving as the perfect hiding spot for the computer, the setup also served a secondary purpose by adding more air cooling to the system. At its maximum setting, the Dreo 519S can hit wind speeds of 28 feet per second, which is more than enough to help keep the mini-PC’s fans slow and keep the system’s temperature in check.
The first thing that Zac Builds did was to disassemble the mini-PC — an AtomMan G7 PT — to take measurements and 3D-print the base that will hold the components to the back of the fan. They then disassembled the fan’s rear cover and 3D-printed four heavy-duty brackets to hold the mini-PC’s base to the fan while also guiding the airflow through the computer. While the initial base was a single flat sheet of plastic with standoffs to hold the various PC parts, the final version had cutouts to help improve airflow.
With the computer mounted on the Dreo 519S, Zac Builds 3D-printed the brackets and external case that will protect the components and ensure that air goes through the system. They initially made this into four parts (two parts for the brackets and two more for the face plates) but discovered a gap between the two face plates where air could seep through, thus ruining the flow. So, for their second iteration, they 3D-printed the face plate as one single unit and also added vent holes over the PC’s heatsink for more efficient cooling. The face plates also feature five I/O ports to allow the PC to connect to their TV and other peripherals, although we imagine that they preferred wireless connectivity as it’s kind of weird to have a bunch of wires plugged into your living room fan. Finally, to avoid having a power brick dangling from the back of the appliance, Zac Builds added a 3D-printed base that hid the power unit and threaded the mini-PC’s power cable inside the fan’s housing.
The completed build successfully hid the mini-PC, with the only hint from the front that there’s something different with the living room fan being the tiny box attached to its side and the single HDMI cable connecting it to the TV. It also had the added benefit of reducing the computer’s fan noise by around 10 to 15 dB because of the additional airflow that the stand fan brings to the table. The only issue that we see here is that you can’t use the fan elsewhere if you want to play games on your living room TV.

 Anmelden